Web Interface Overview
The Web Interface is a browser-based control system that provides full access to your Vision Miner 22IDEX V4. It allows firmware updates, print uploads, real-time monitoring, and complete printer control from any device on the same network.
The interface organizes printer functions into logical sections: machine control, job monitoring, file management, and system settings. All major printer operations – from manual movement and temperature control to starting prints and updating firmware – are accessible through a web browser without installing additional software.
Browser Compatibility
| Browser | Support Level | Notes |
|---|---|---|
| Chrome | Full | Recommended |
| Firefox | Full | Recommended |
| Chrome-based Edge | Full | Recommended |
| Safari 10.0.1+ | Partial | File editor only |
| Internet Explorer | None | Not supported |
| Older Edge/Safari | None | Not supported |
Some browsers fail to implement the HTML 5 standard, causing compatibility issues.
Main Features
The Web Interface provides:
- Full printer control and monitoring
- Upload, start, and monitor print jobs
- Upload and install firmware updates
- Direct G-Code command entry and macro execution
- Real-time temperature and status monitoring
- File management for G-Code files and macros
Interface Layout
Header and Menu
The Web Interface consists of:
- Header Bar: Fixed at the top while the page content scrolls
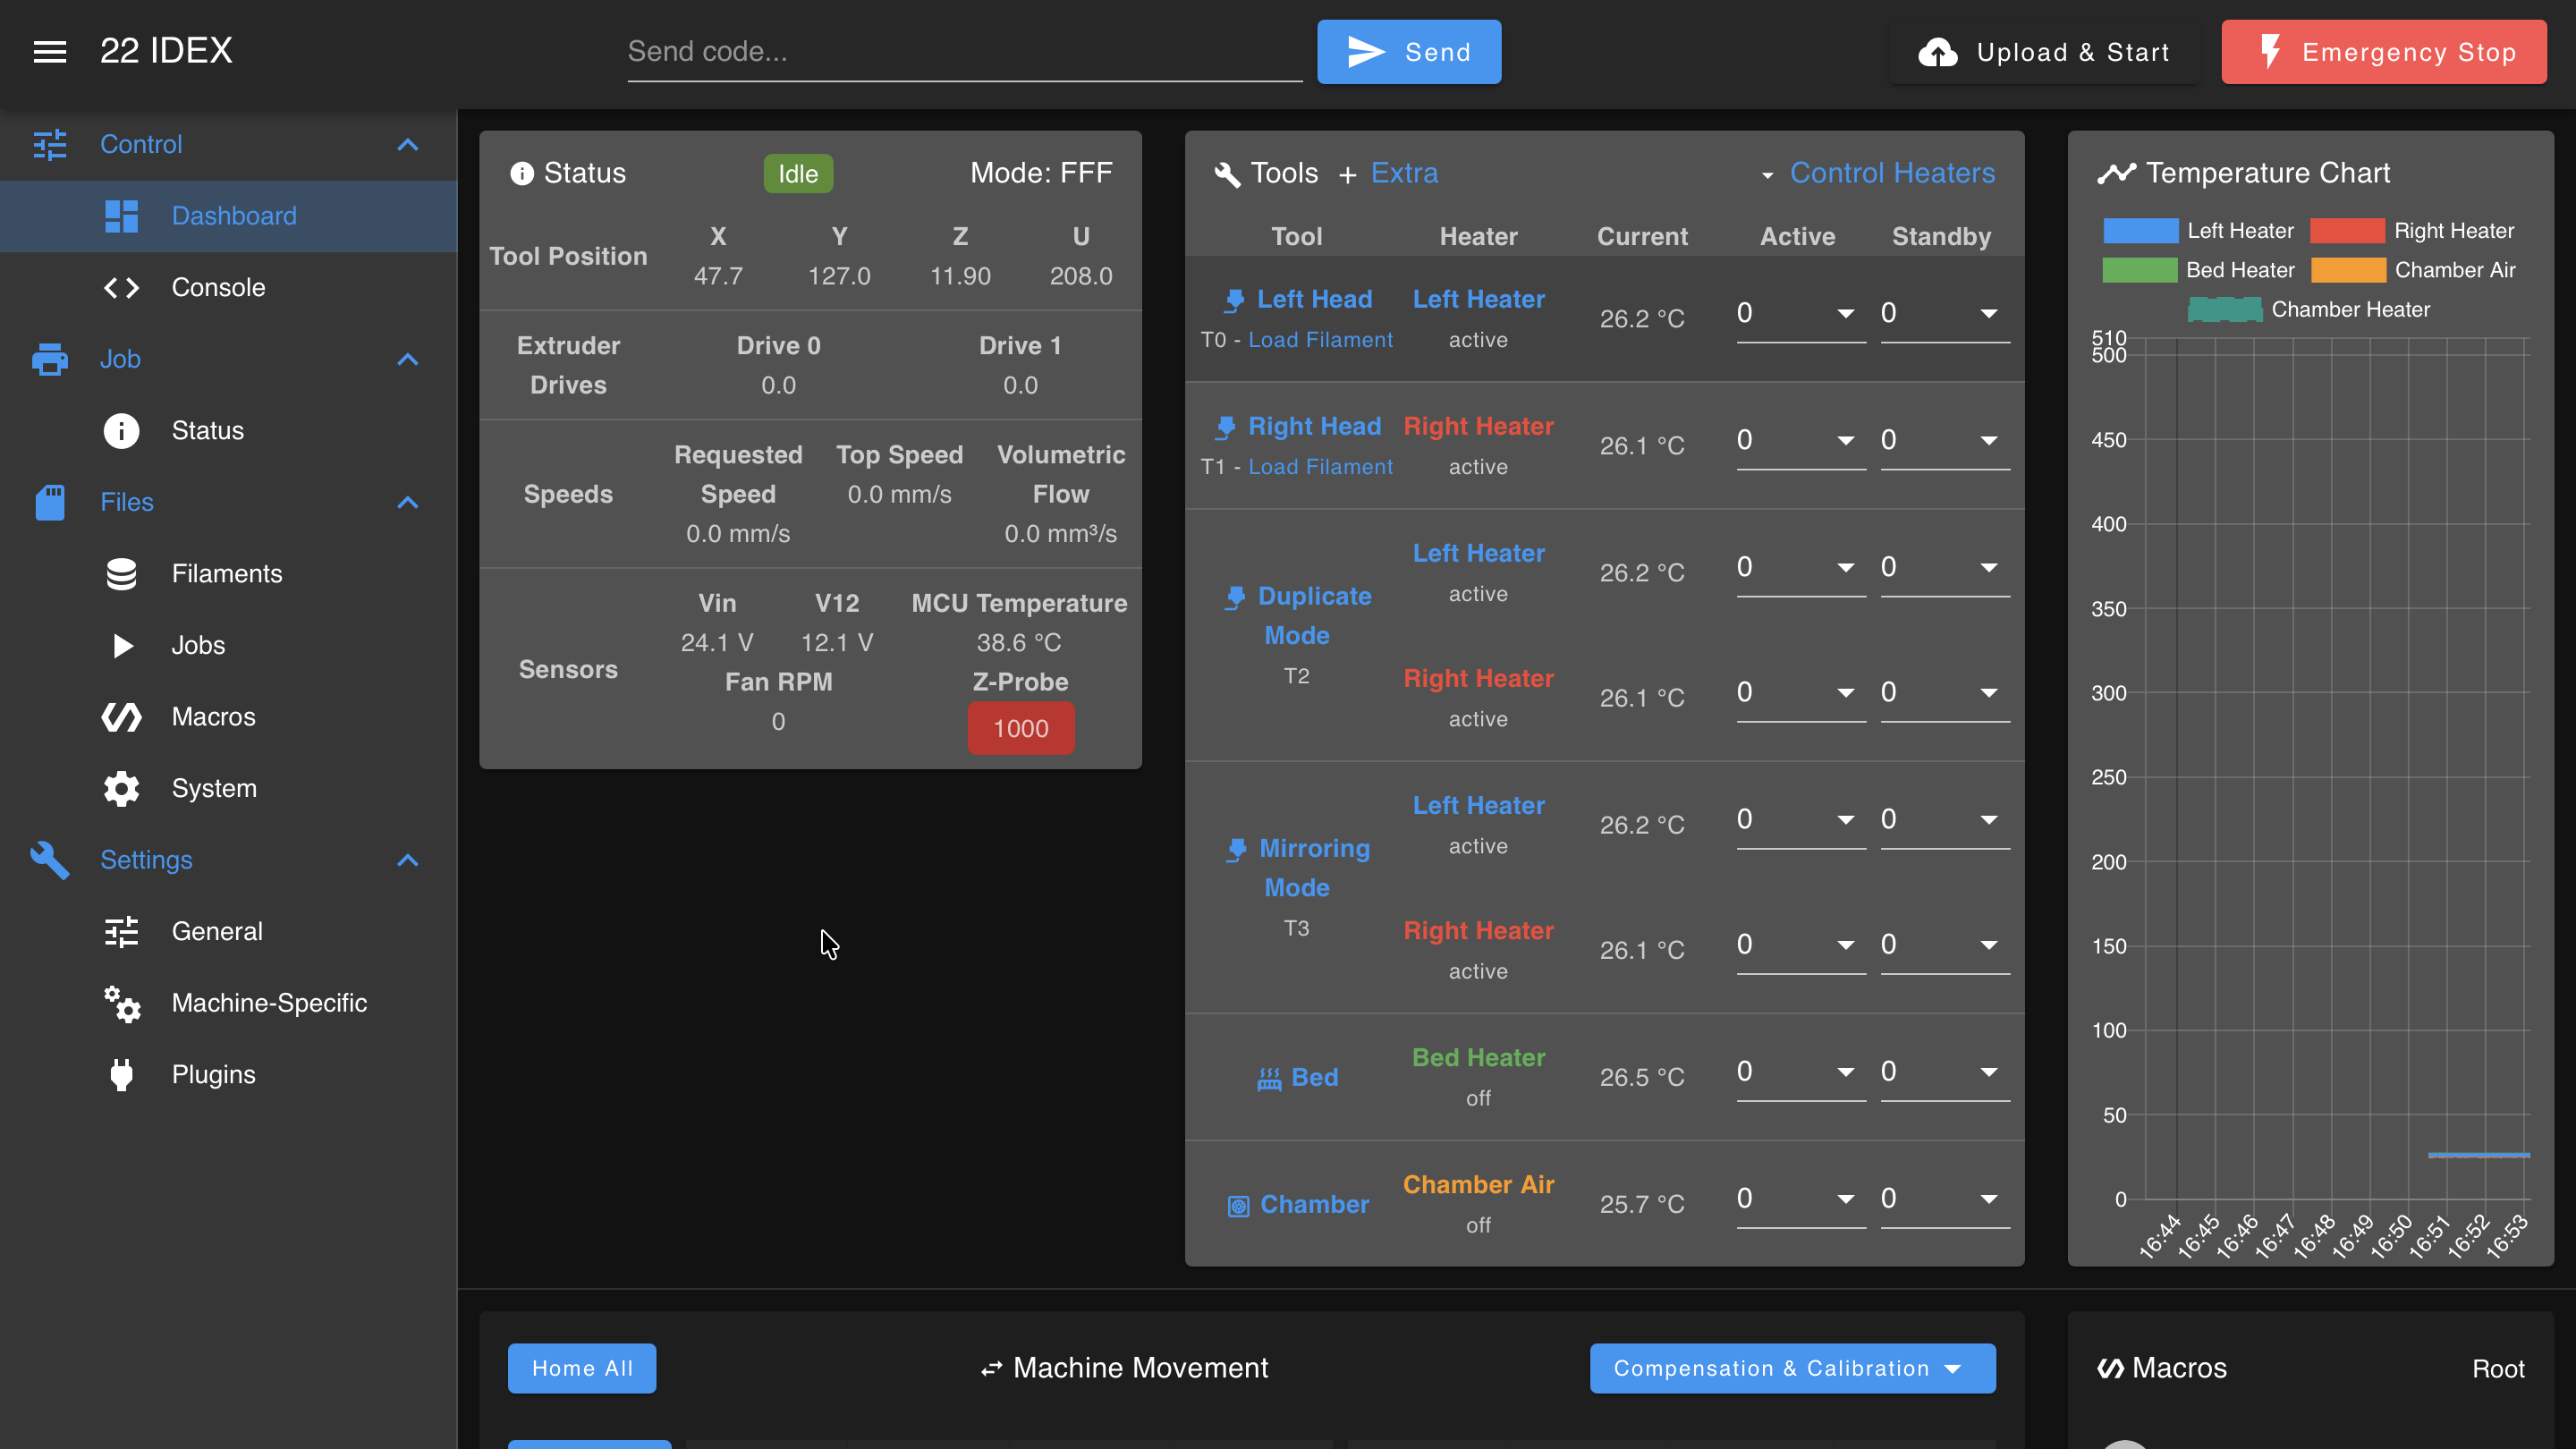
- Main Menu: Left sidebar, divided into four groups (can be hidden by clicking the three-bar icon)
Main Menu Structure
Machine Control
- Dashboard: Manual machine control when not running a job
- Console: Enter G-Code commands and view responses. Supported RepRap Firmware commands are documented in the Duet3D G-Code Dictionary.
Current Job
- Status: Monitor progress of the current job
- Filaments: Filament control and management
File Management
- Jobs: List of G-Code files with management options
- Macros: List of macros with run and edit options
Settings
- System: Configuration files and system macros
- General: General settings
- Machine-Specific: Firmware updates and machine-specific settings
Printer Status
The top area of the dashboard displays three sections:
Machine Status

Displays:
- Current printer state (idle, printing, paused)
- Axis positions (X, Y, Z, U)
- Speed and feed rate
- Input voltage (VIN)
- Microcontroller temperature
- Z-Probe reading (0 or 1000 for digital probes)
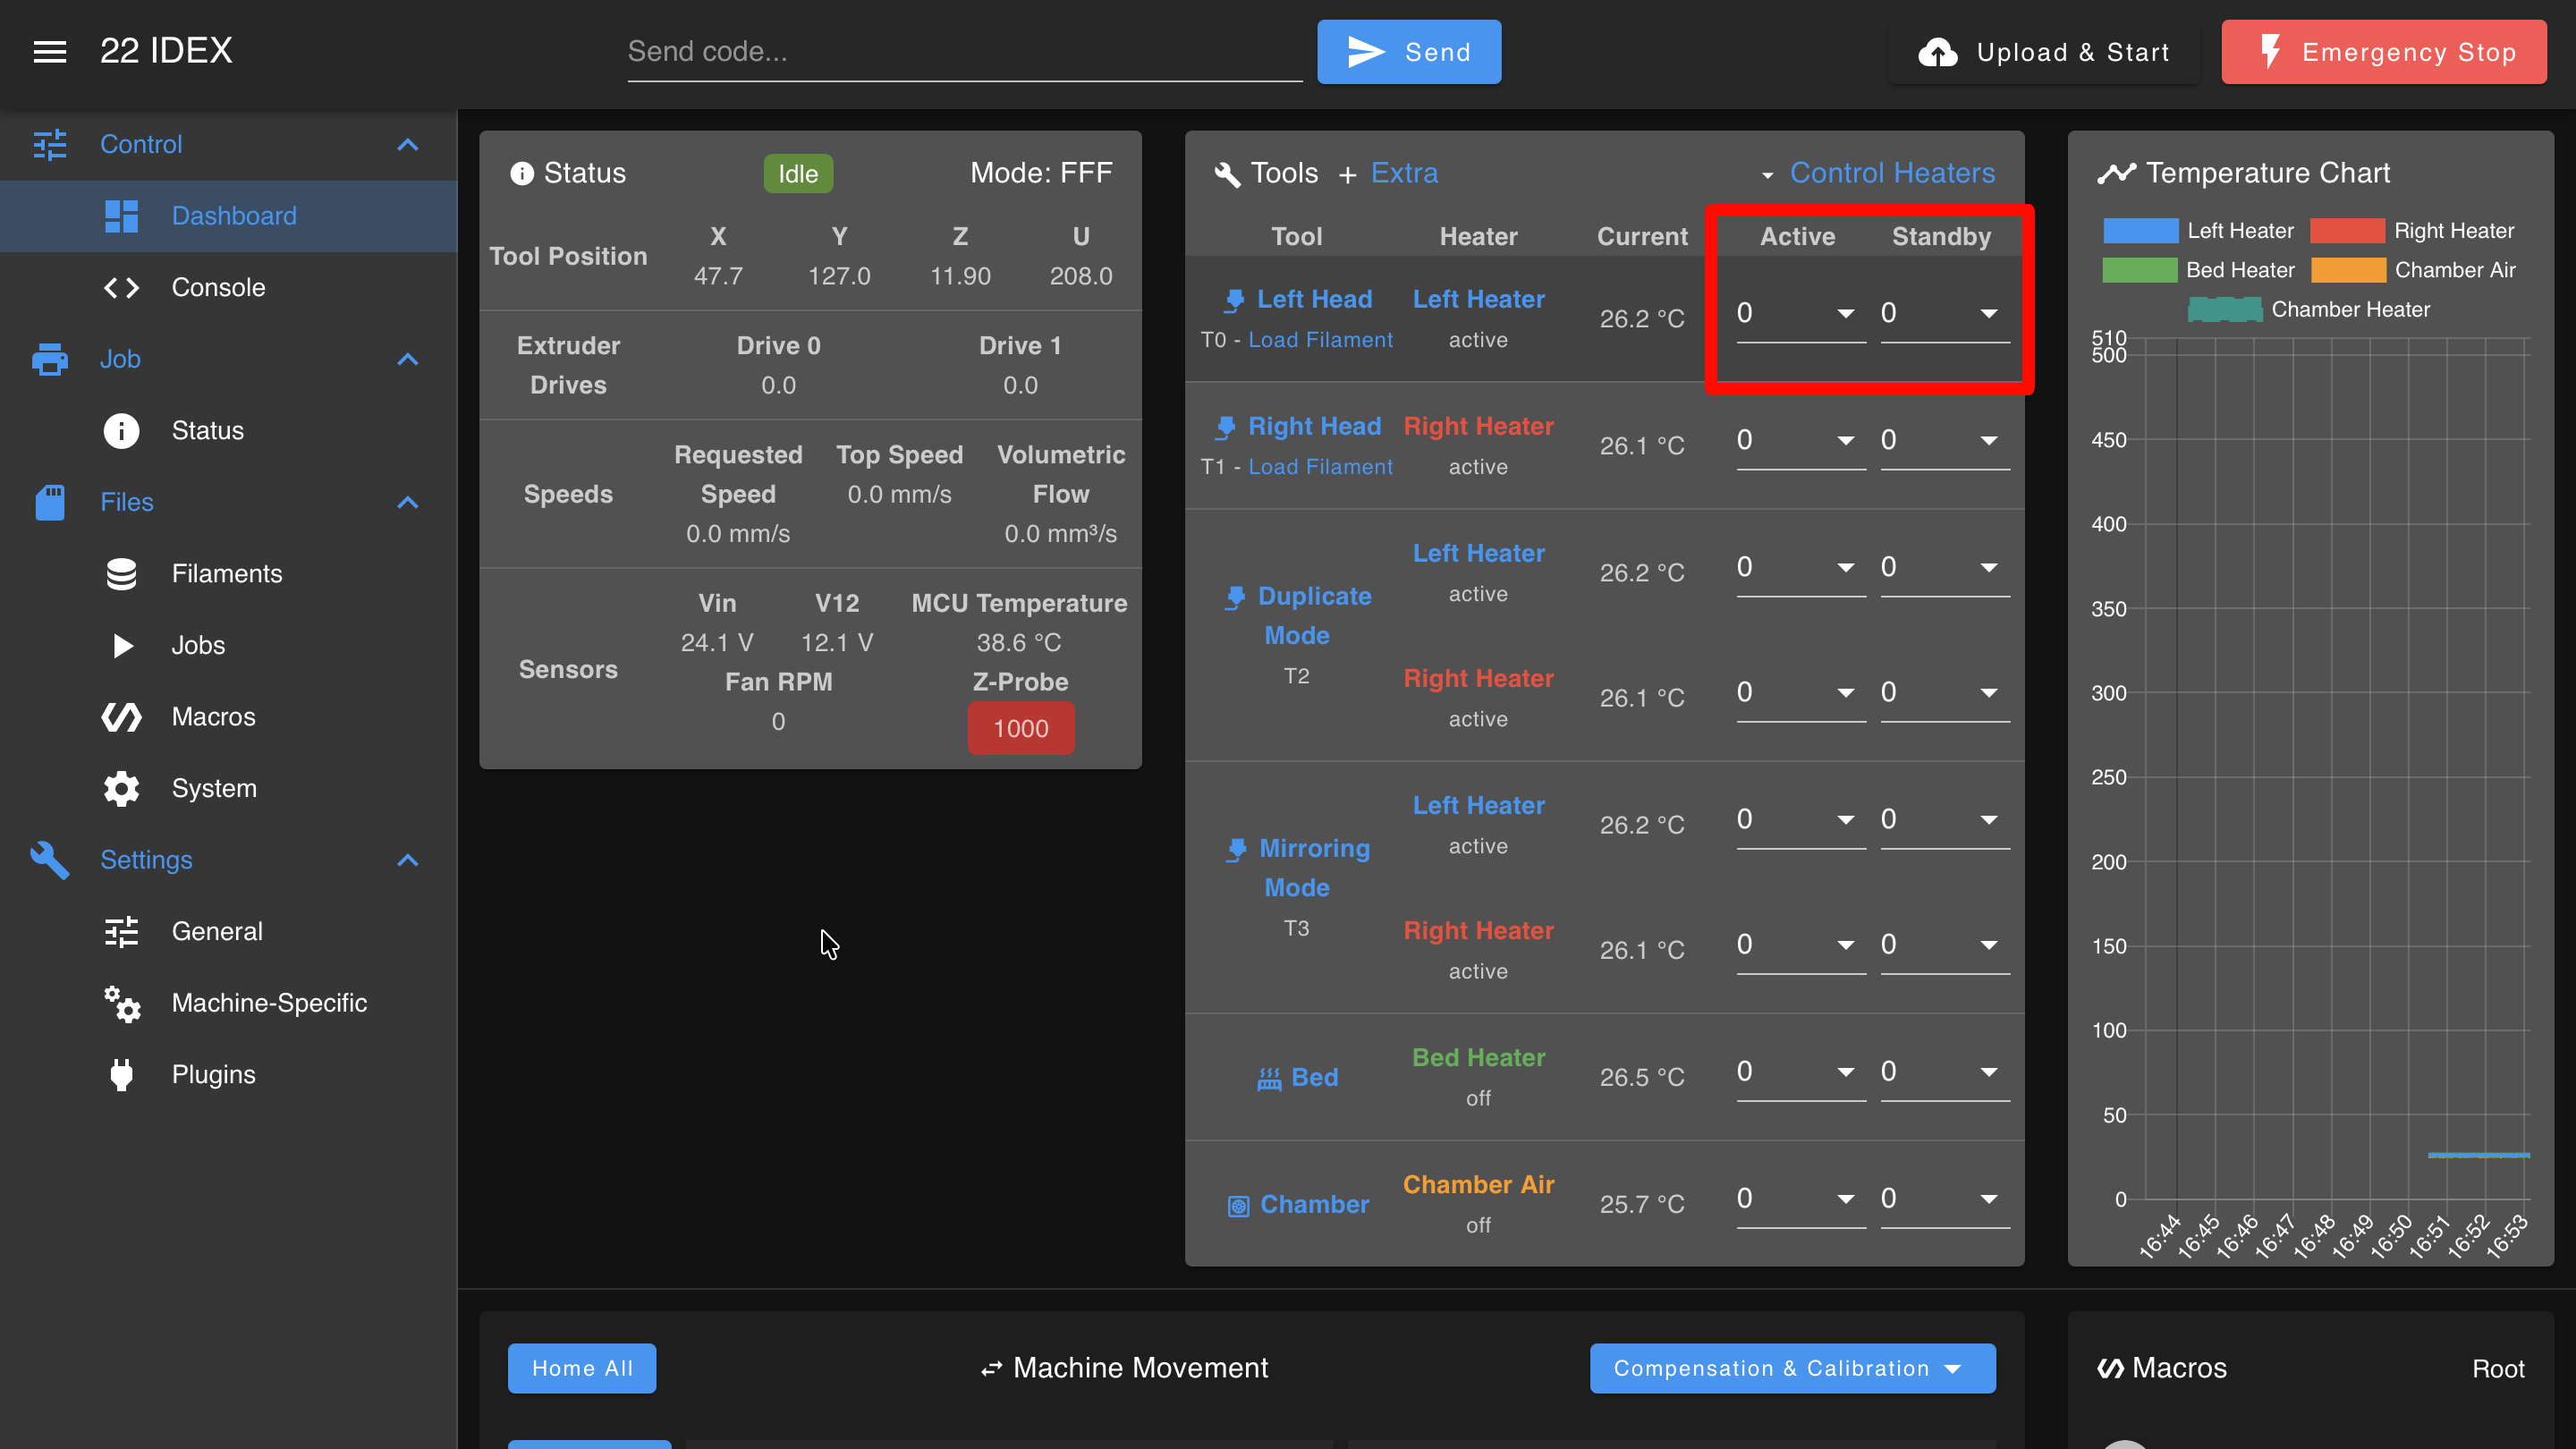
Tool Control
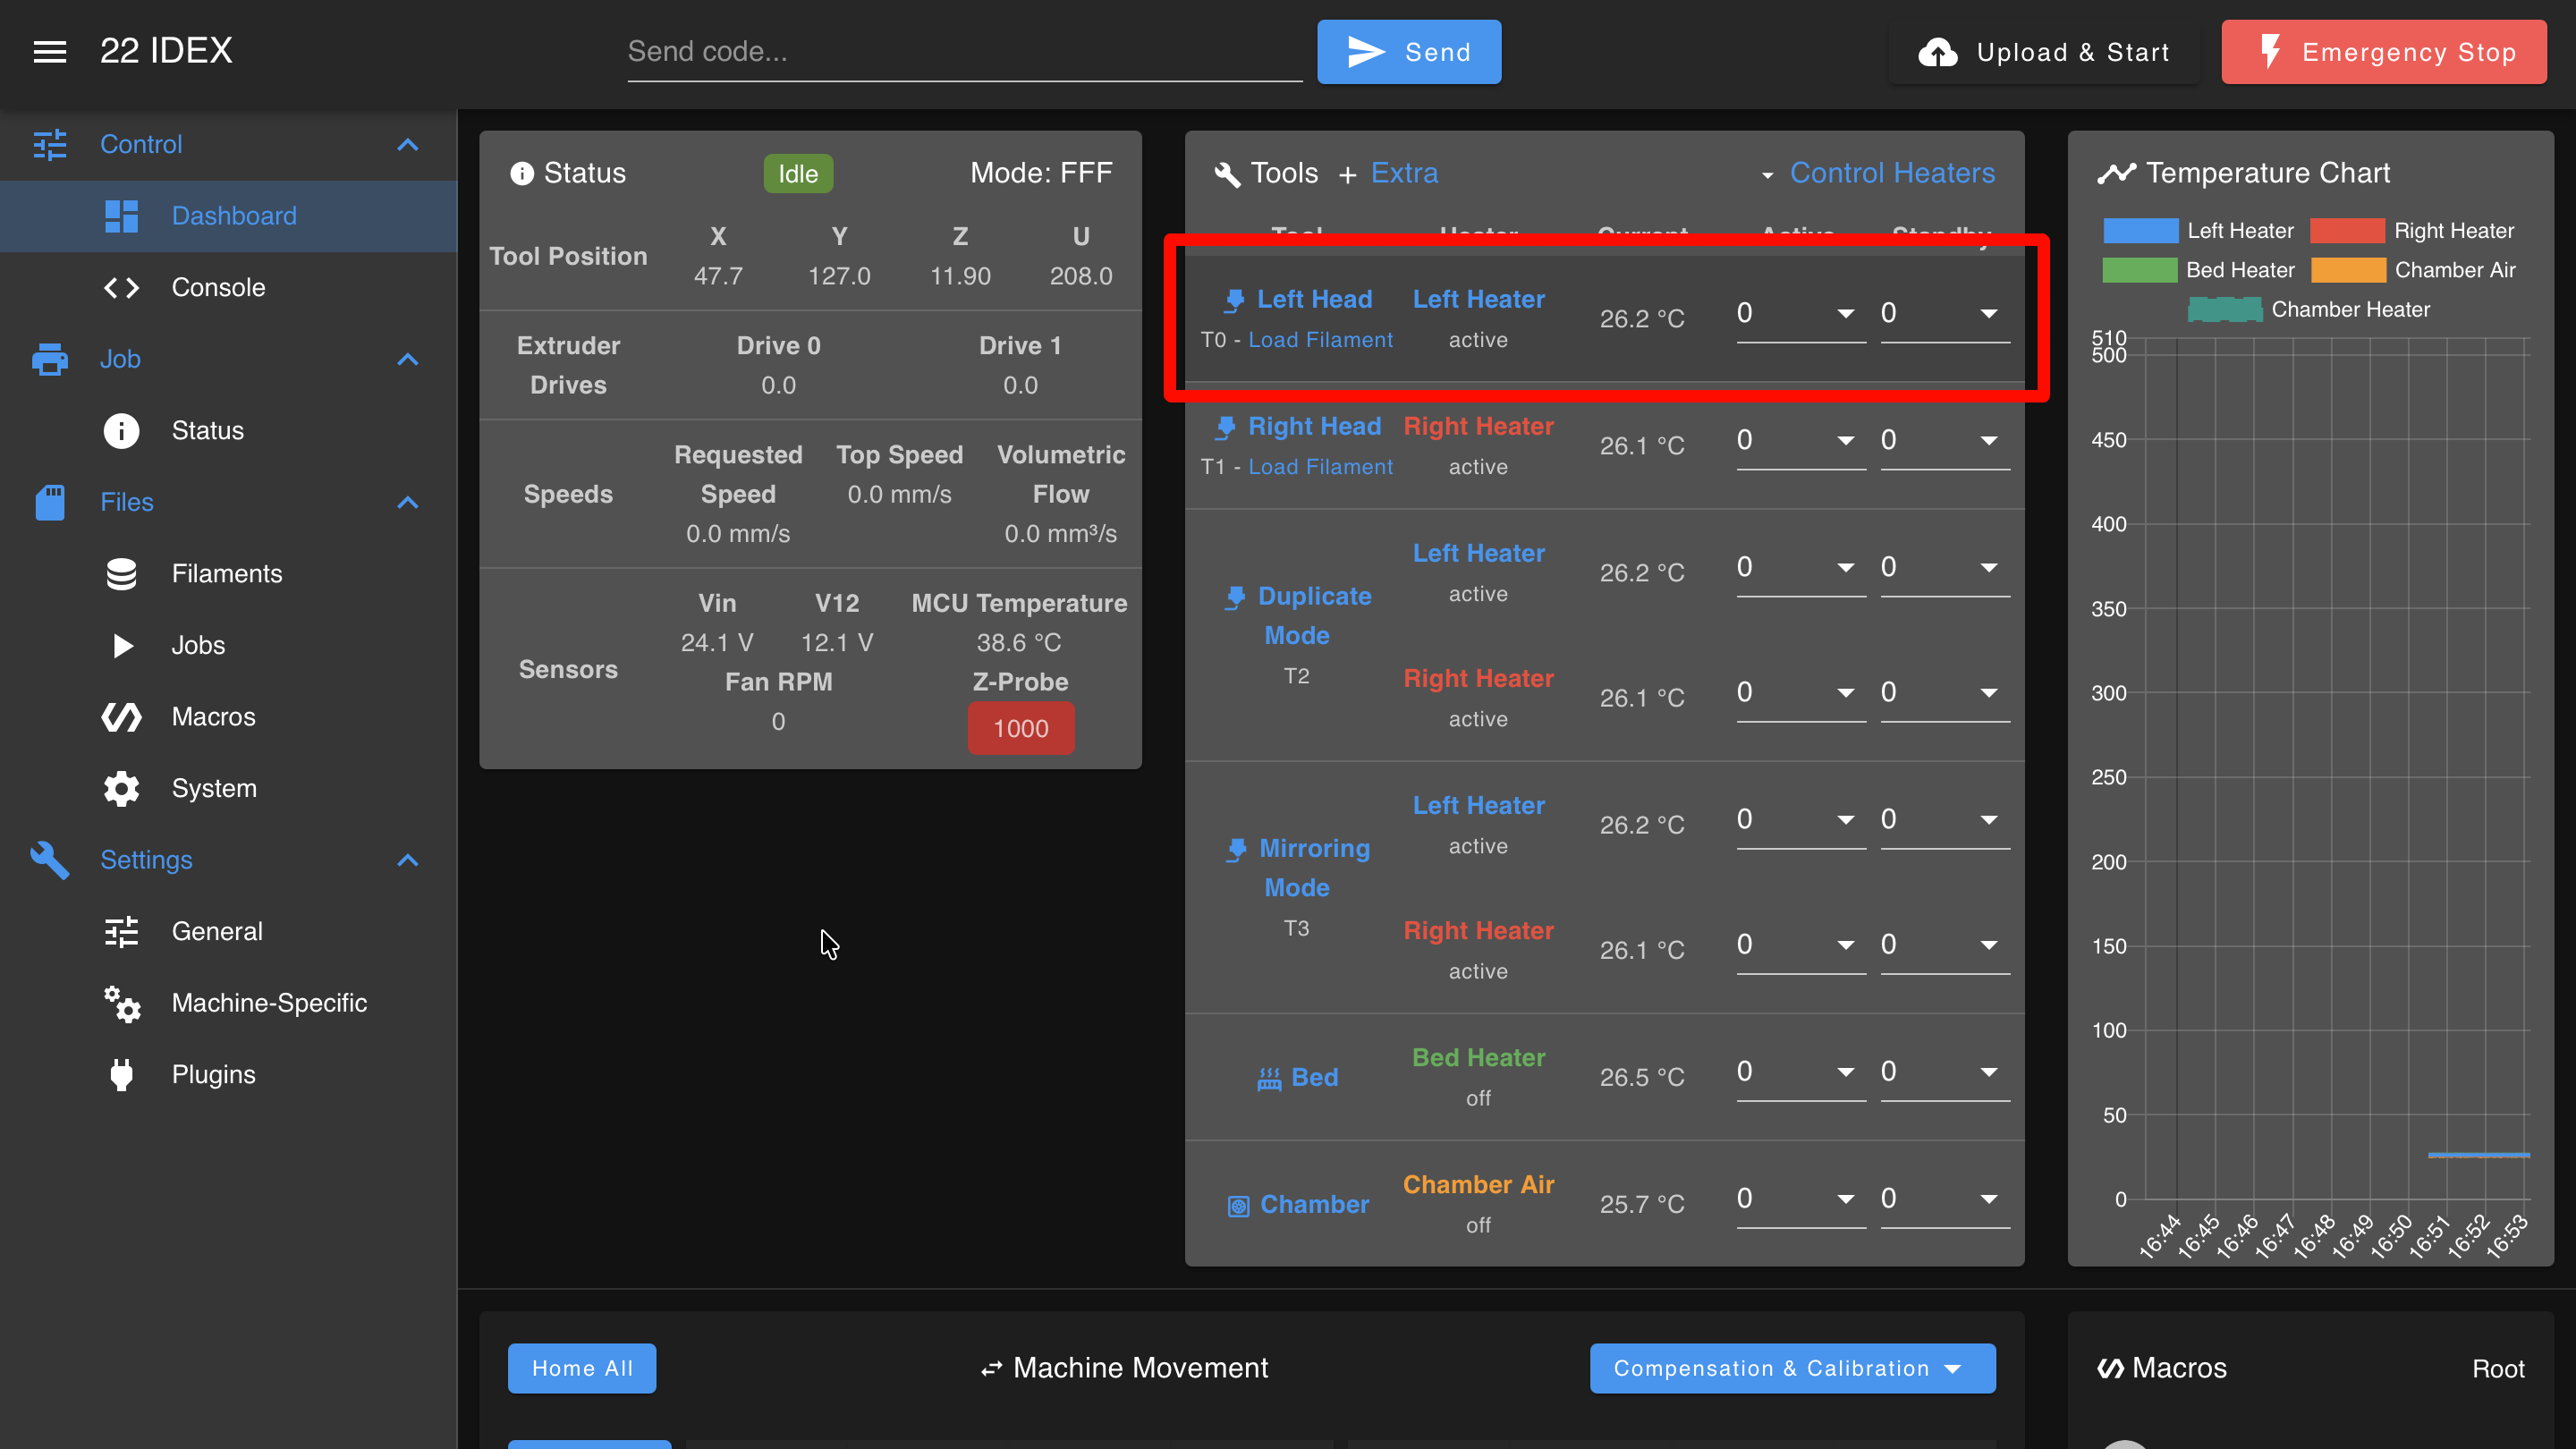
Displays:
- Tool and filament state
- Heater state (Off, Active, Standby)
- Current temperature
- Active and standby set temperatures
Tools can exist in three states:
- Off: The tool and its heaters are completely inactive.
- Active: The tool is selected for use, and its heaters are set to the defined active temperature.
- Standby: The tool is not currently in use, but its heaters are maintained at a lower standby temperature for quick activation.
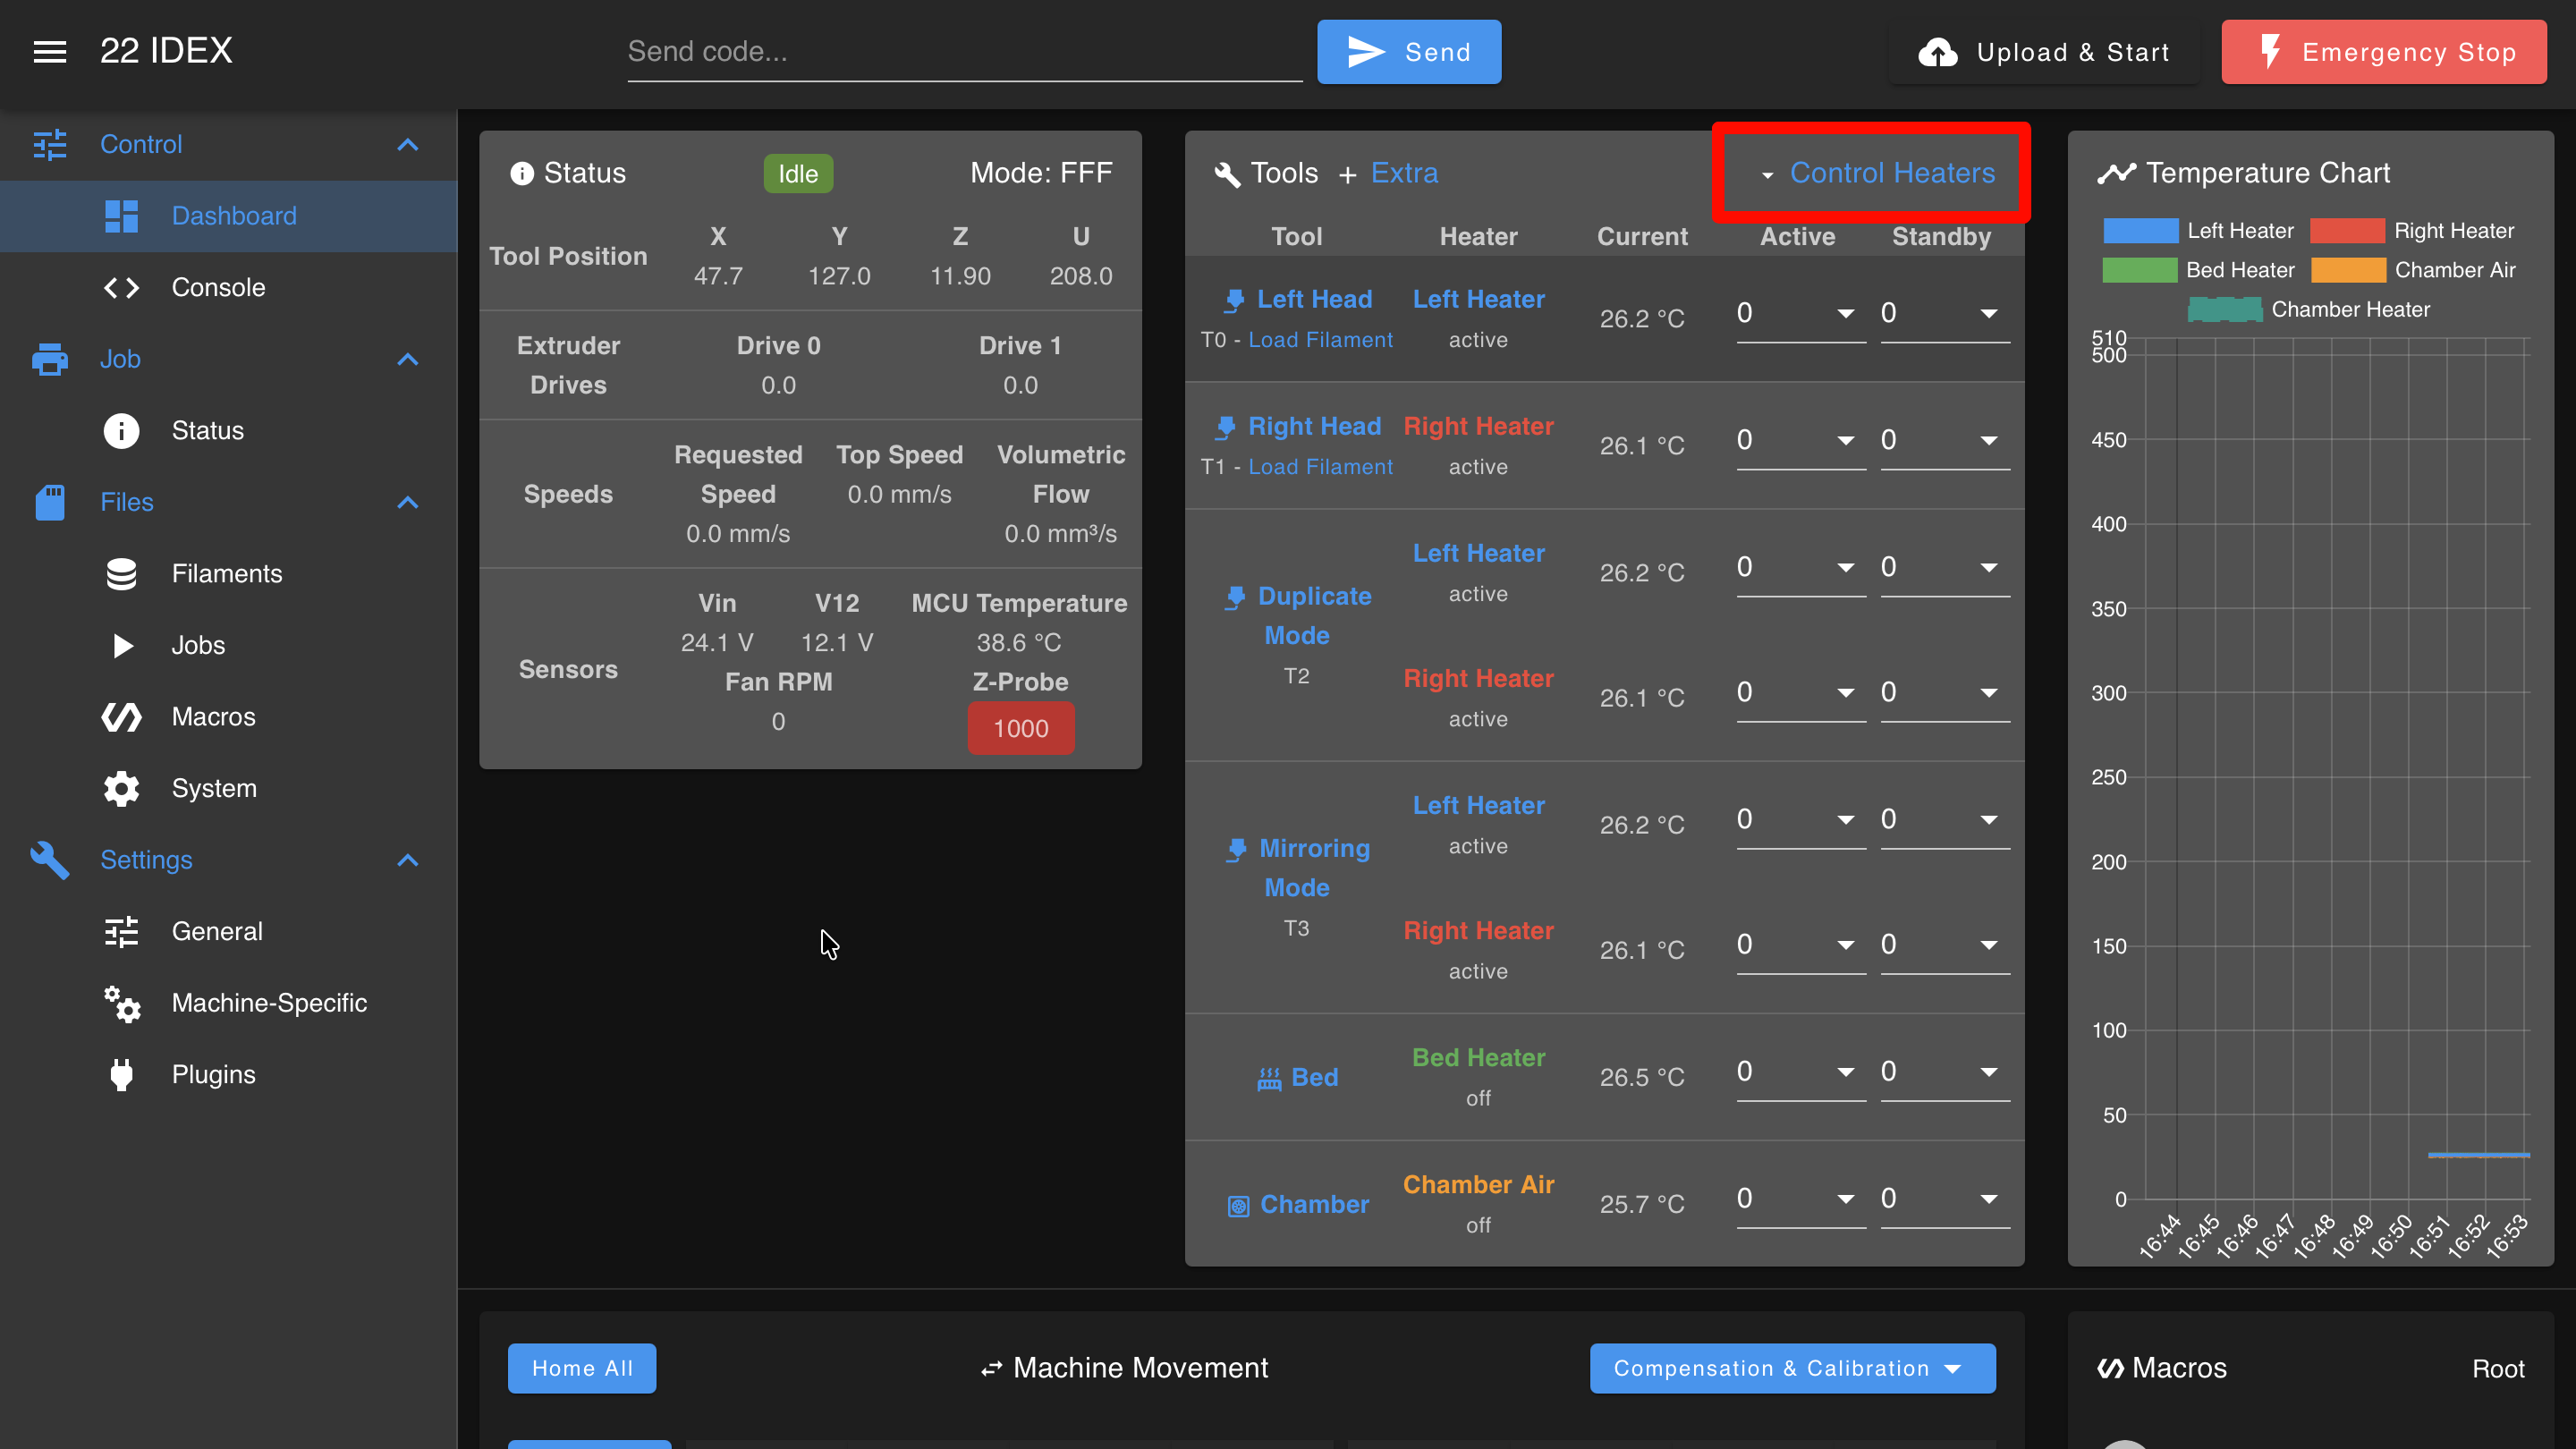
Use the Control All menu to:
- Turn off all heaters
- Set global active temperatures
- Set global standby temperatures
Temperature Chart
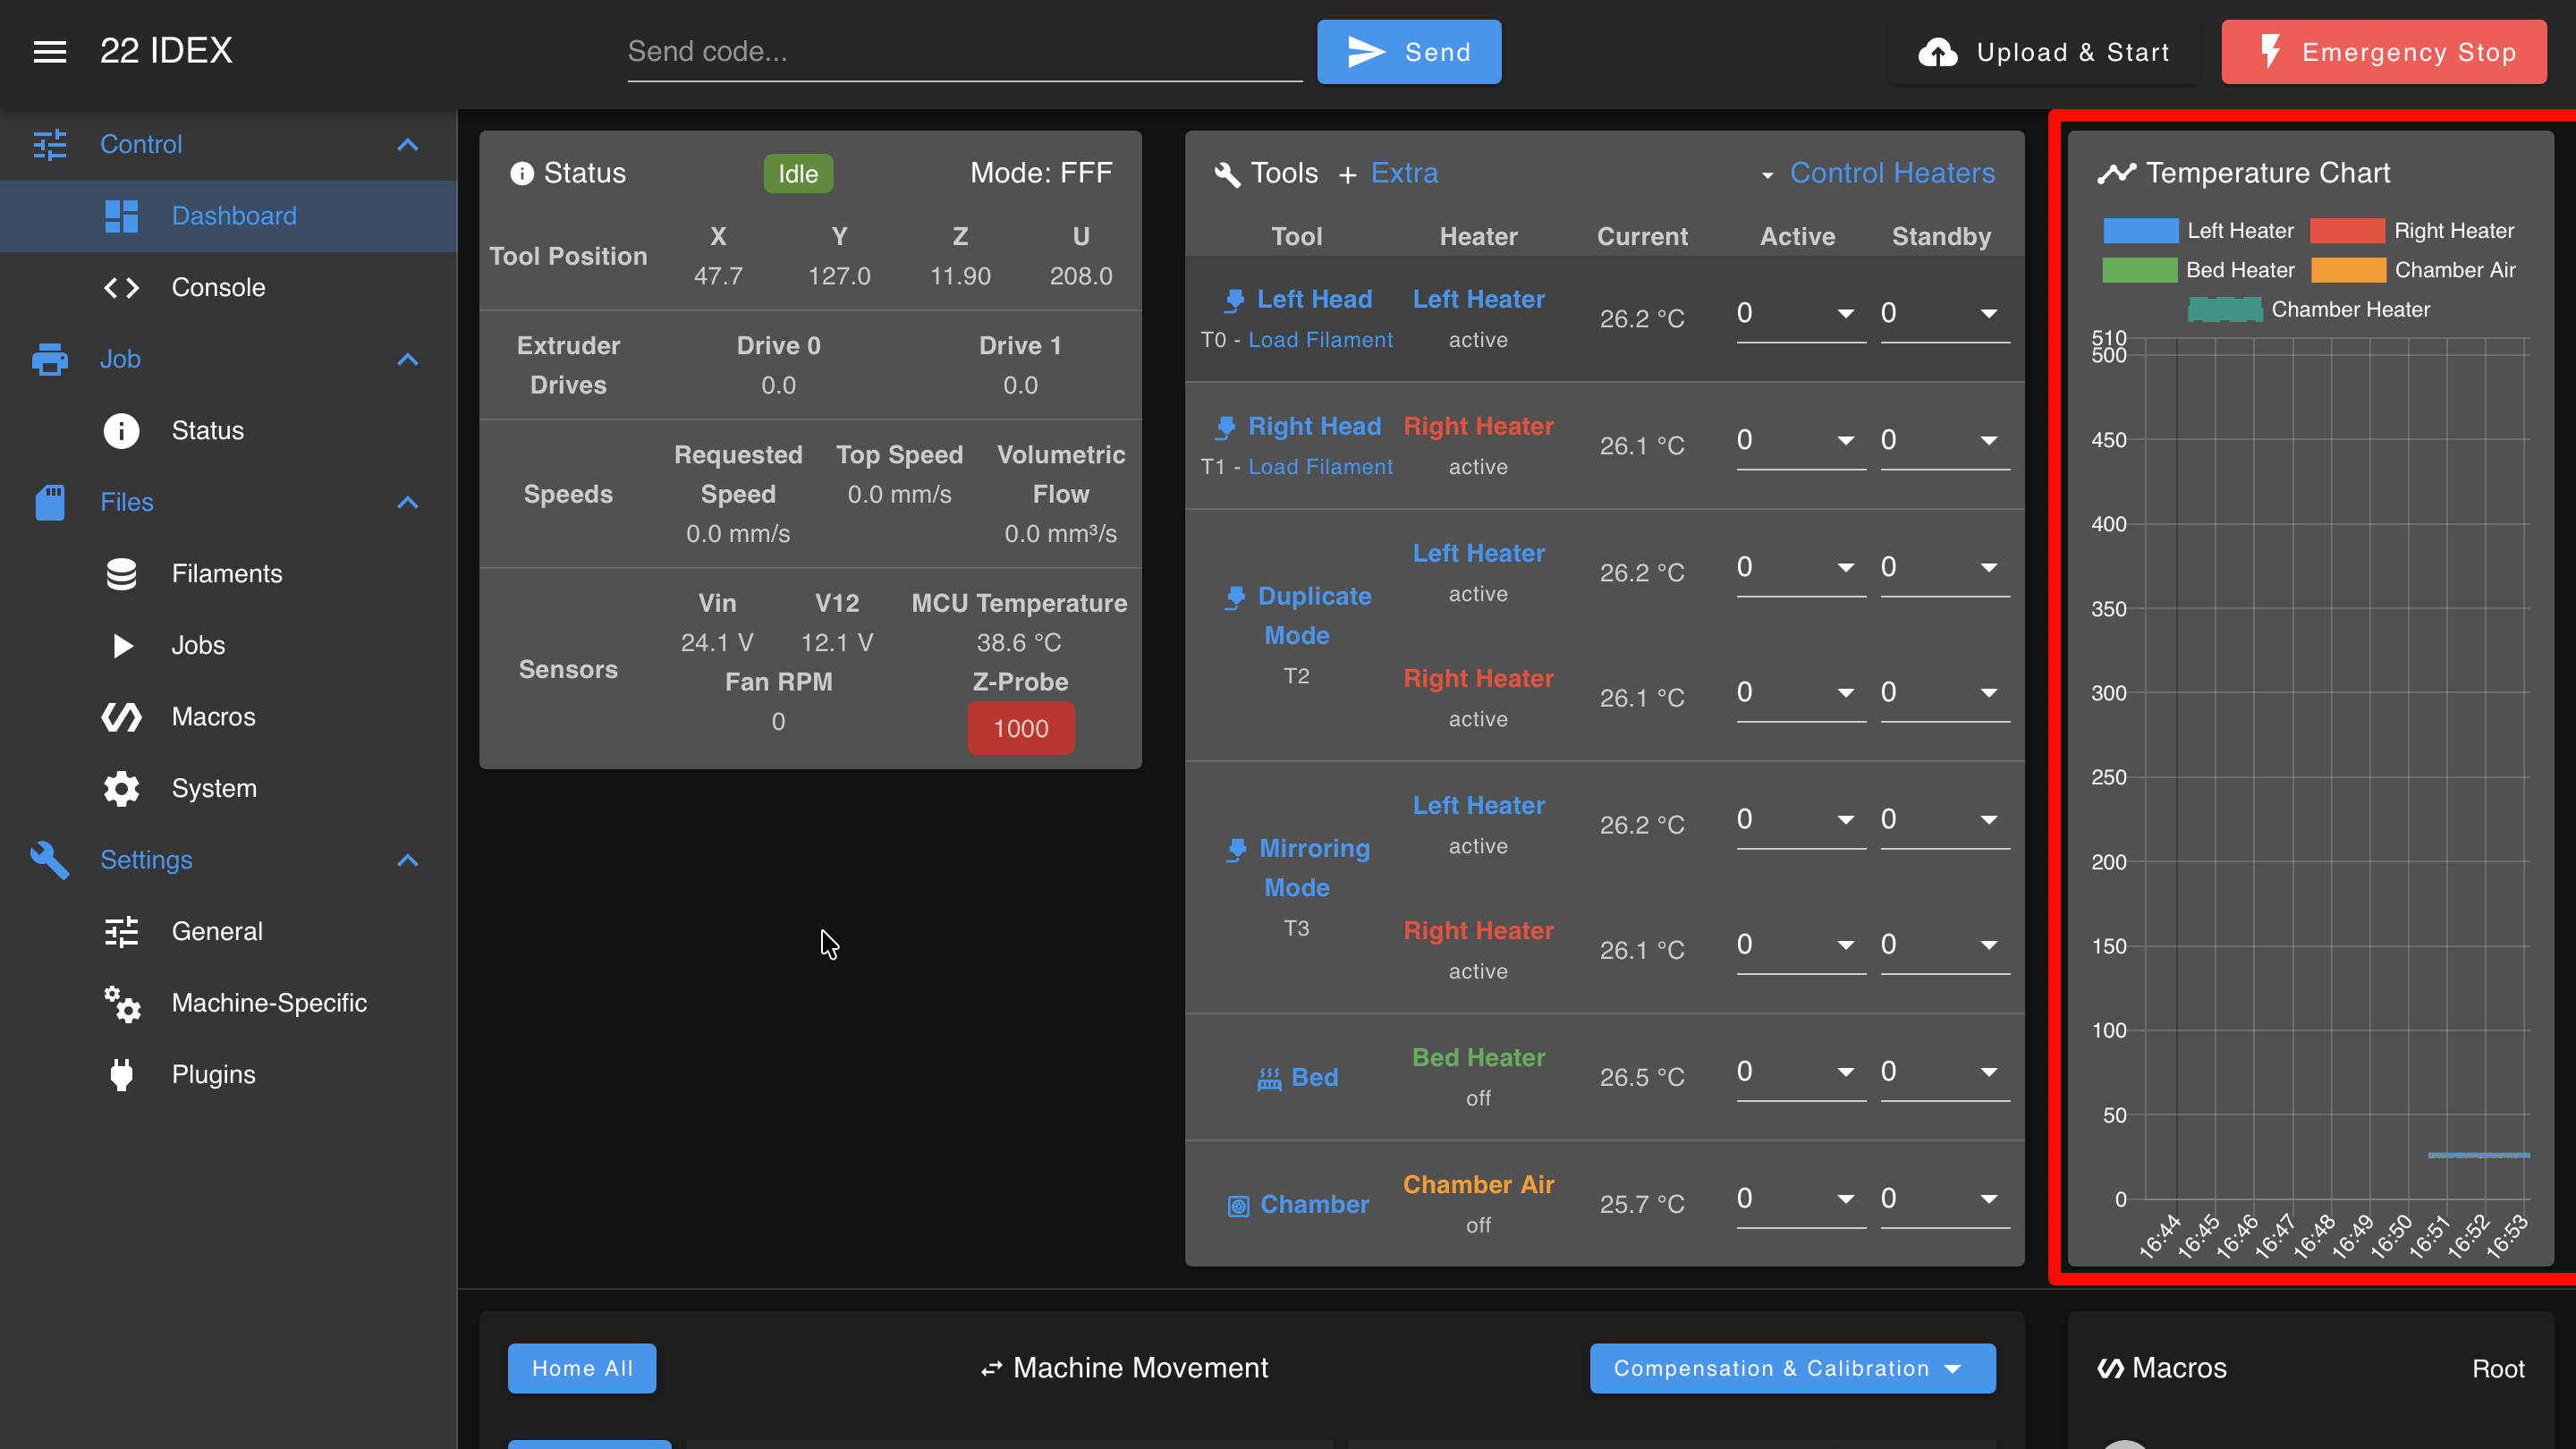
Displays temperature data over time for all defined heaters and selected extra sensors. Additional sensor inputs appear in the Extra view with options to display them on the chart.
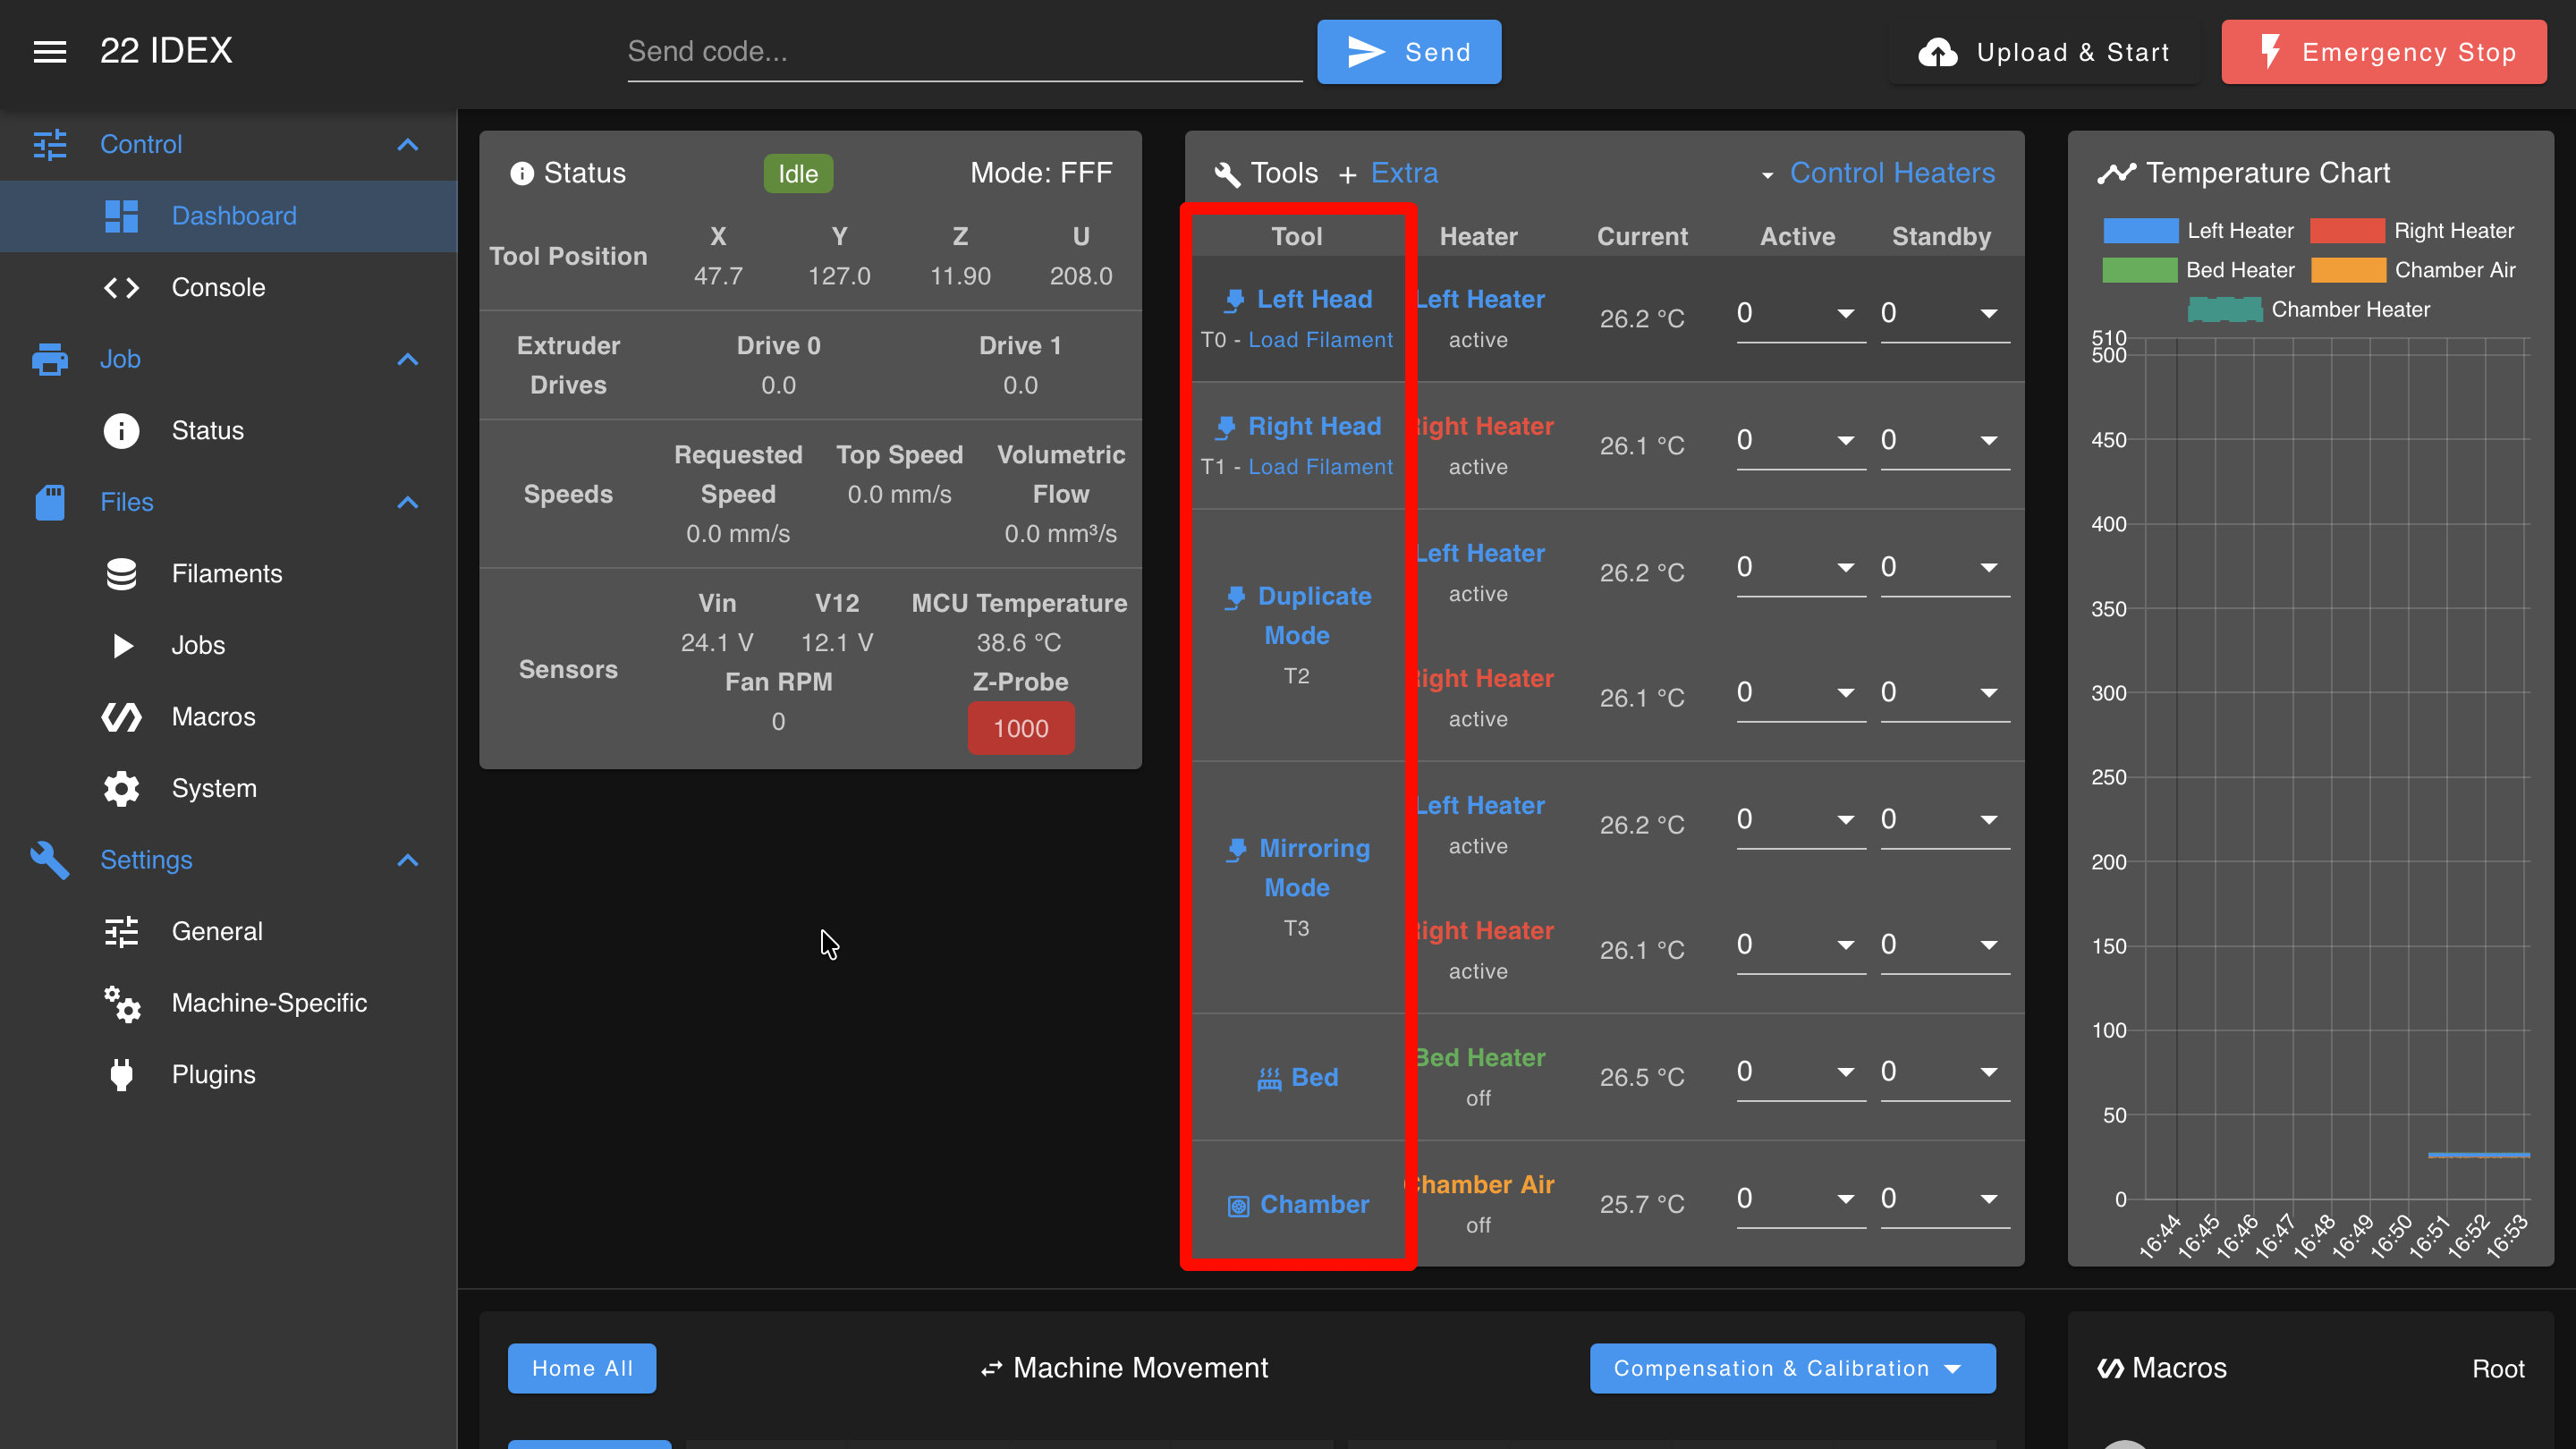
Tool Management
Individual Tool Control
Temperature Settings
For each tool, you can set active and standby temperatures by direct input or from a drop-down list. Press Enter to confirm after inputting a temperature.
Multiple Heater Tools
Some tools, like T3 (Mirror Mode), may use multiple heaters shared with other tools. In this case, the heaters will show as active under multiple tool entries, but only the selected tool is truly active.
Selecting a Tool
Click on a tool name to set it as Active. This will:
- Set the tool's heaters to the defined active temperature
- Set any previously active tool to standby
- Tools that were off will remain off
Deactivating a Tool
Clicking an active tool's name again will set it to standby. The heaters will cool to the standby temperature (which can be set to 0°C to effectively turn off the heater).
Switching Tools
Selecting a different tool will activate it and set the previous tool to standby.
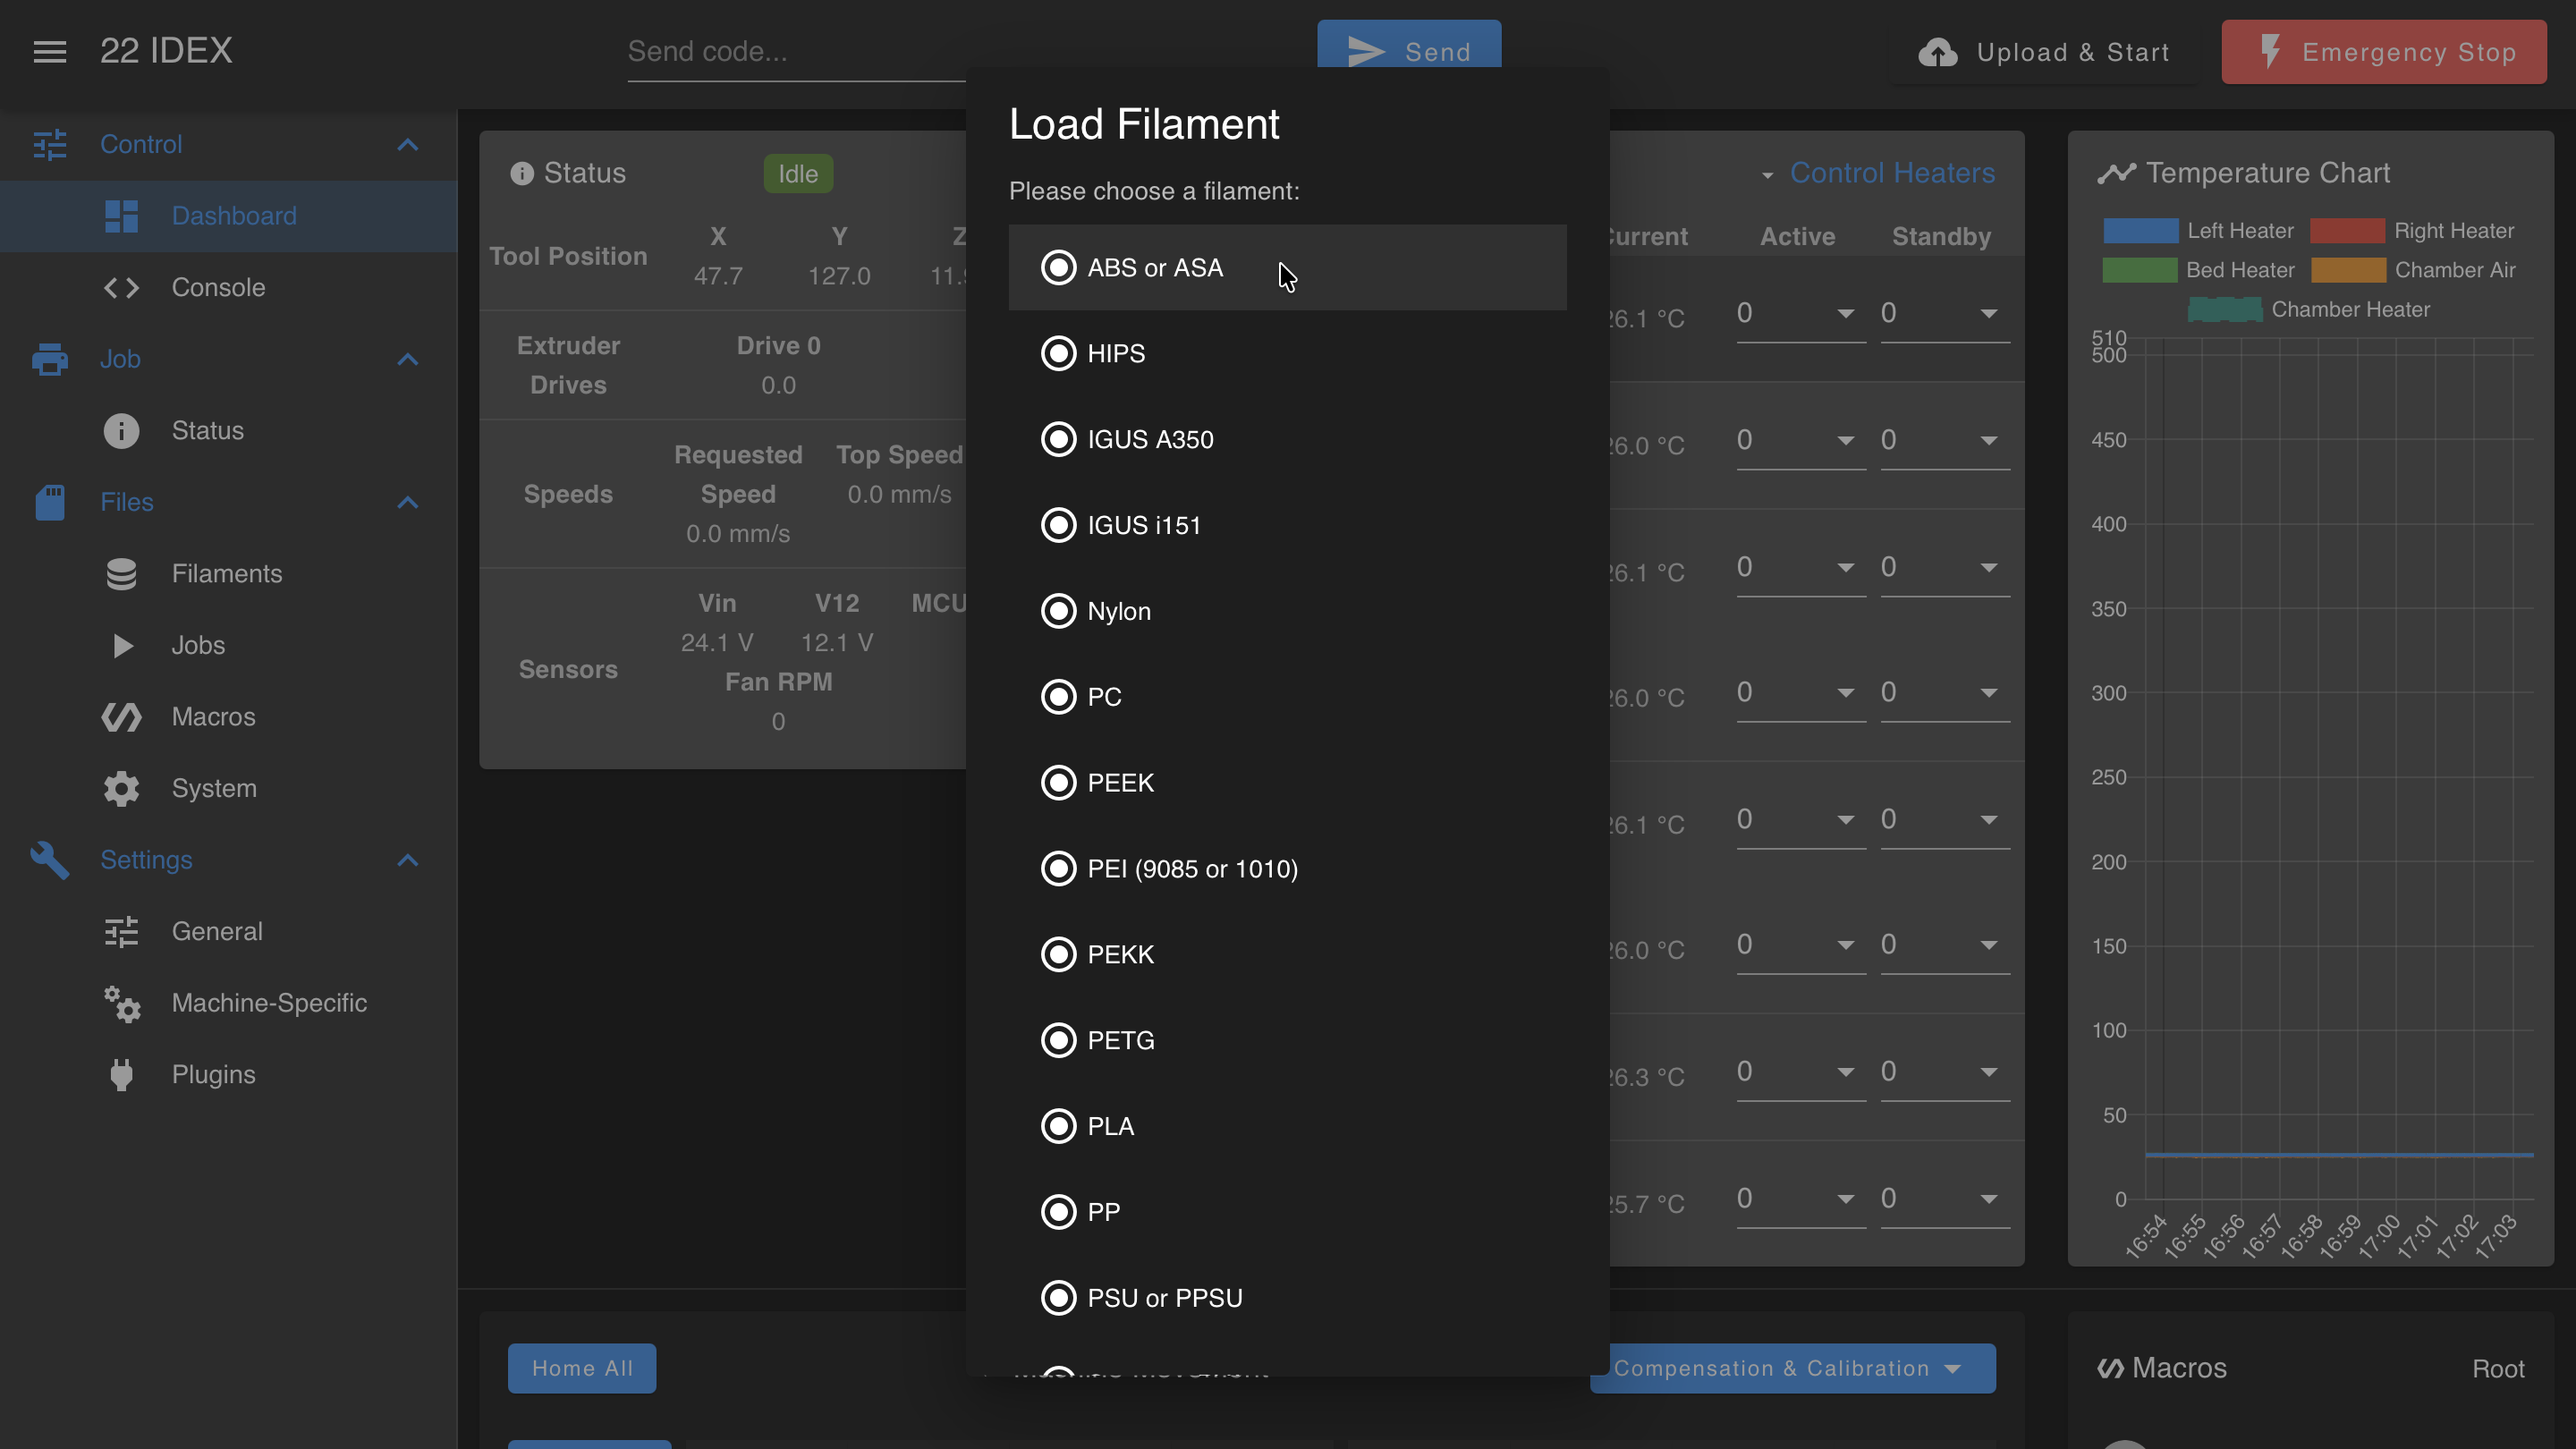
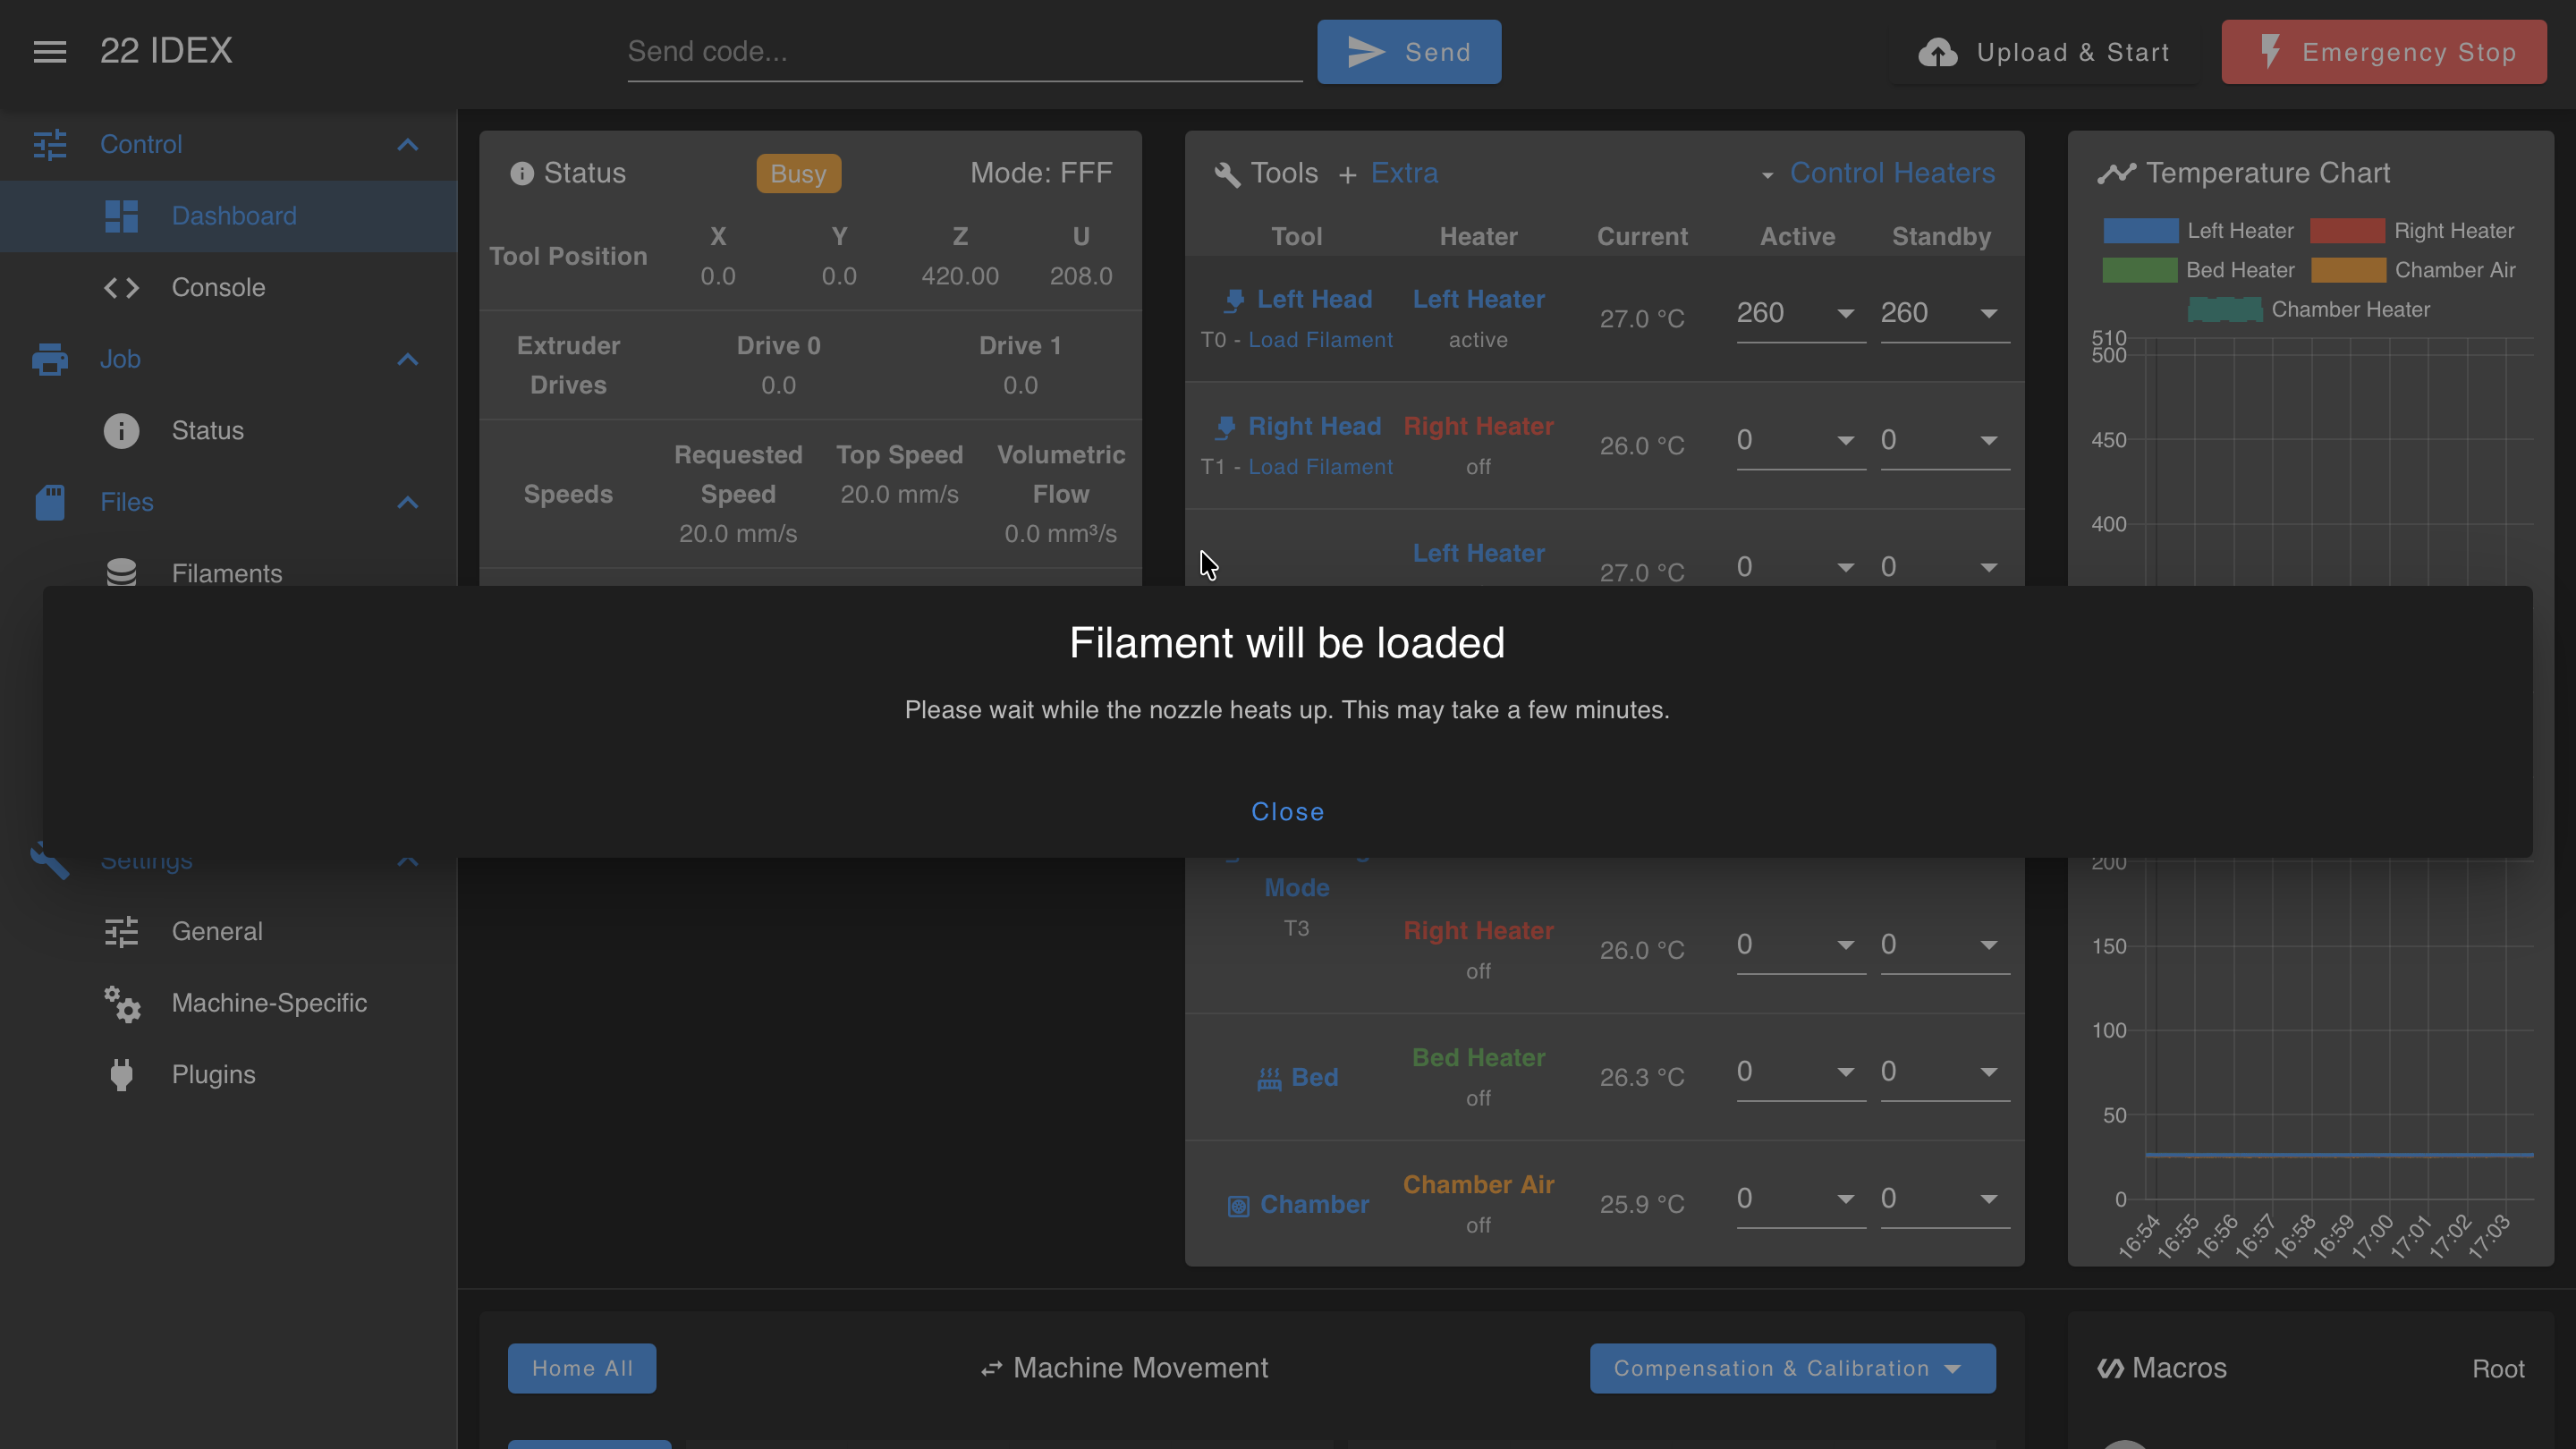
Filament Management
Options for loading, unloading, or changing filament become available after a tool is selected and filament is loaded.
Load Filament Button Location

Loaded Filaments List
Filament Loaded Status Indicator
Heater Cycling
Clicking on a heater associated with a tool cycles it (and all associated heaters) through Active, Standby, and Off states. Setting a heater to Off will set both active and standby temperatures to 0°C.
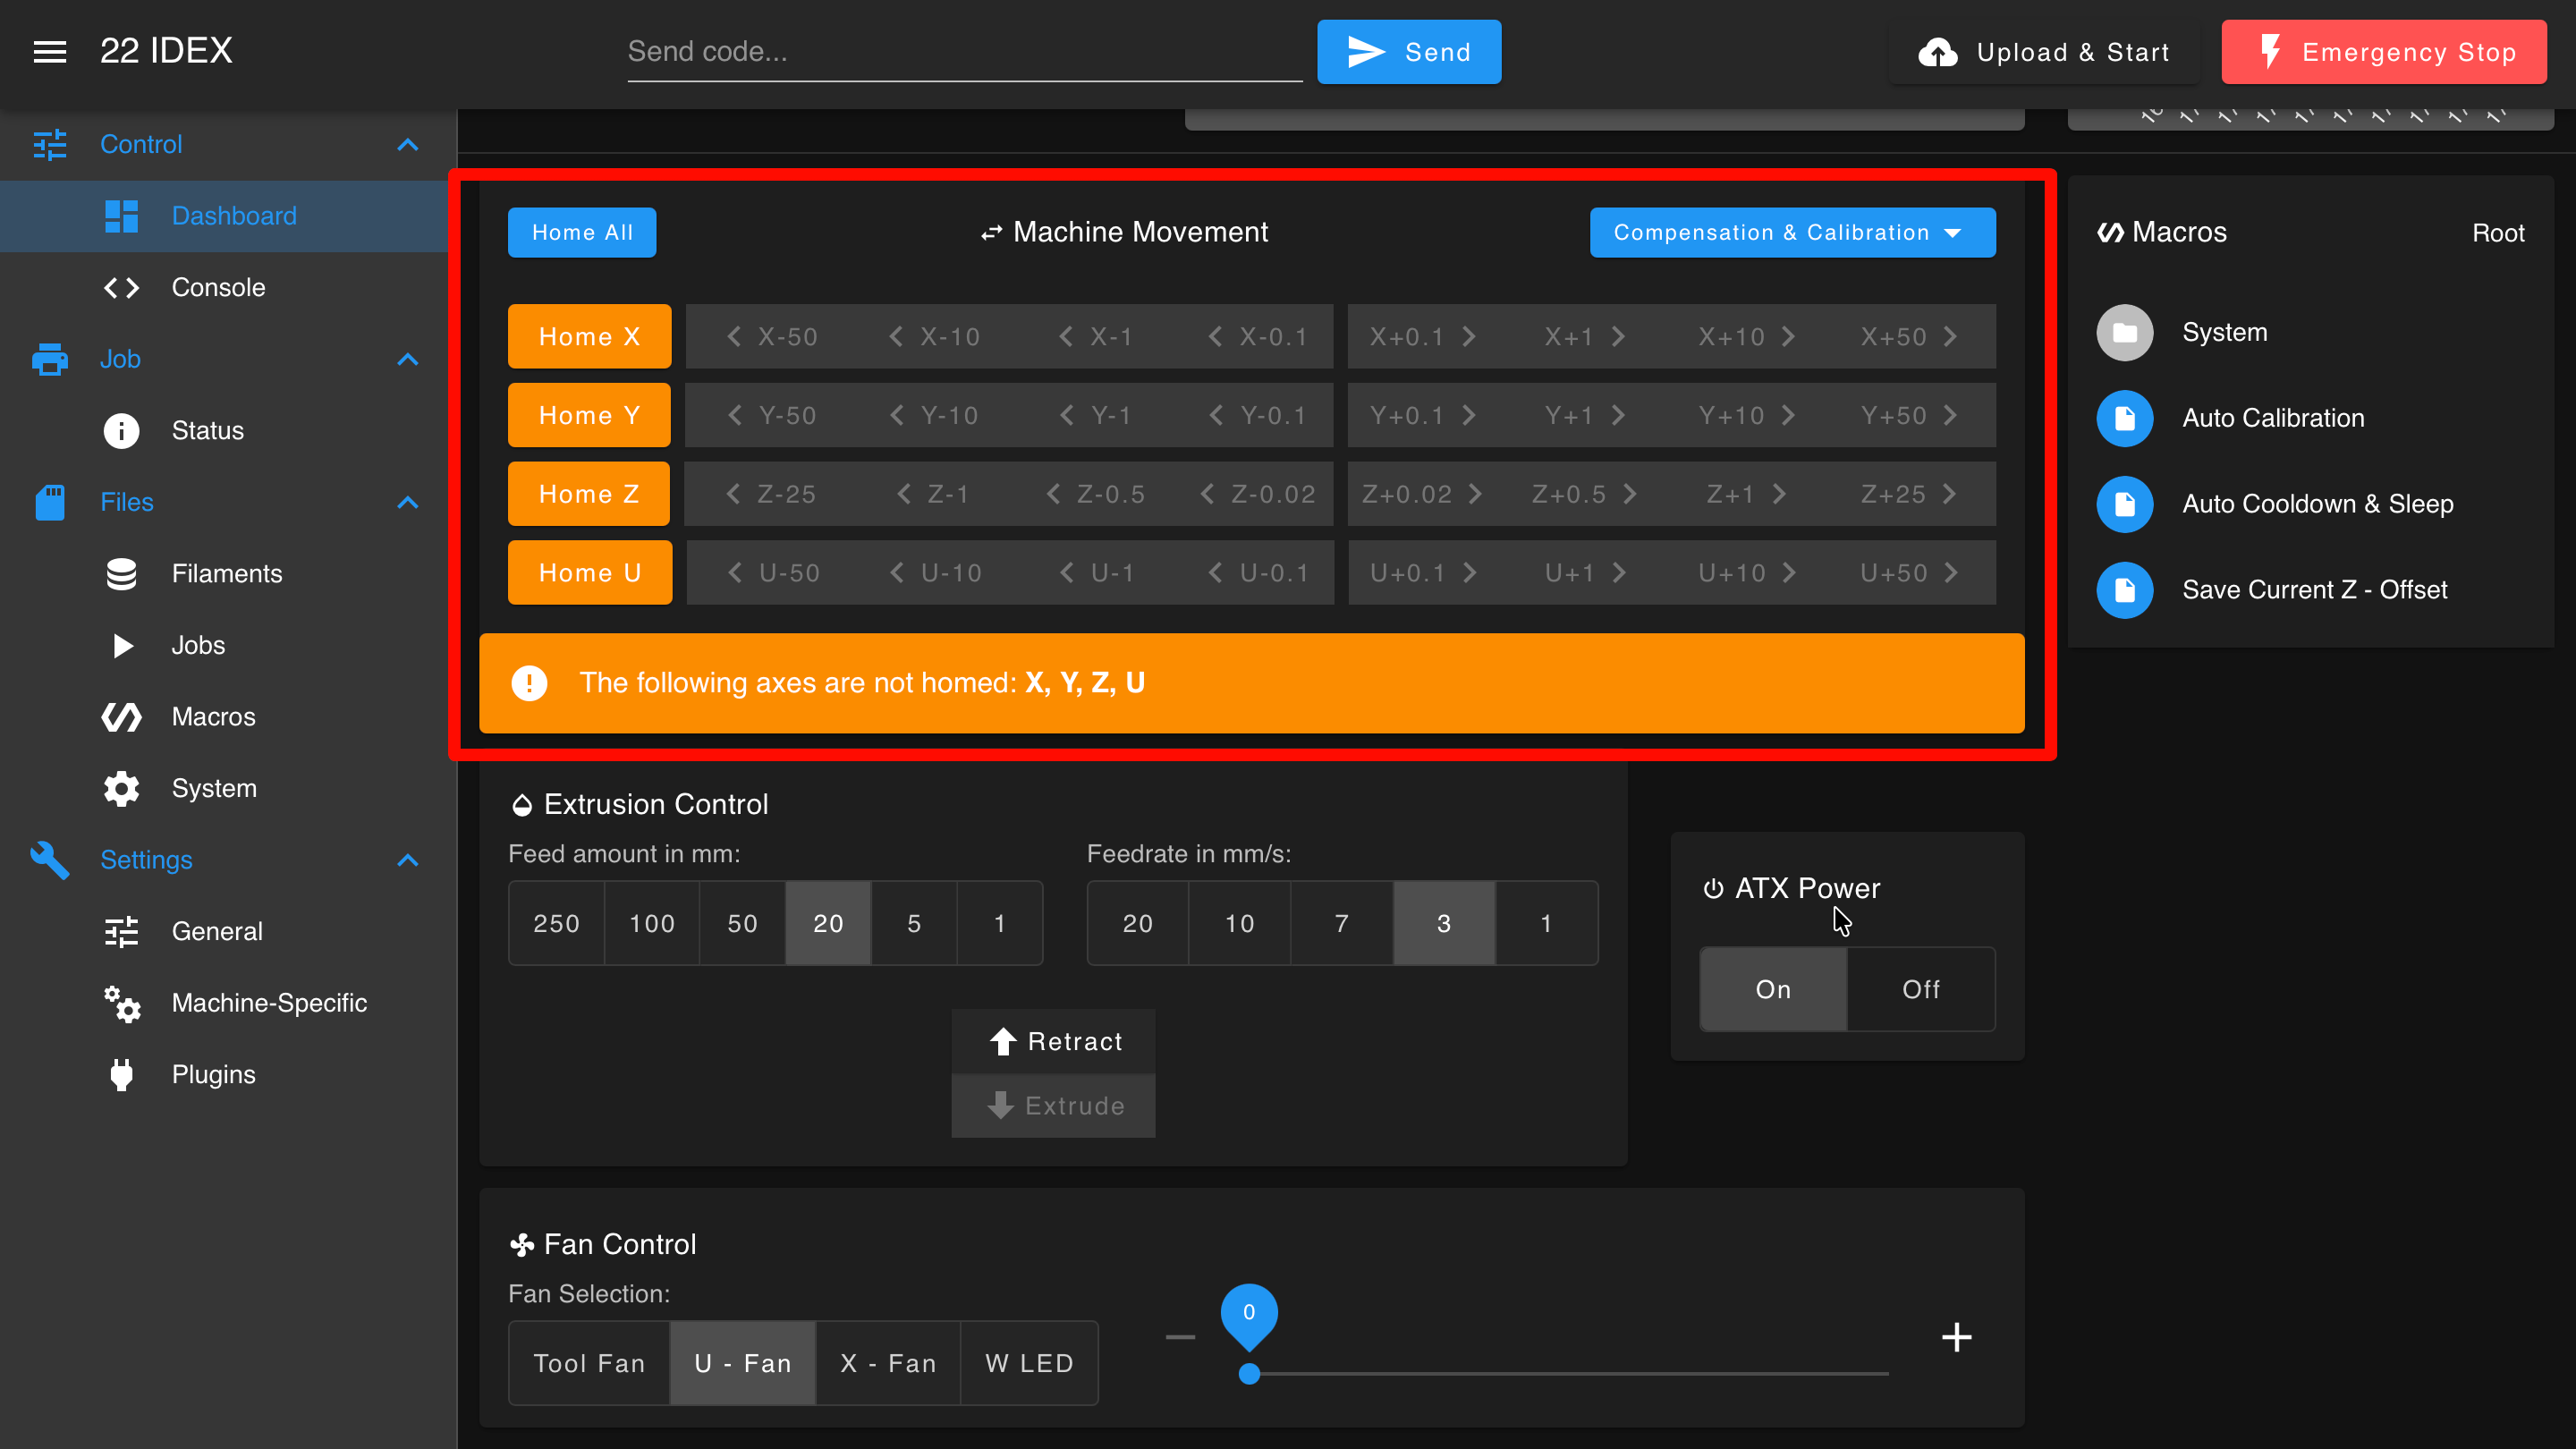
Dashboard
The Dashboard provides direct machine control.
Machine Movement
- Manual homing and movement controls
- Bed compensation and calibration
- Home individual axes or all at once
- Move axes after homing (or with override if not homed)
Extrusion Control
- Manual extrusion and retraction for the selected tool
- Temperature limits apply: 160°C minimum for extrusion, 90°C minimum for retraction

Fan Control
- Manual control of fans
- Adjust LED brightness

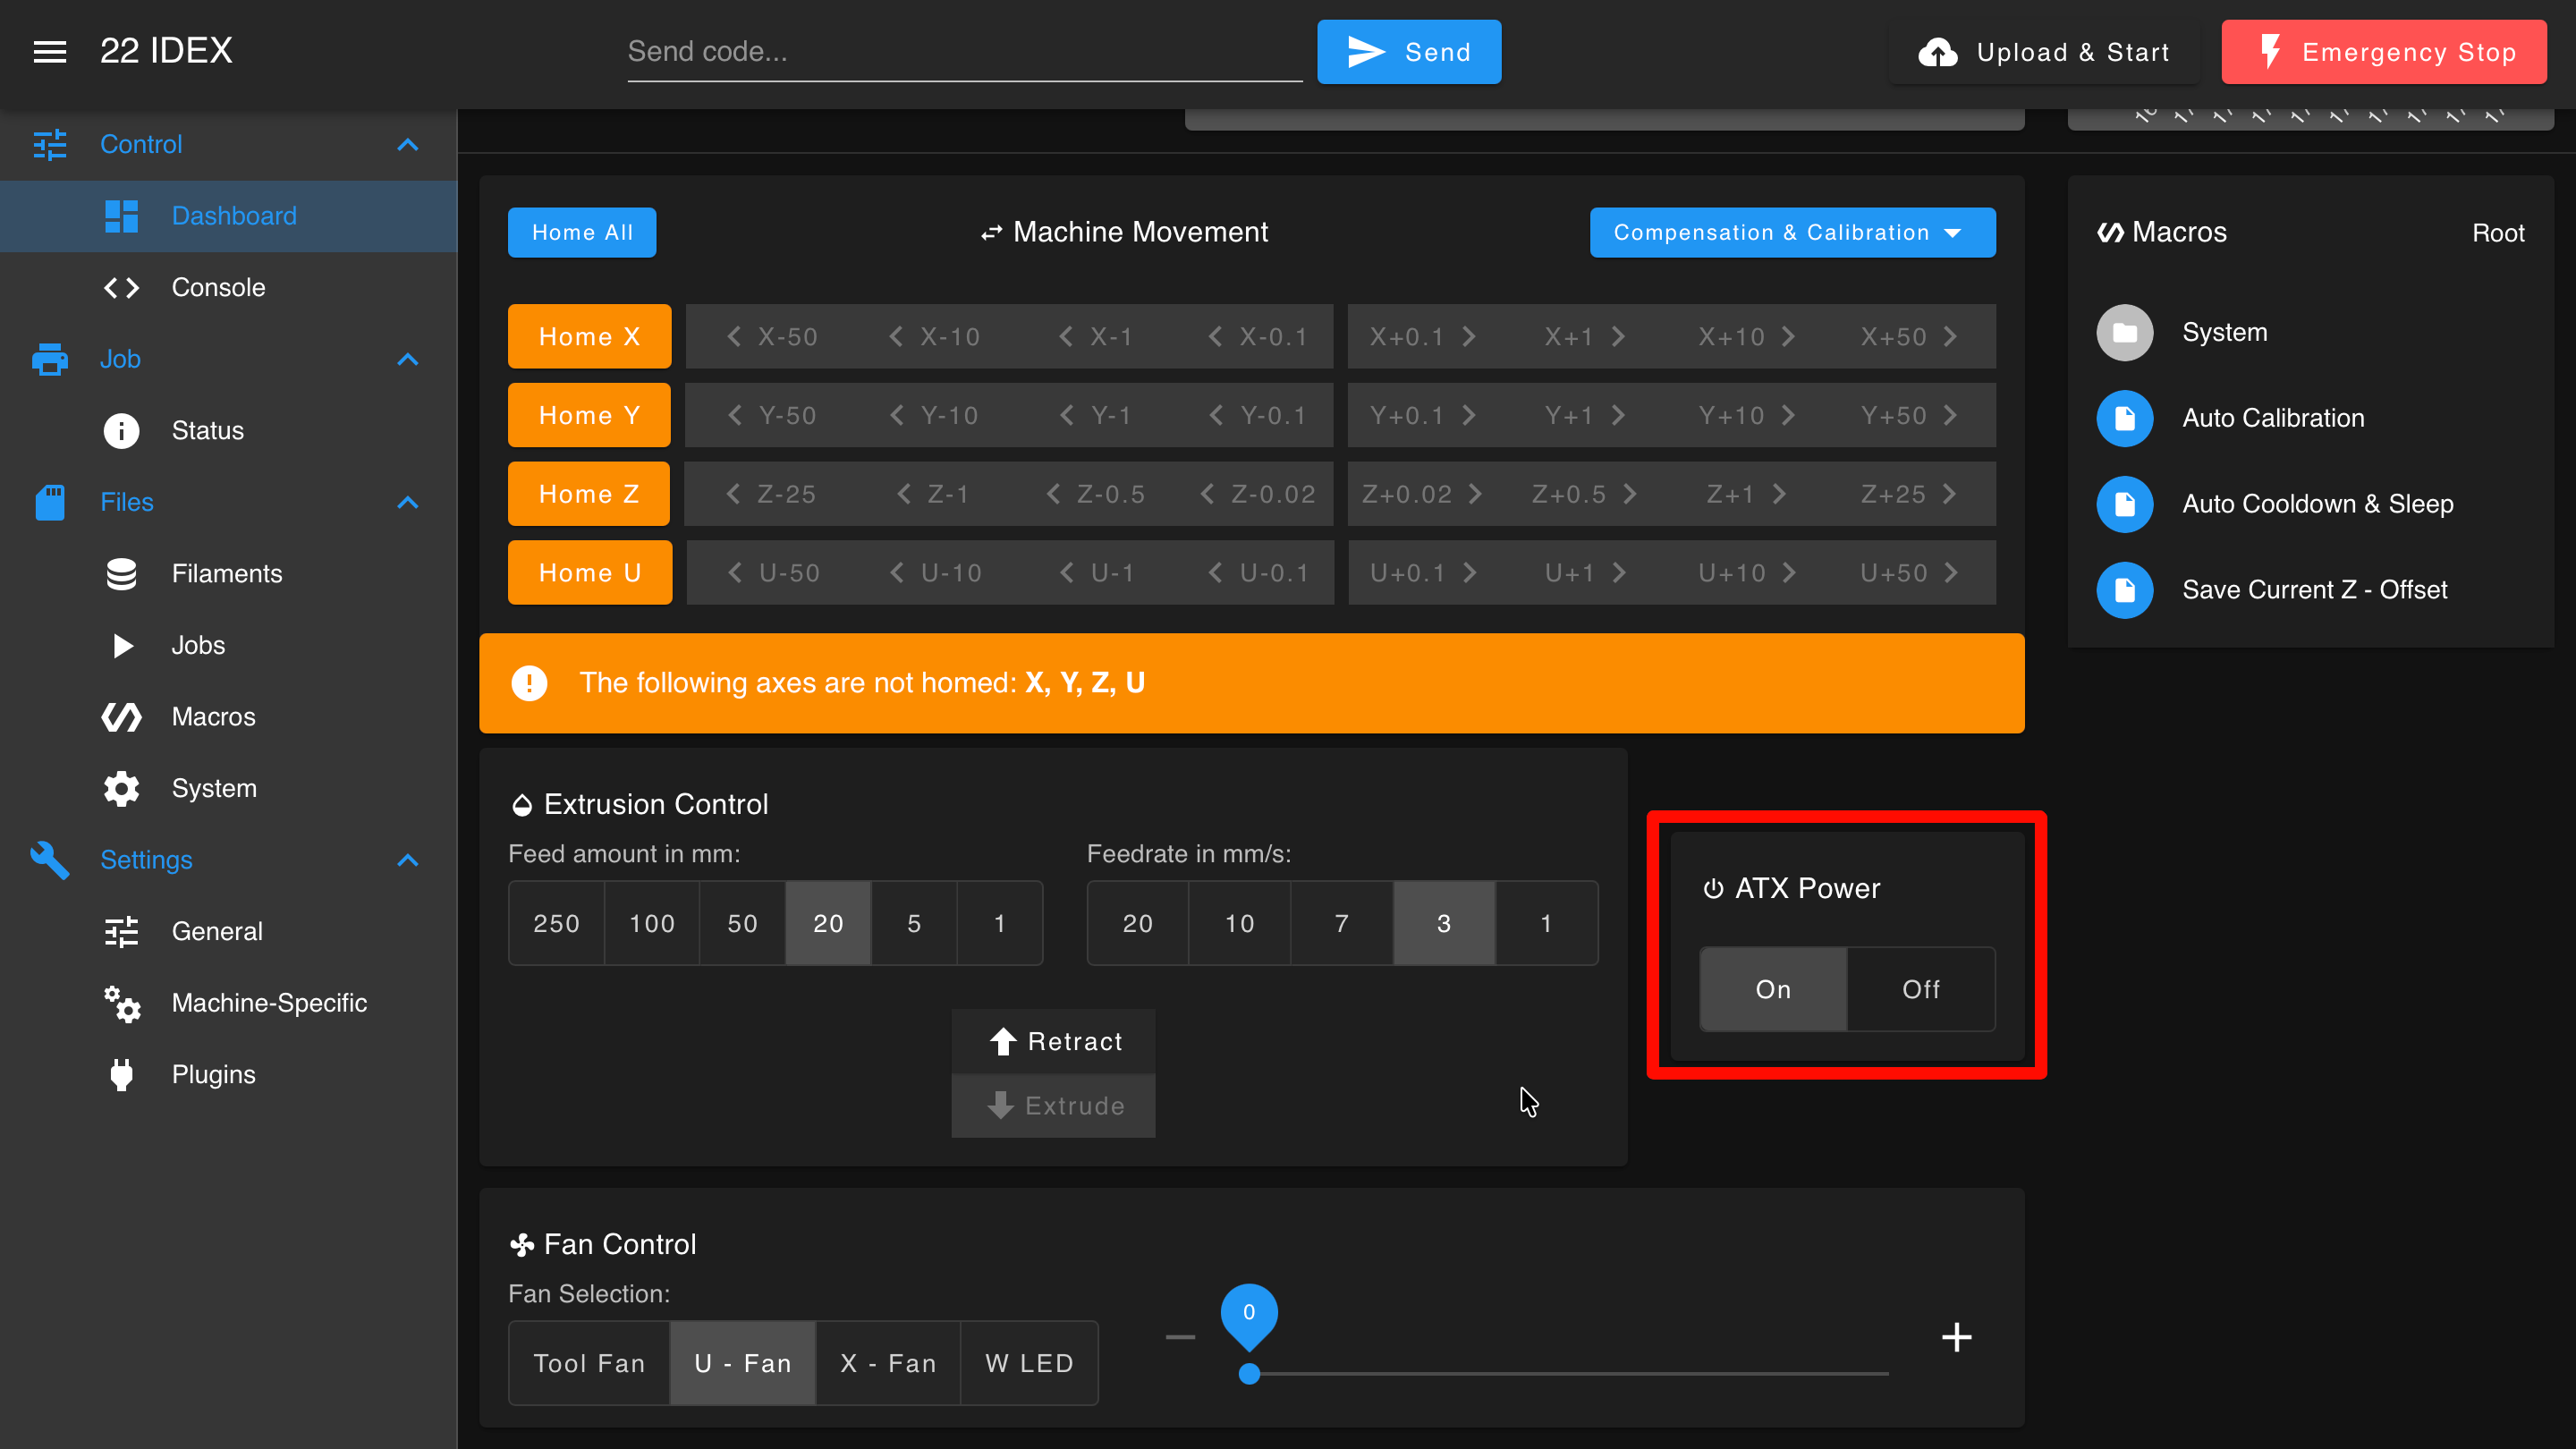
ATX Power
- Control power to the machine while maintaining Web Interface connectivity
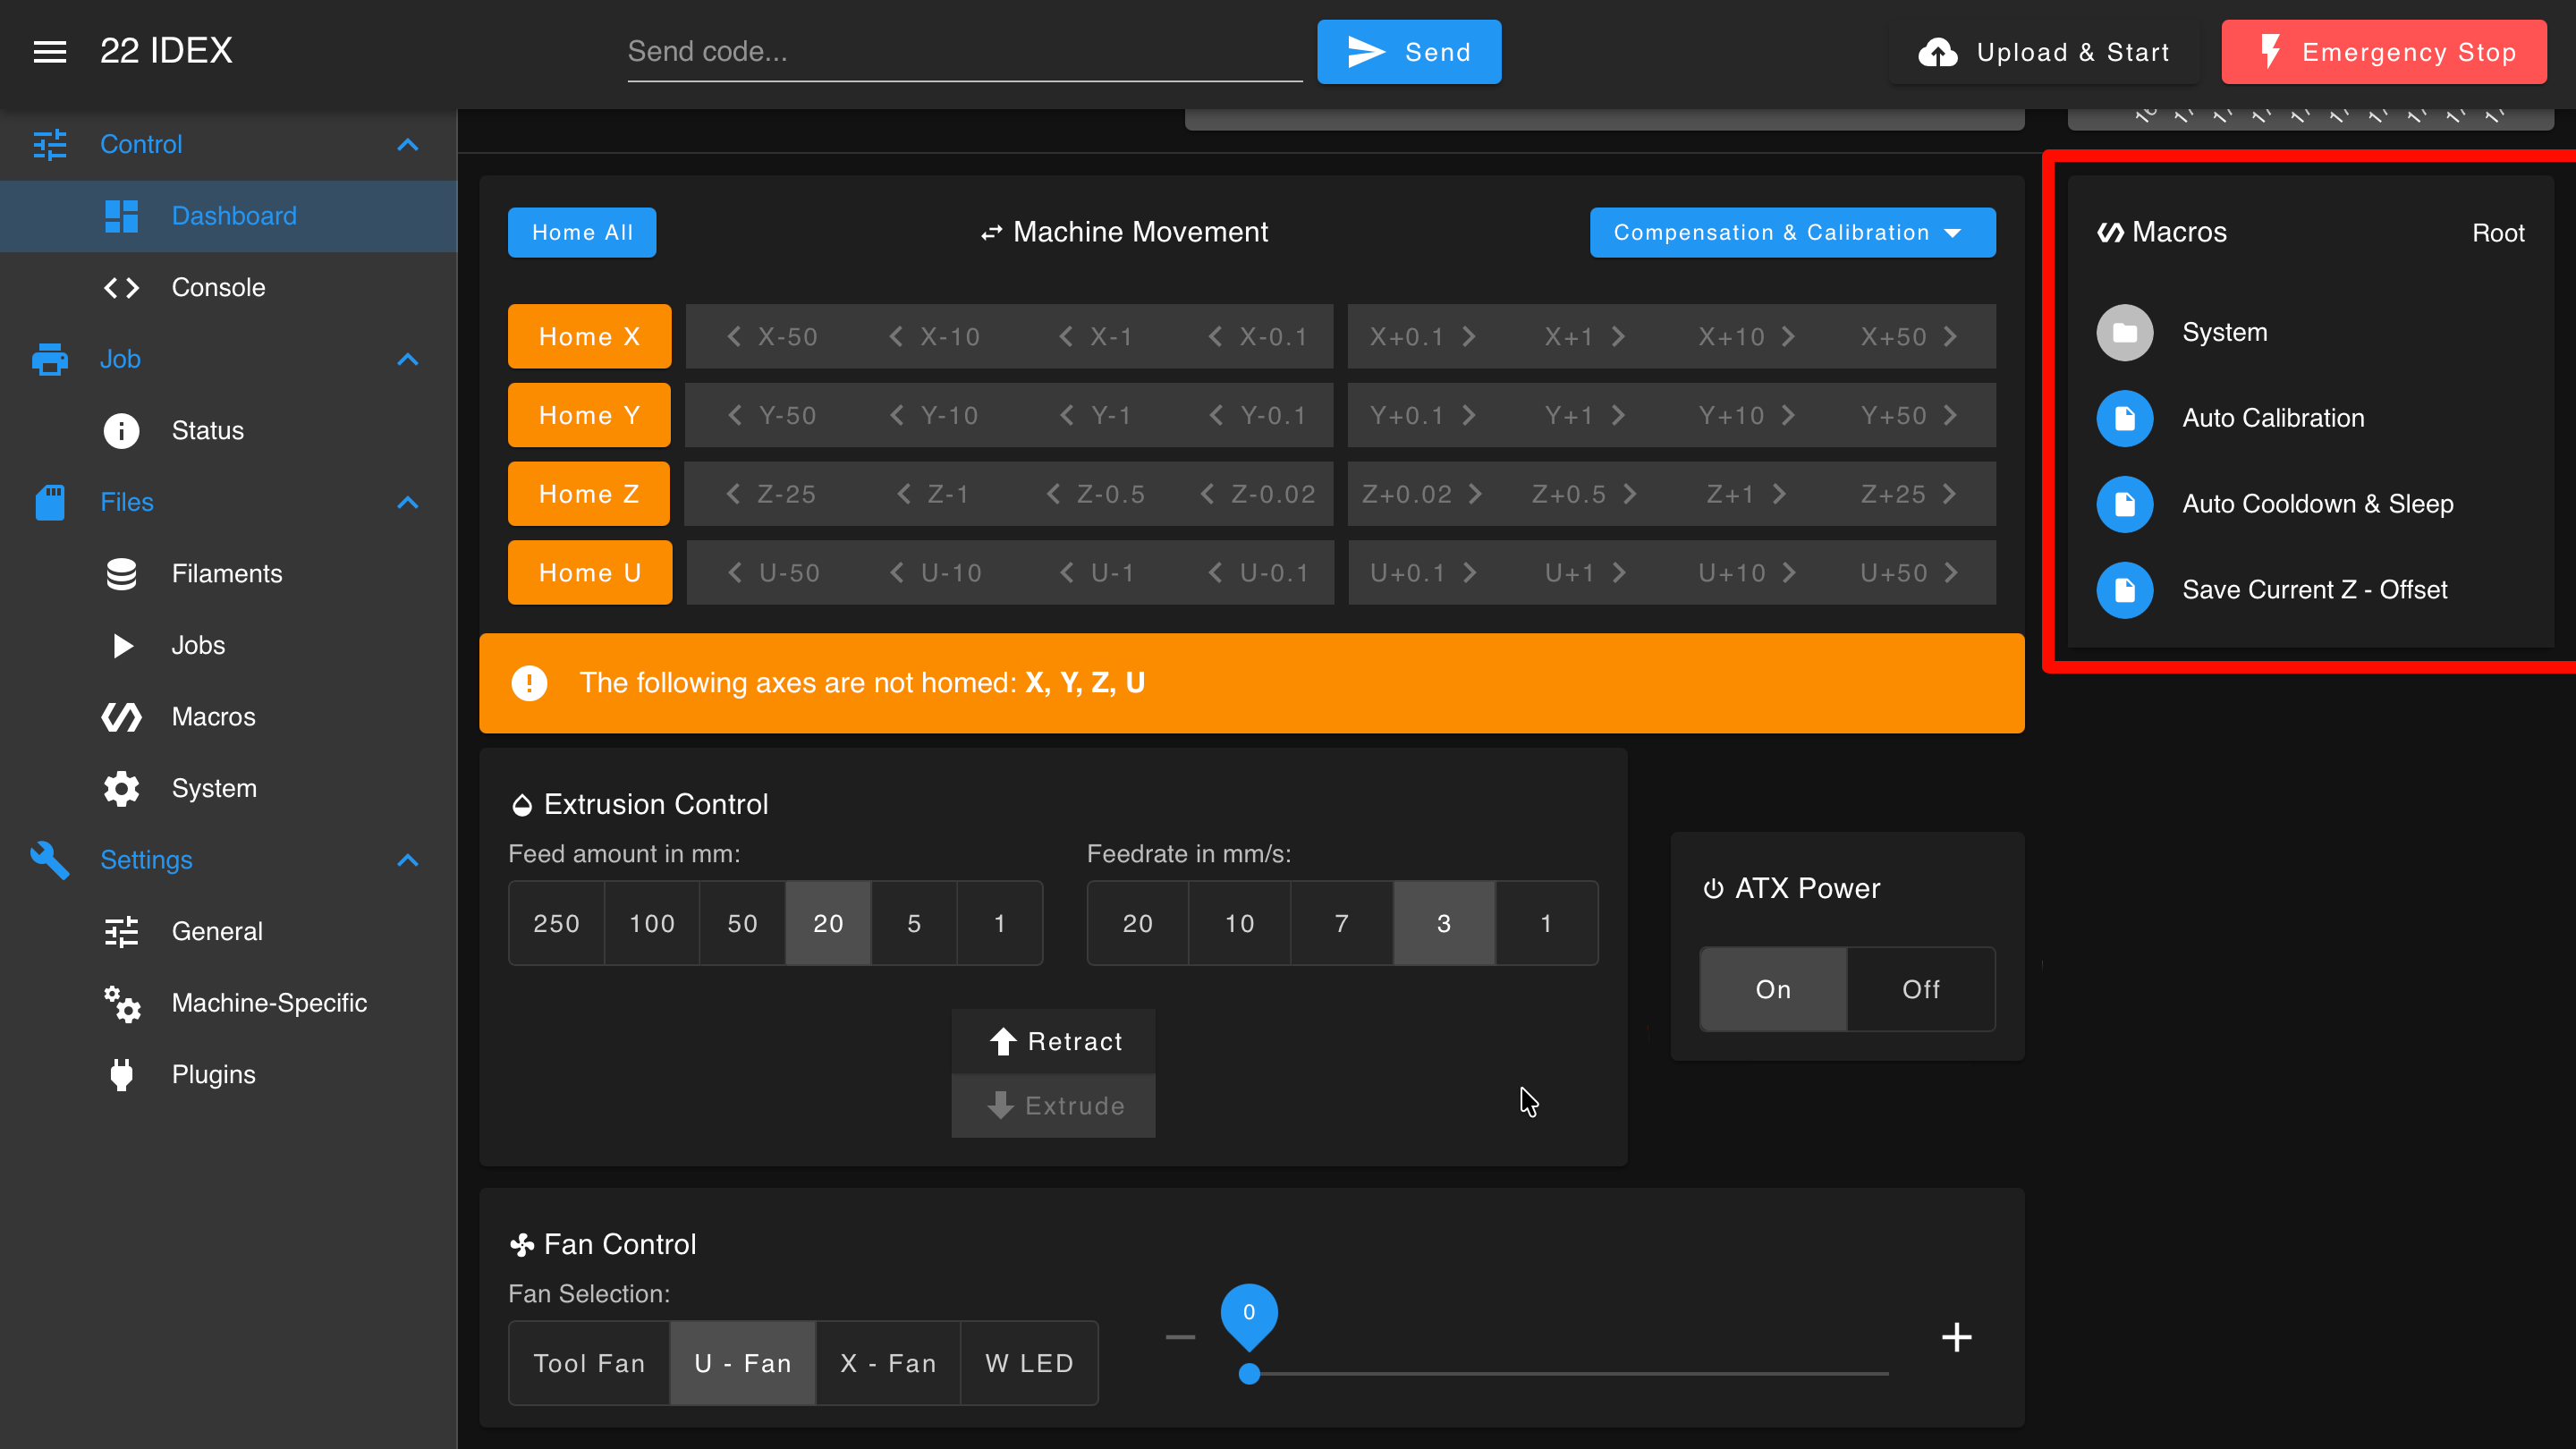
Macros
- Quick access to G-Code macros stored in the /macros/ directory
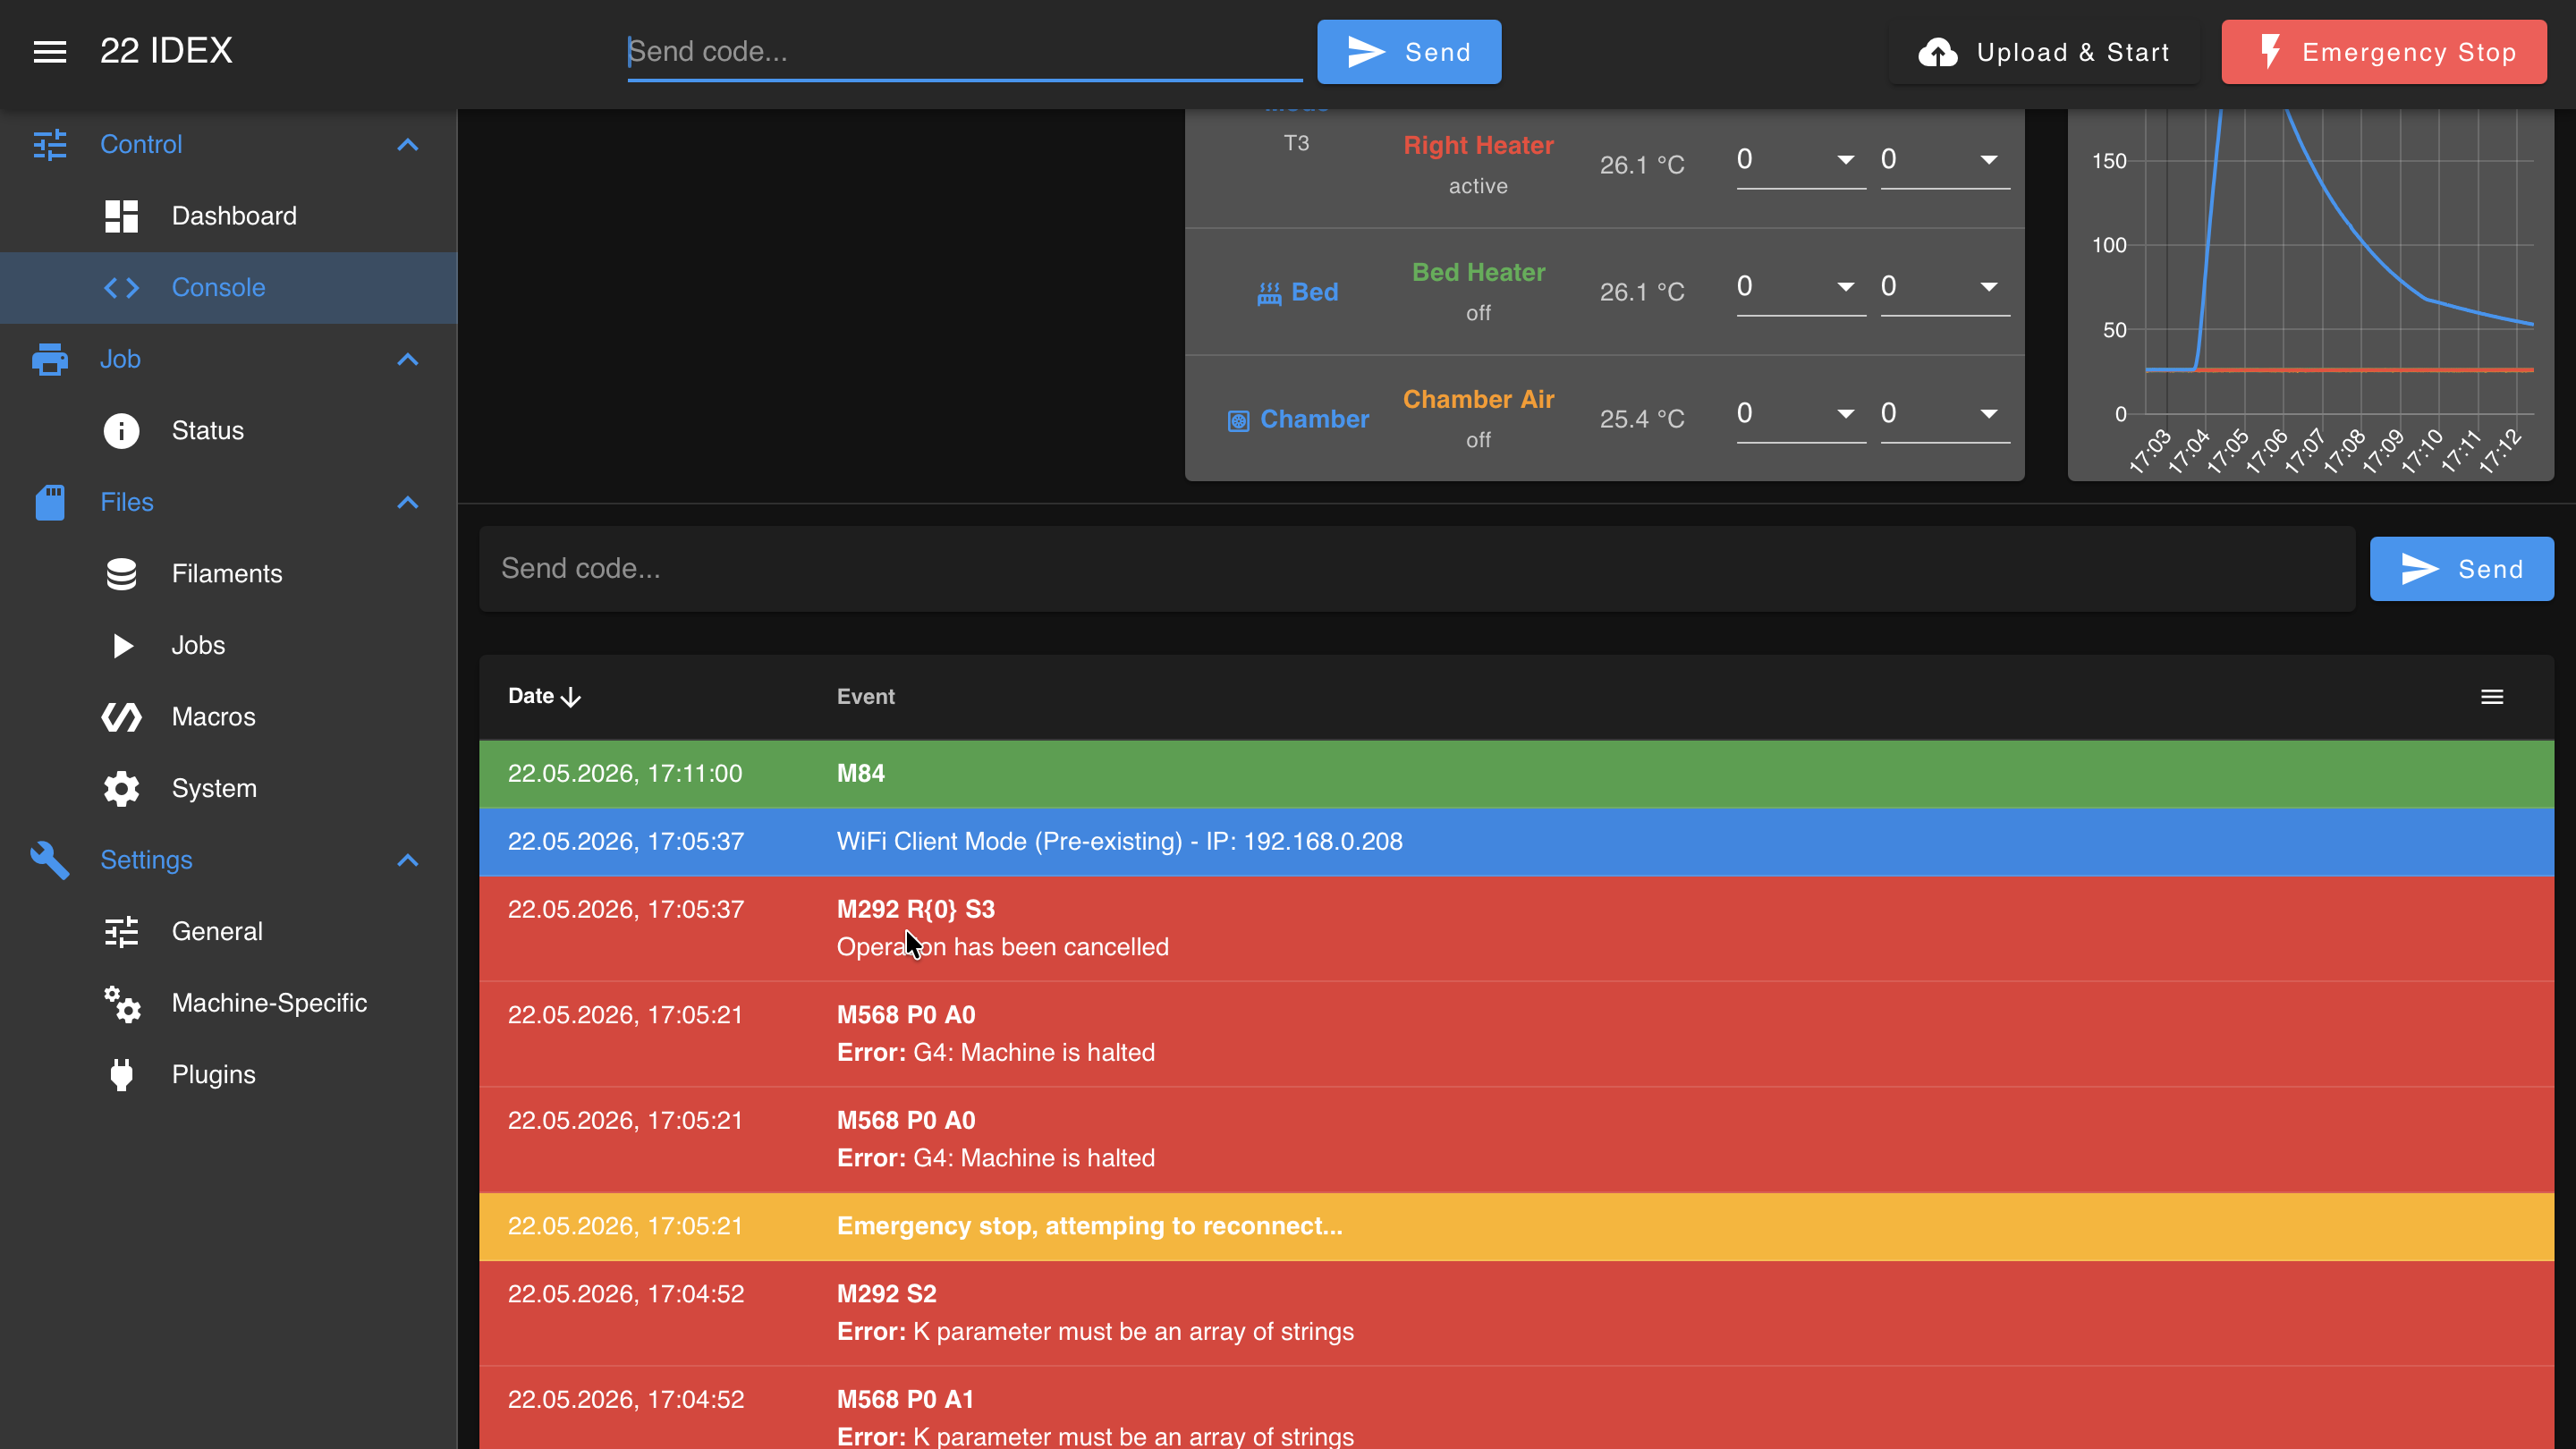
Console
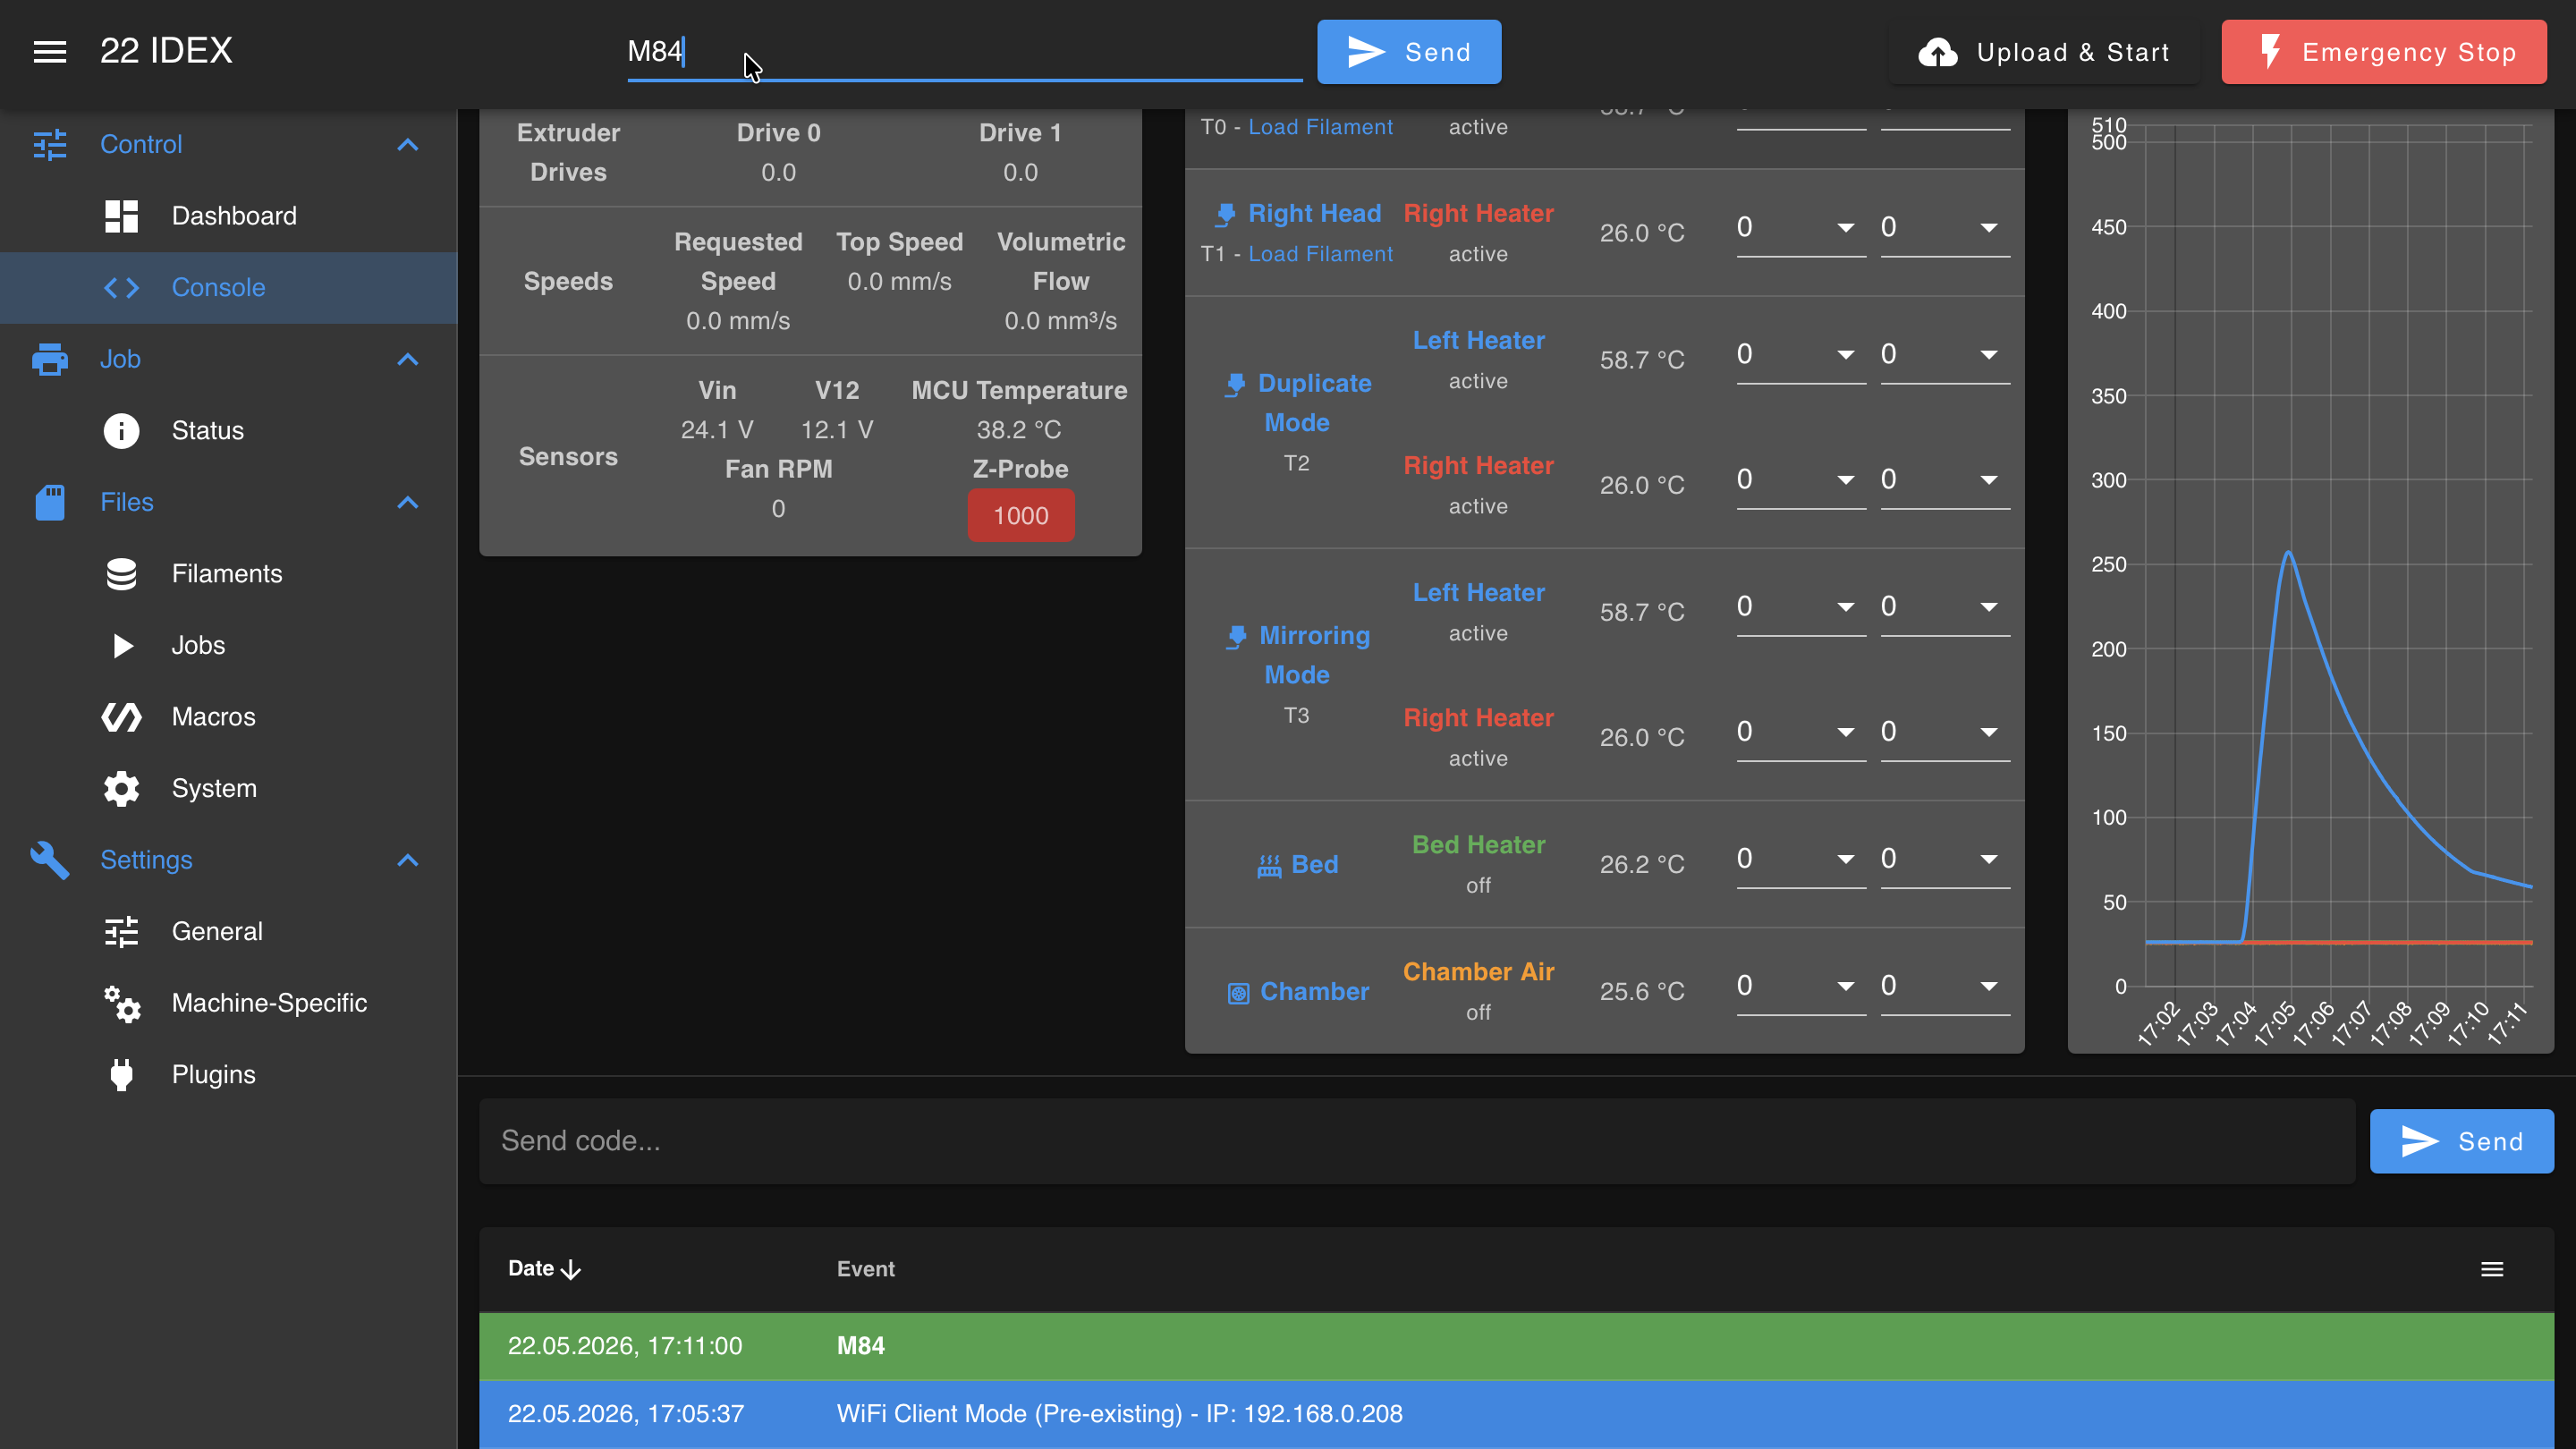
The Console allows direct G-Code command entry and displays a log of responses and system messages.
Color-coded responses:
- Green: No firmware response or system messages
- Blue: Notifications and firmware responses
- Orange: Warnings
- Red: Errors
Supported RepRap Firmware commands are documented in the Duet3D G-Code Dictionary.
Status (Current Job)
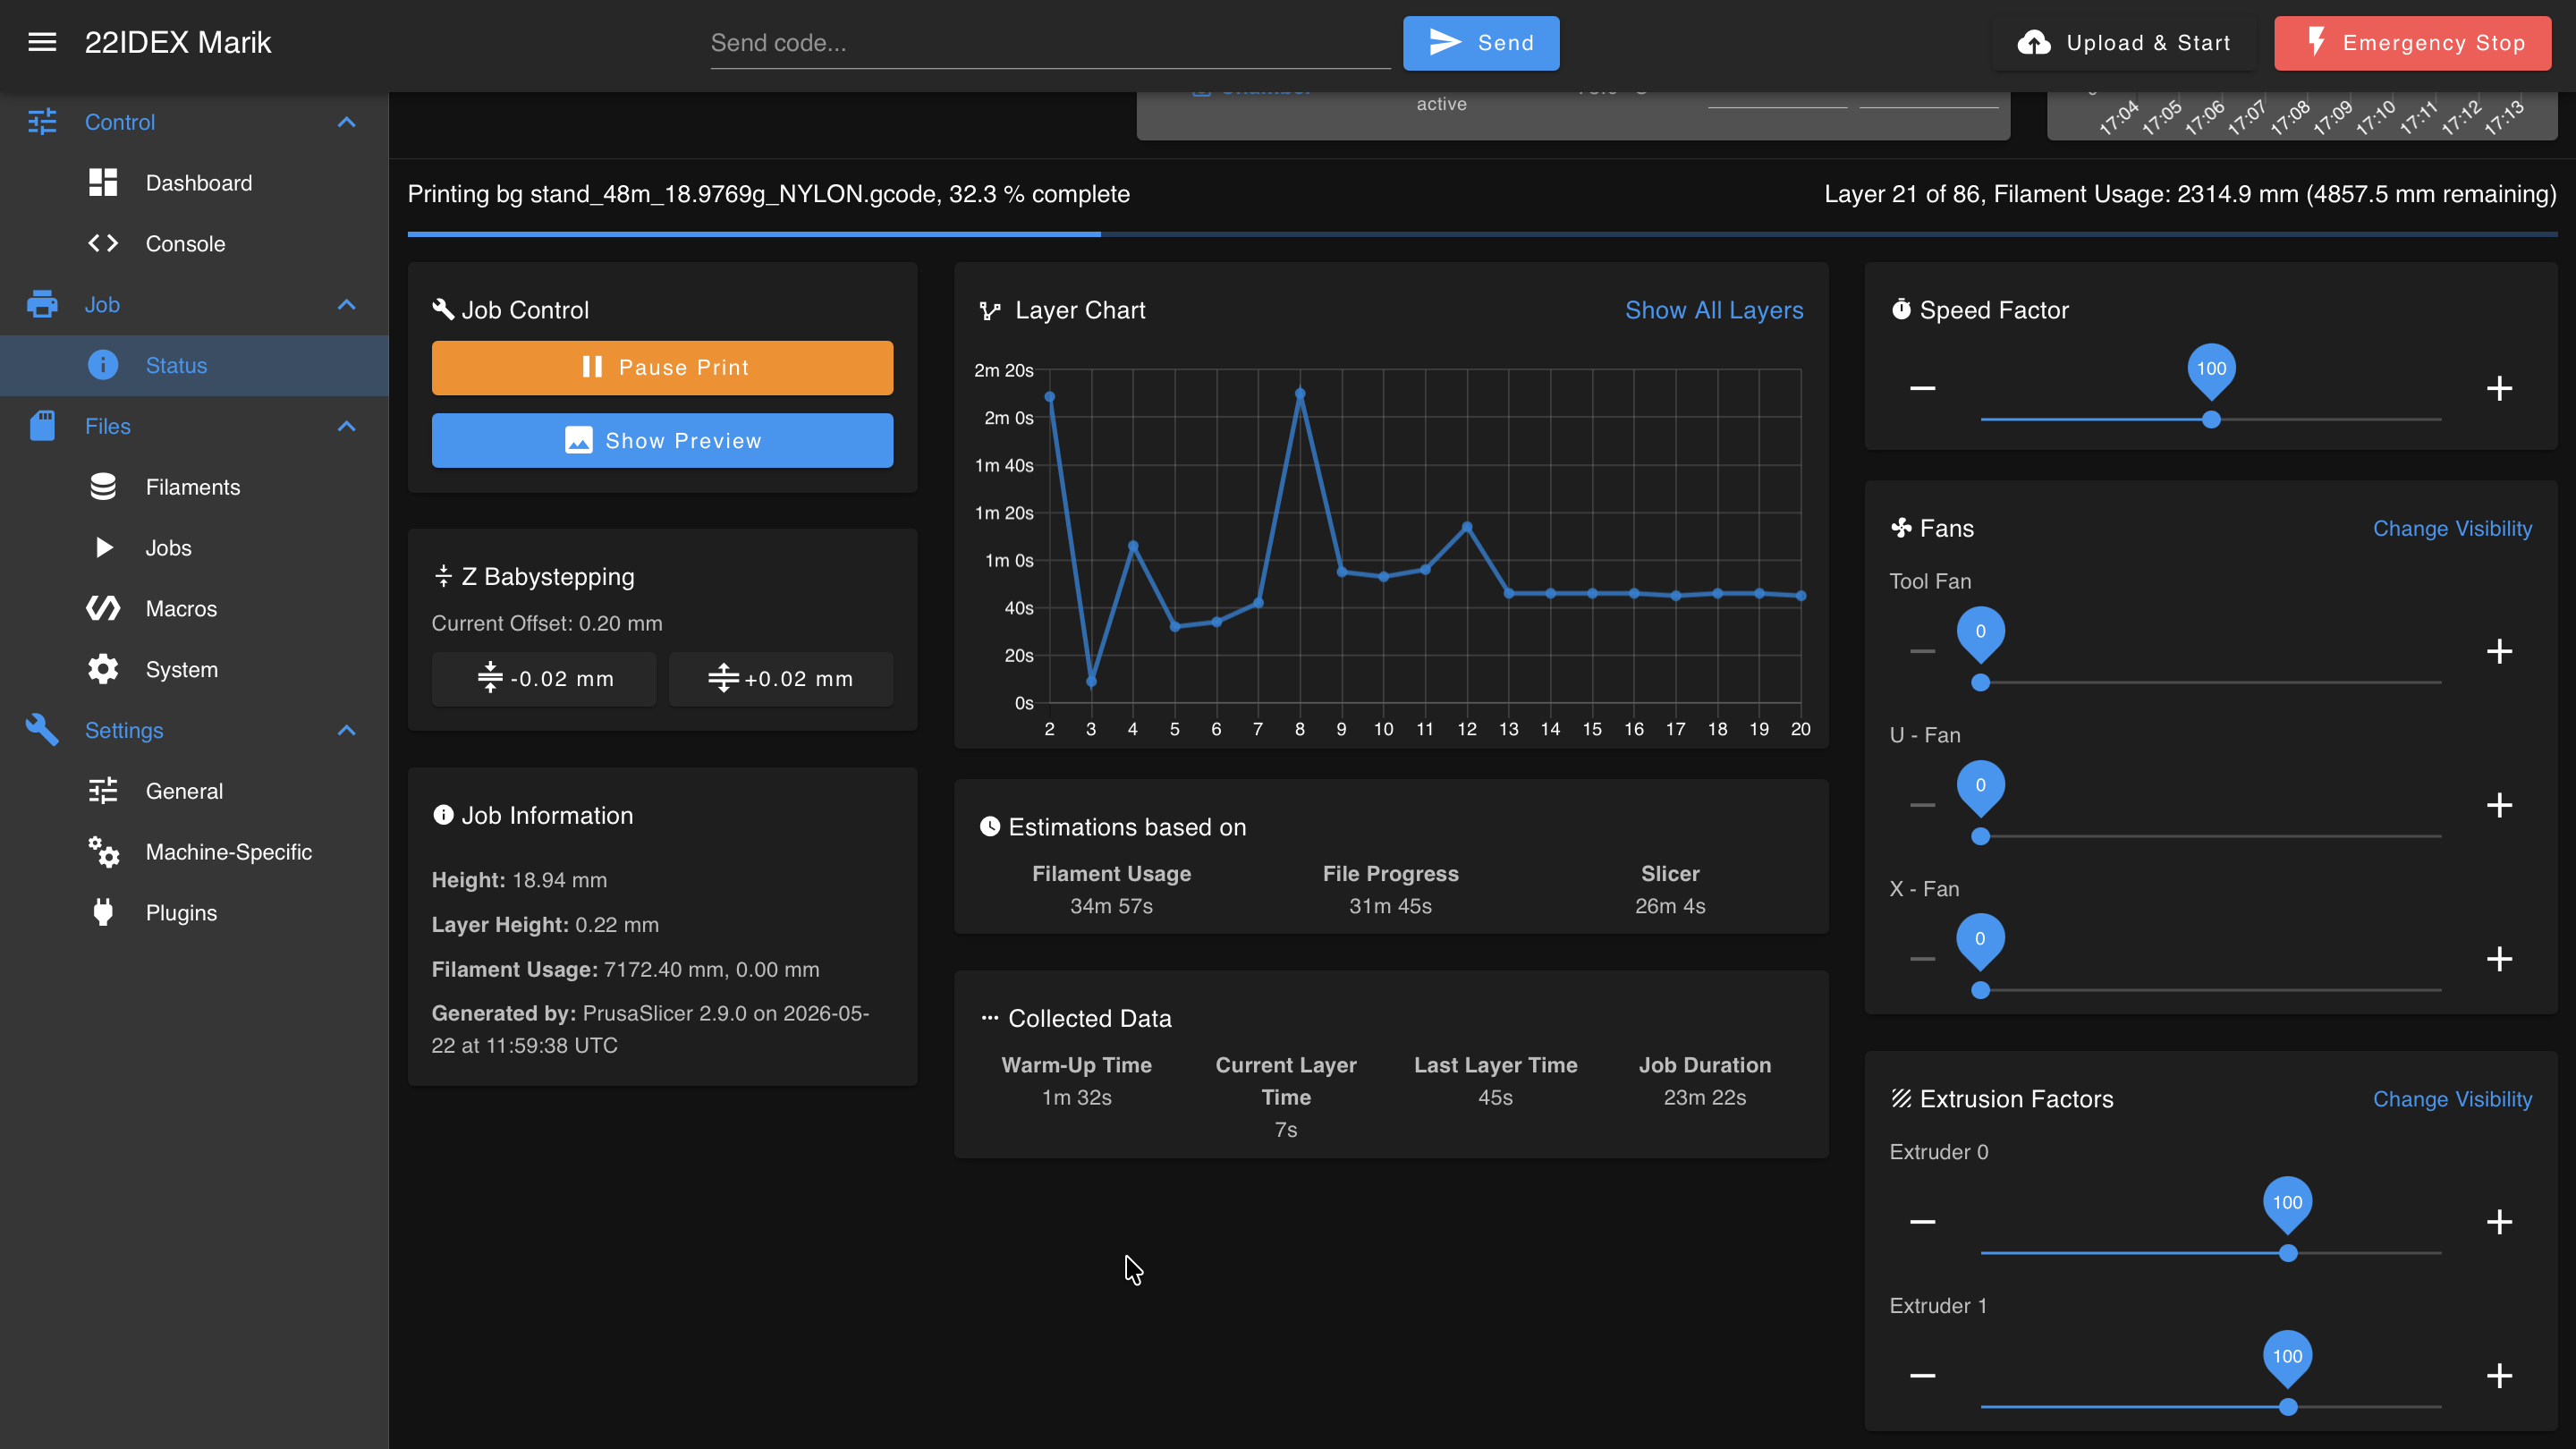
The Status panel appears when a print is in progress and displays:
- Print progress bar
- Job control buttons (pause, resume, cancel)
- Z Babystepping for minor first-layer adjustments
- Job information from file header (object height, filament usage, layer height)
- Print progress estimations (filament usage, file progress, layer time)
- Collected data (warm-up time, print time)
- Speed factor control
- Fan control
- Extrusion factors adjustment
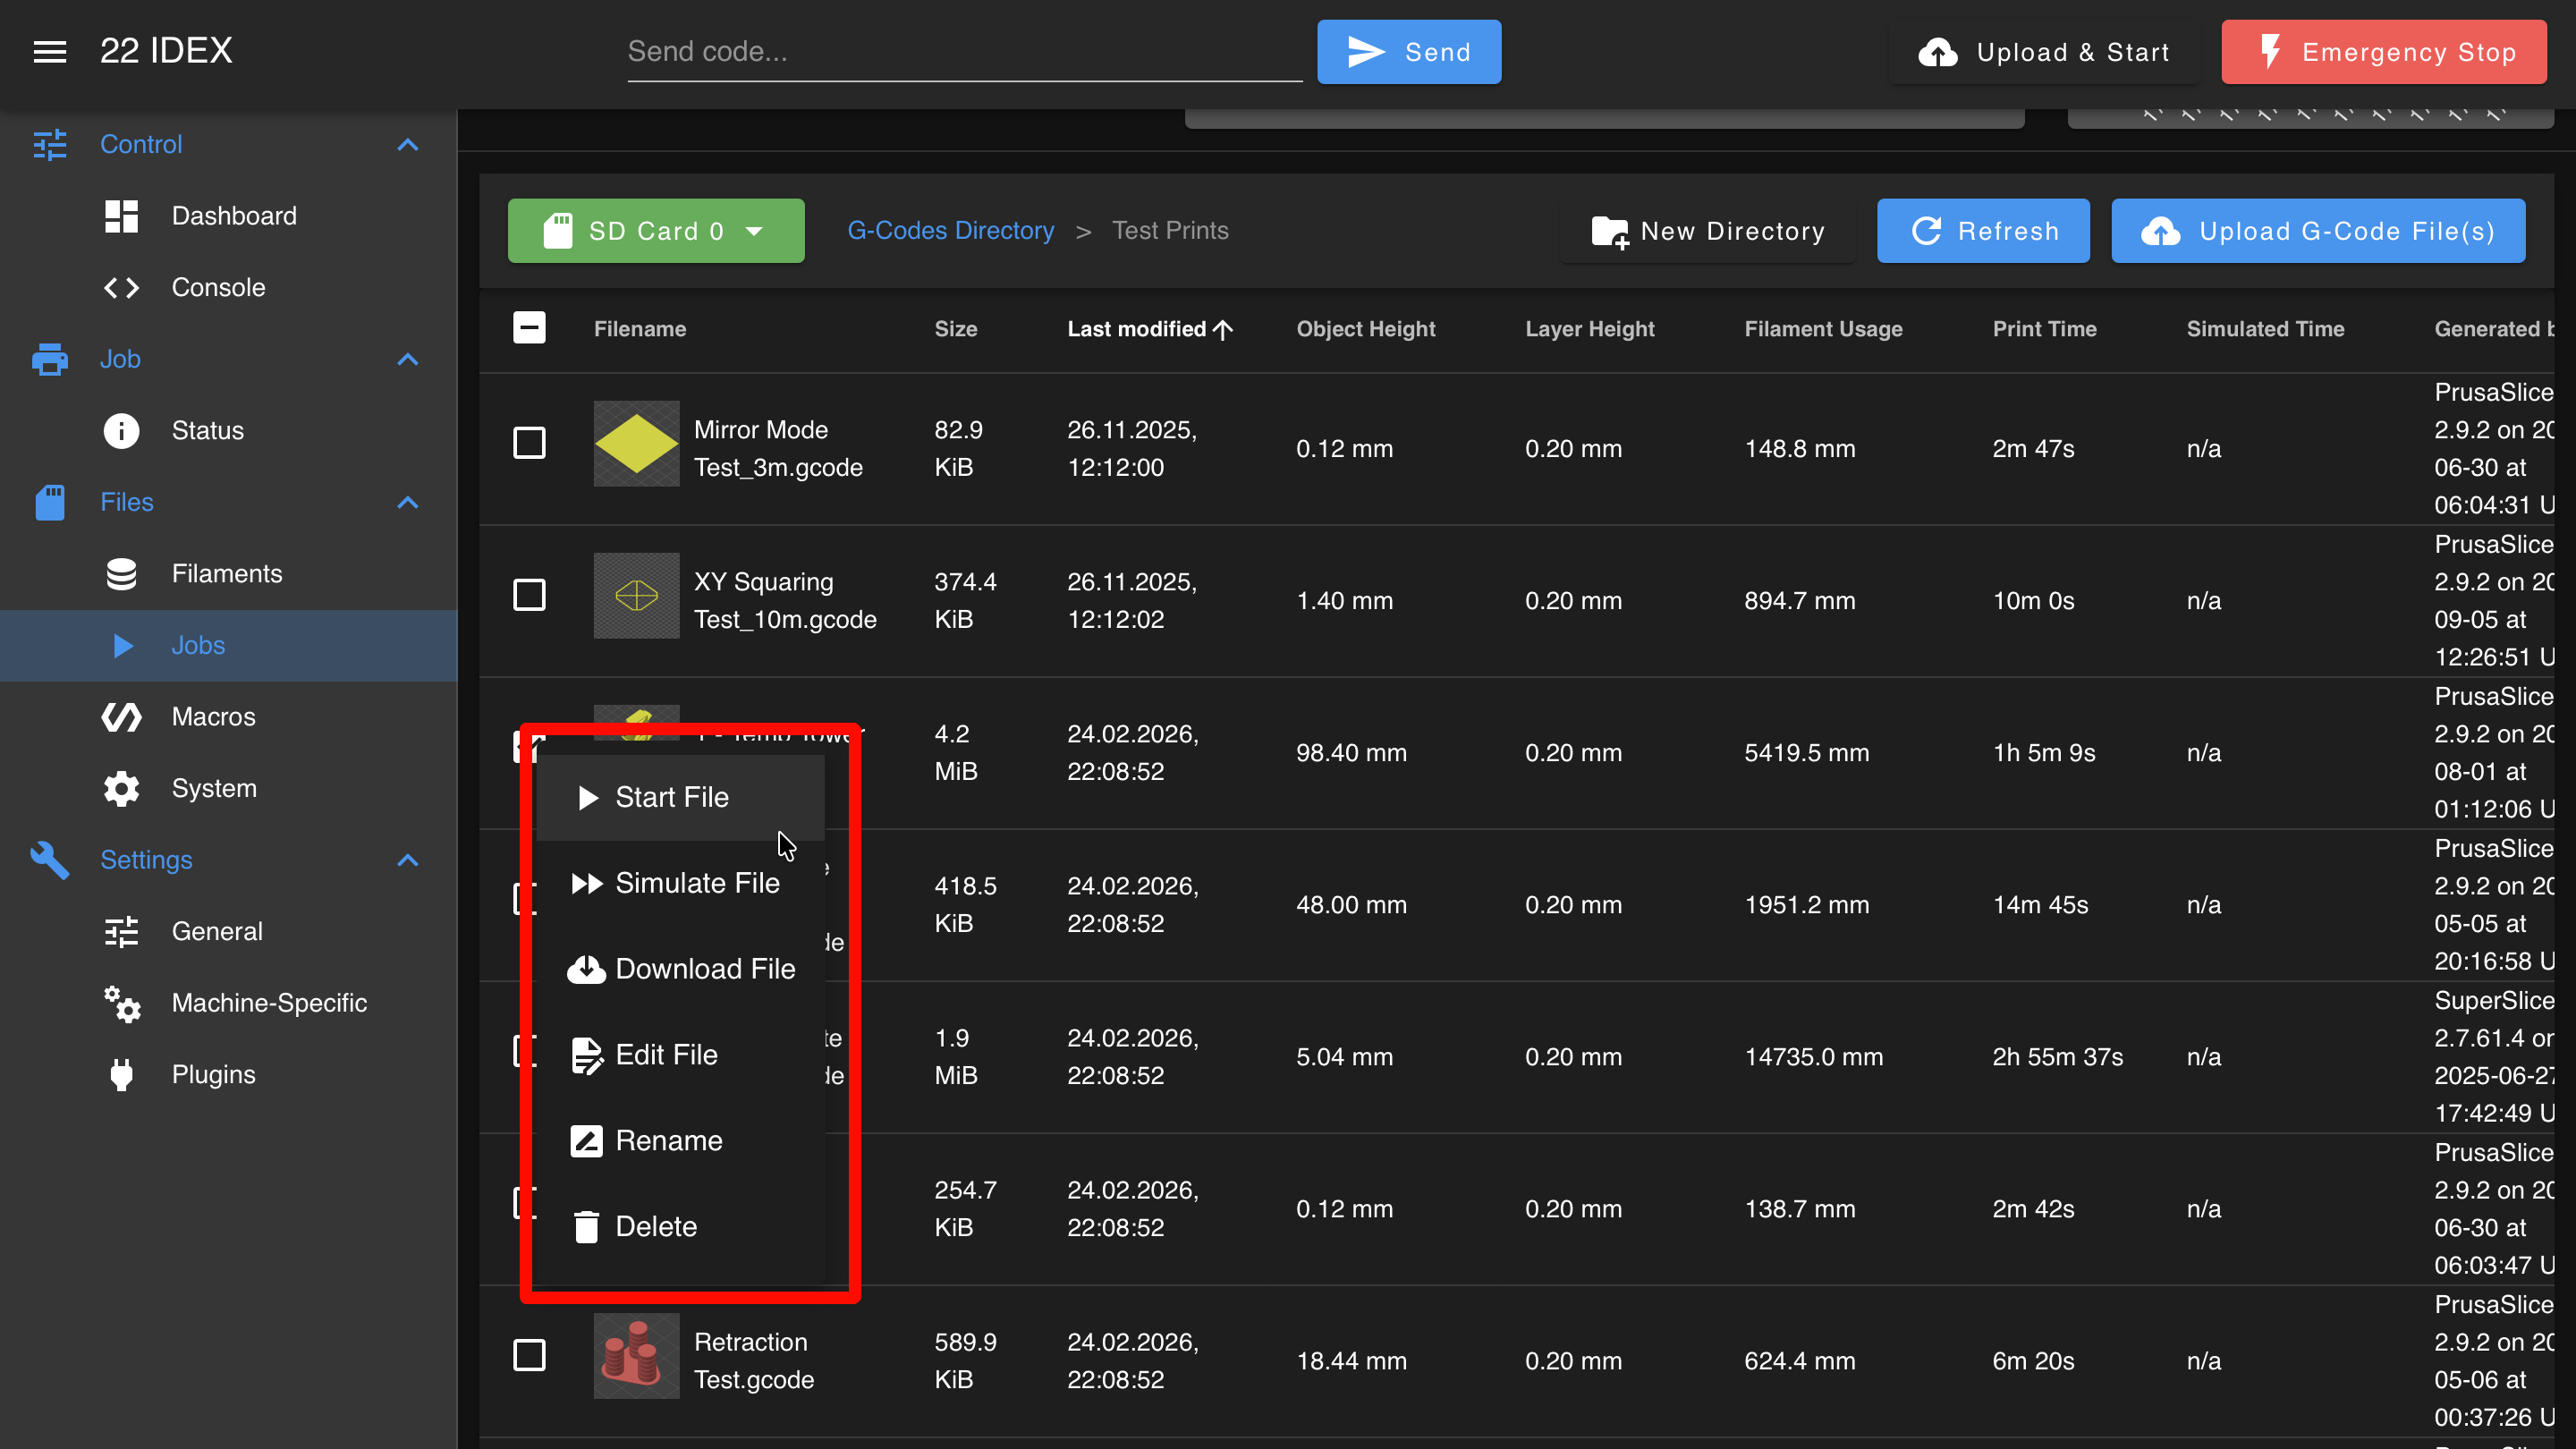
Jobs (File Management)
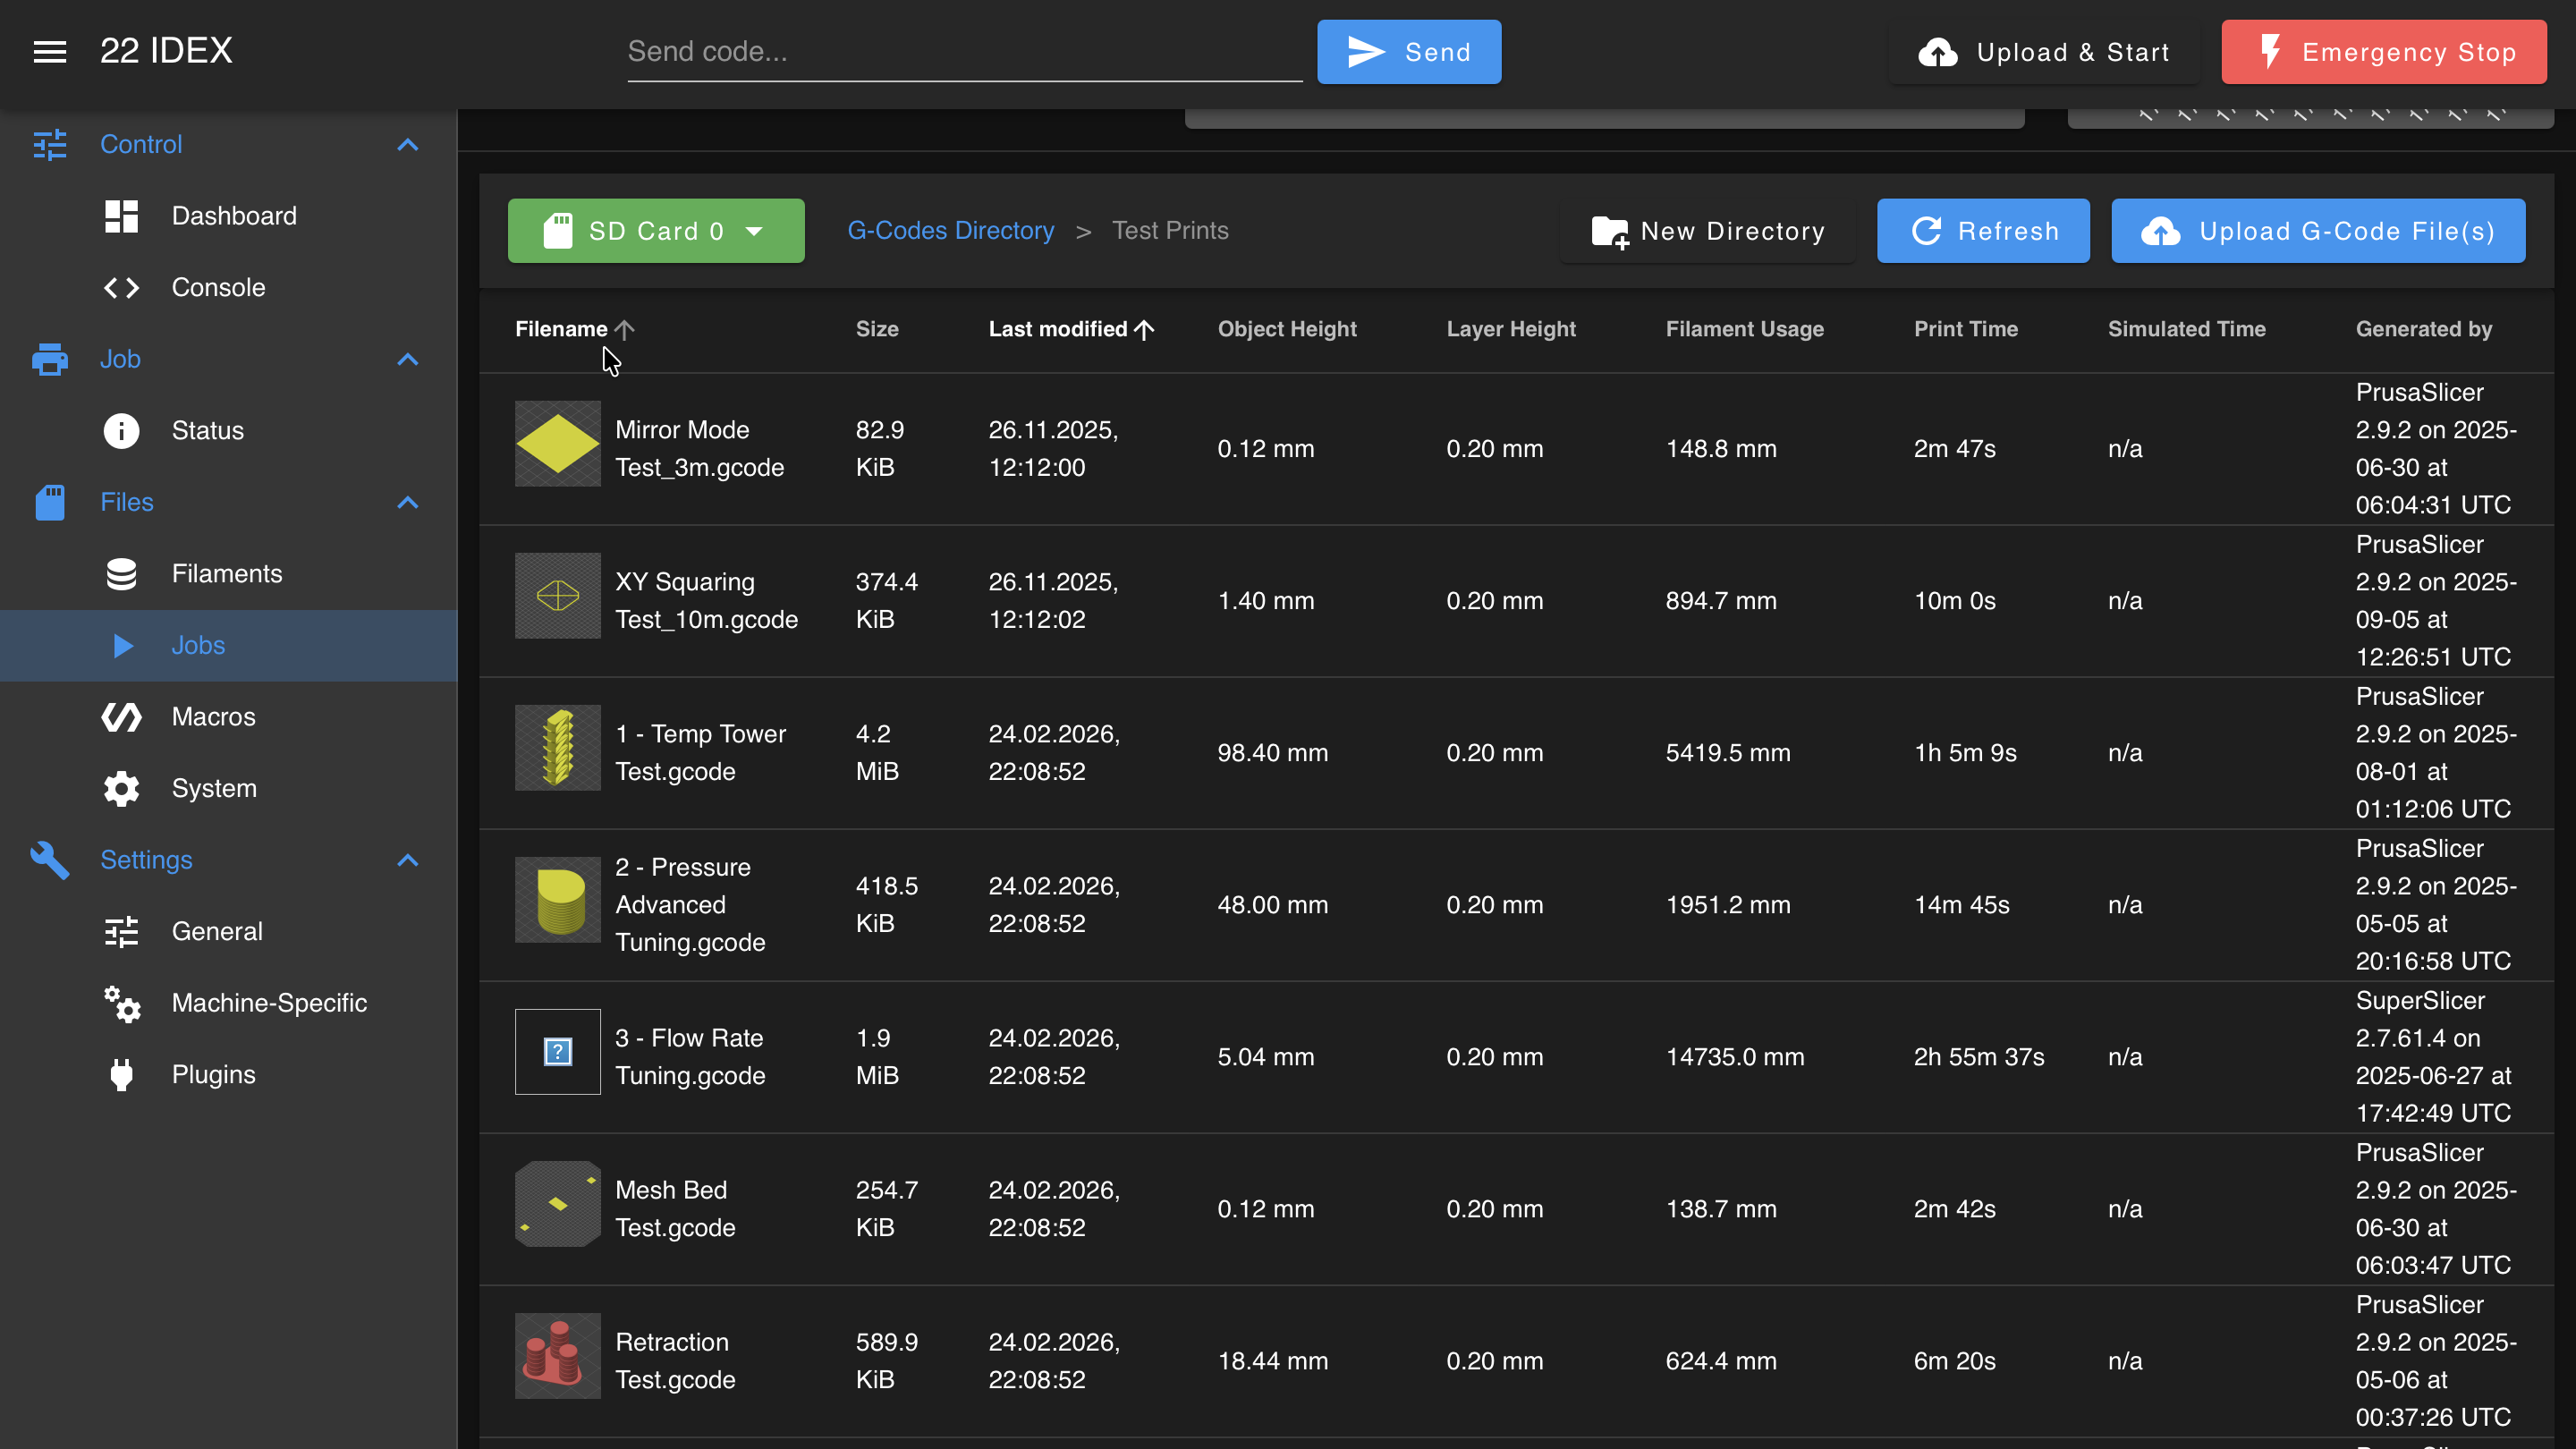
The Jobs panel provides file management for G-Code files:
Available actions:
- Upload G-Code files from your computer
- Run files immediately
- Simulate files (estimates print time without actual printing)
- Download files to your computer
- Edit G-Code directly in the browser
- Rename files
- Delete files
- Create and manage subdirectories
- Sort file list by clicking column headings
File menu options:
- Start File: Runs the file immediately
- Simulate File: Estimates print time without actual printing (typically takes a couple of minutes per megabyte of G-Code)
- Edit File: Modify G-Code directly in the browser after downloading to cache
File upload during printing
Do not upload files during an ongoing print. This can cause interference or file corruption.
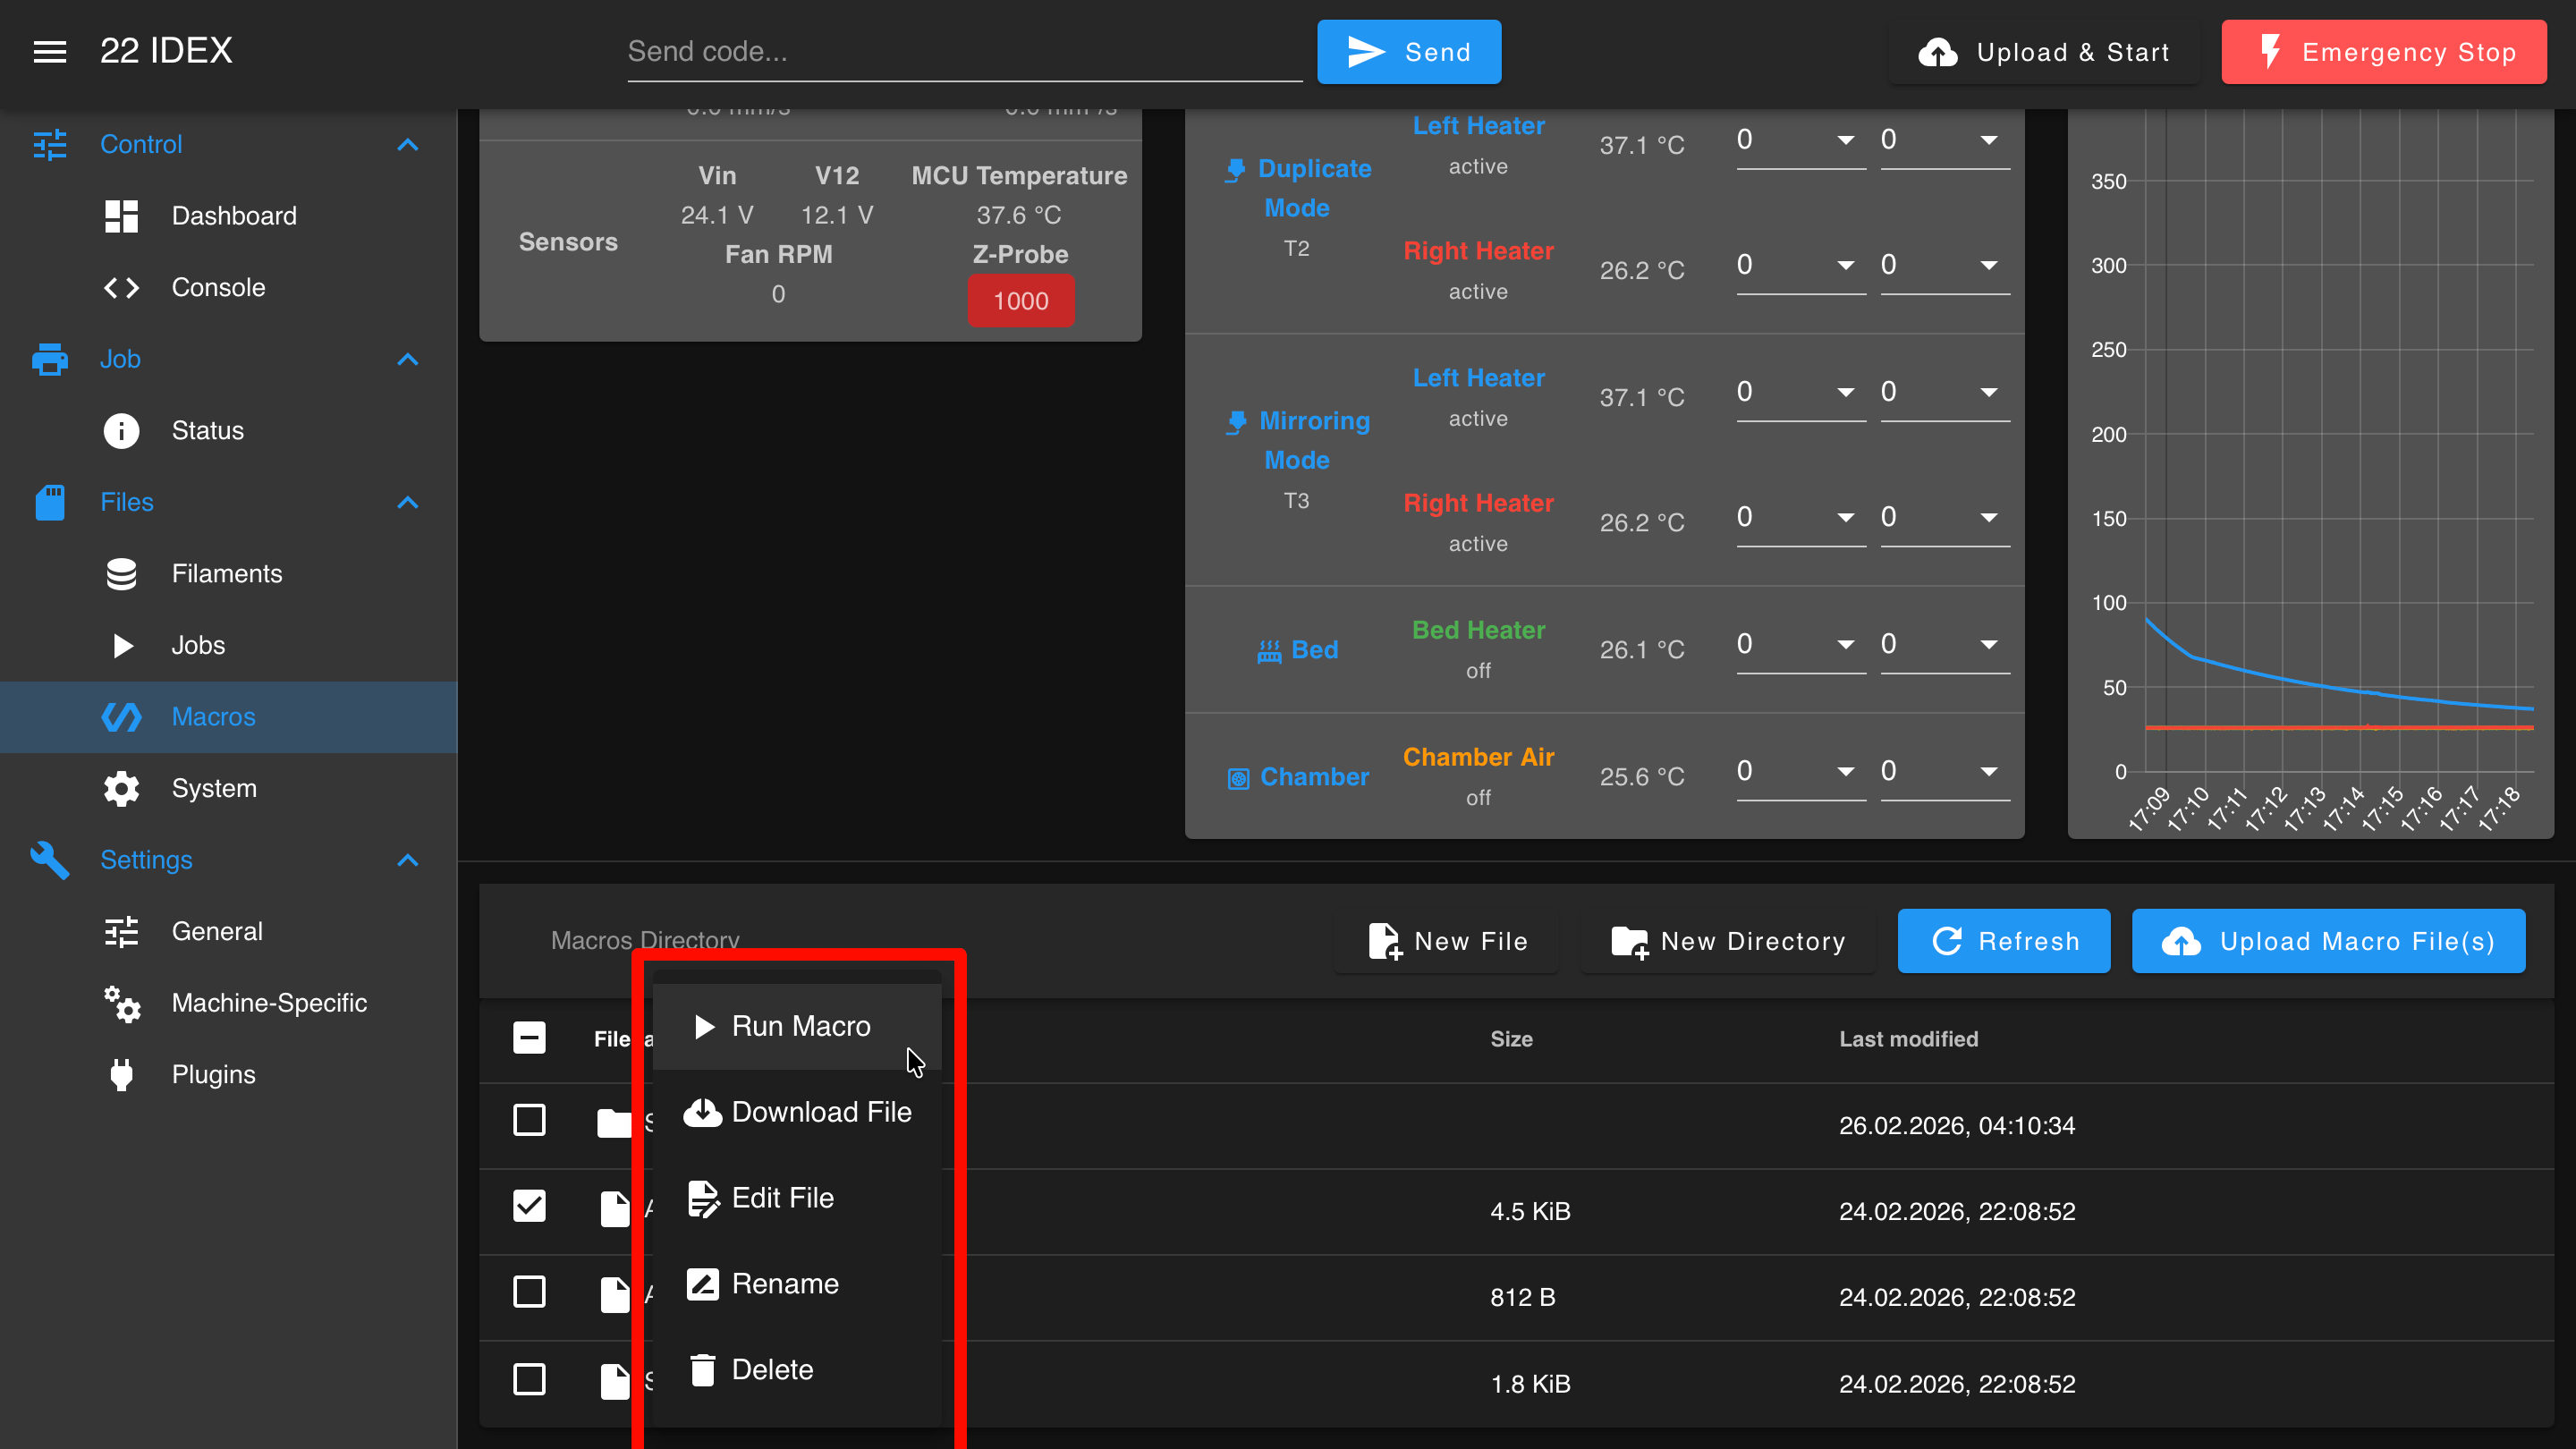
Macros
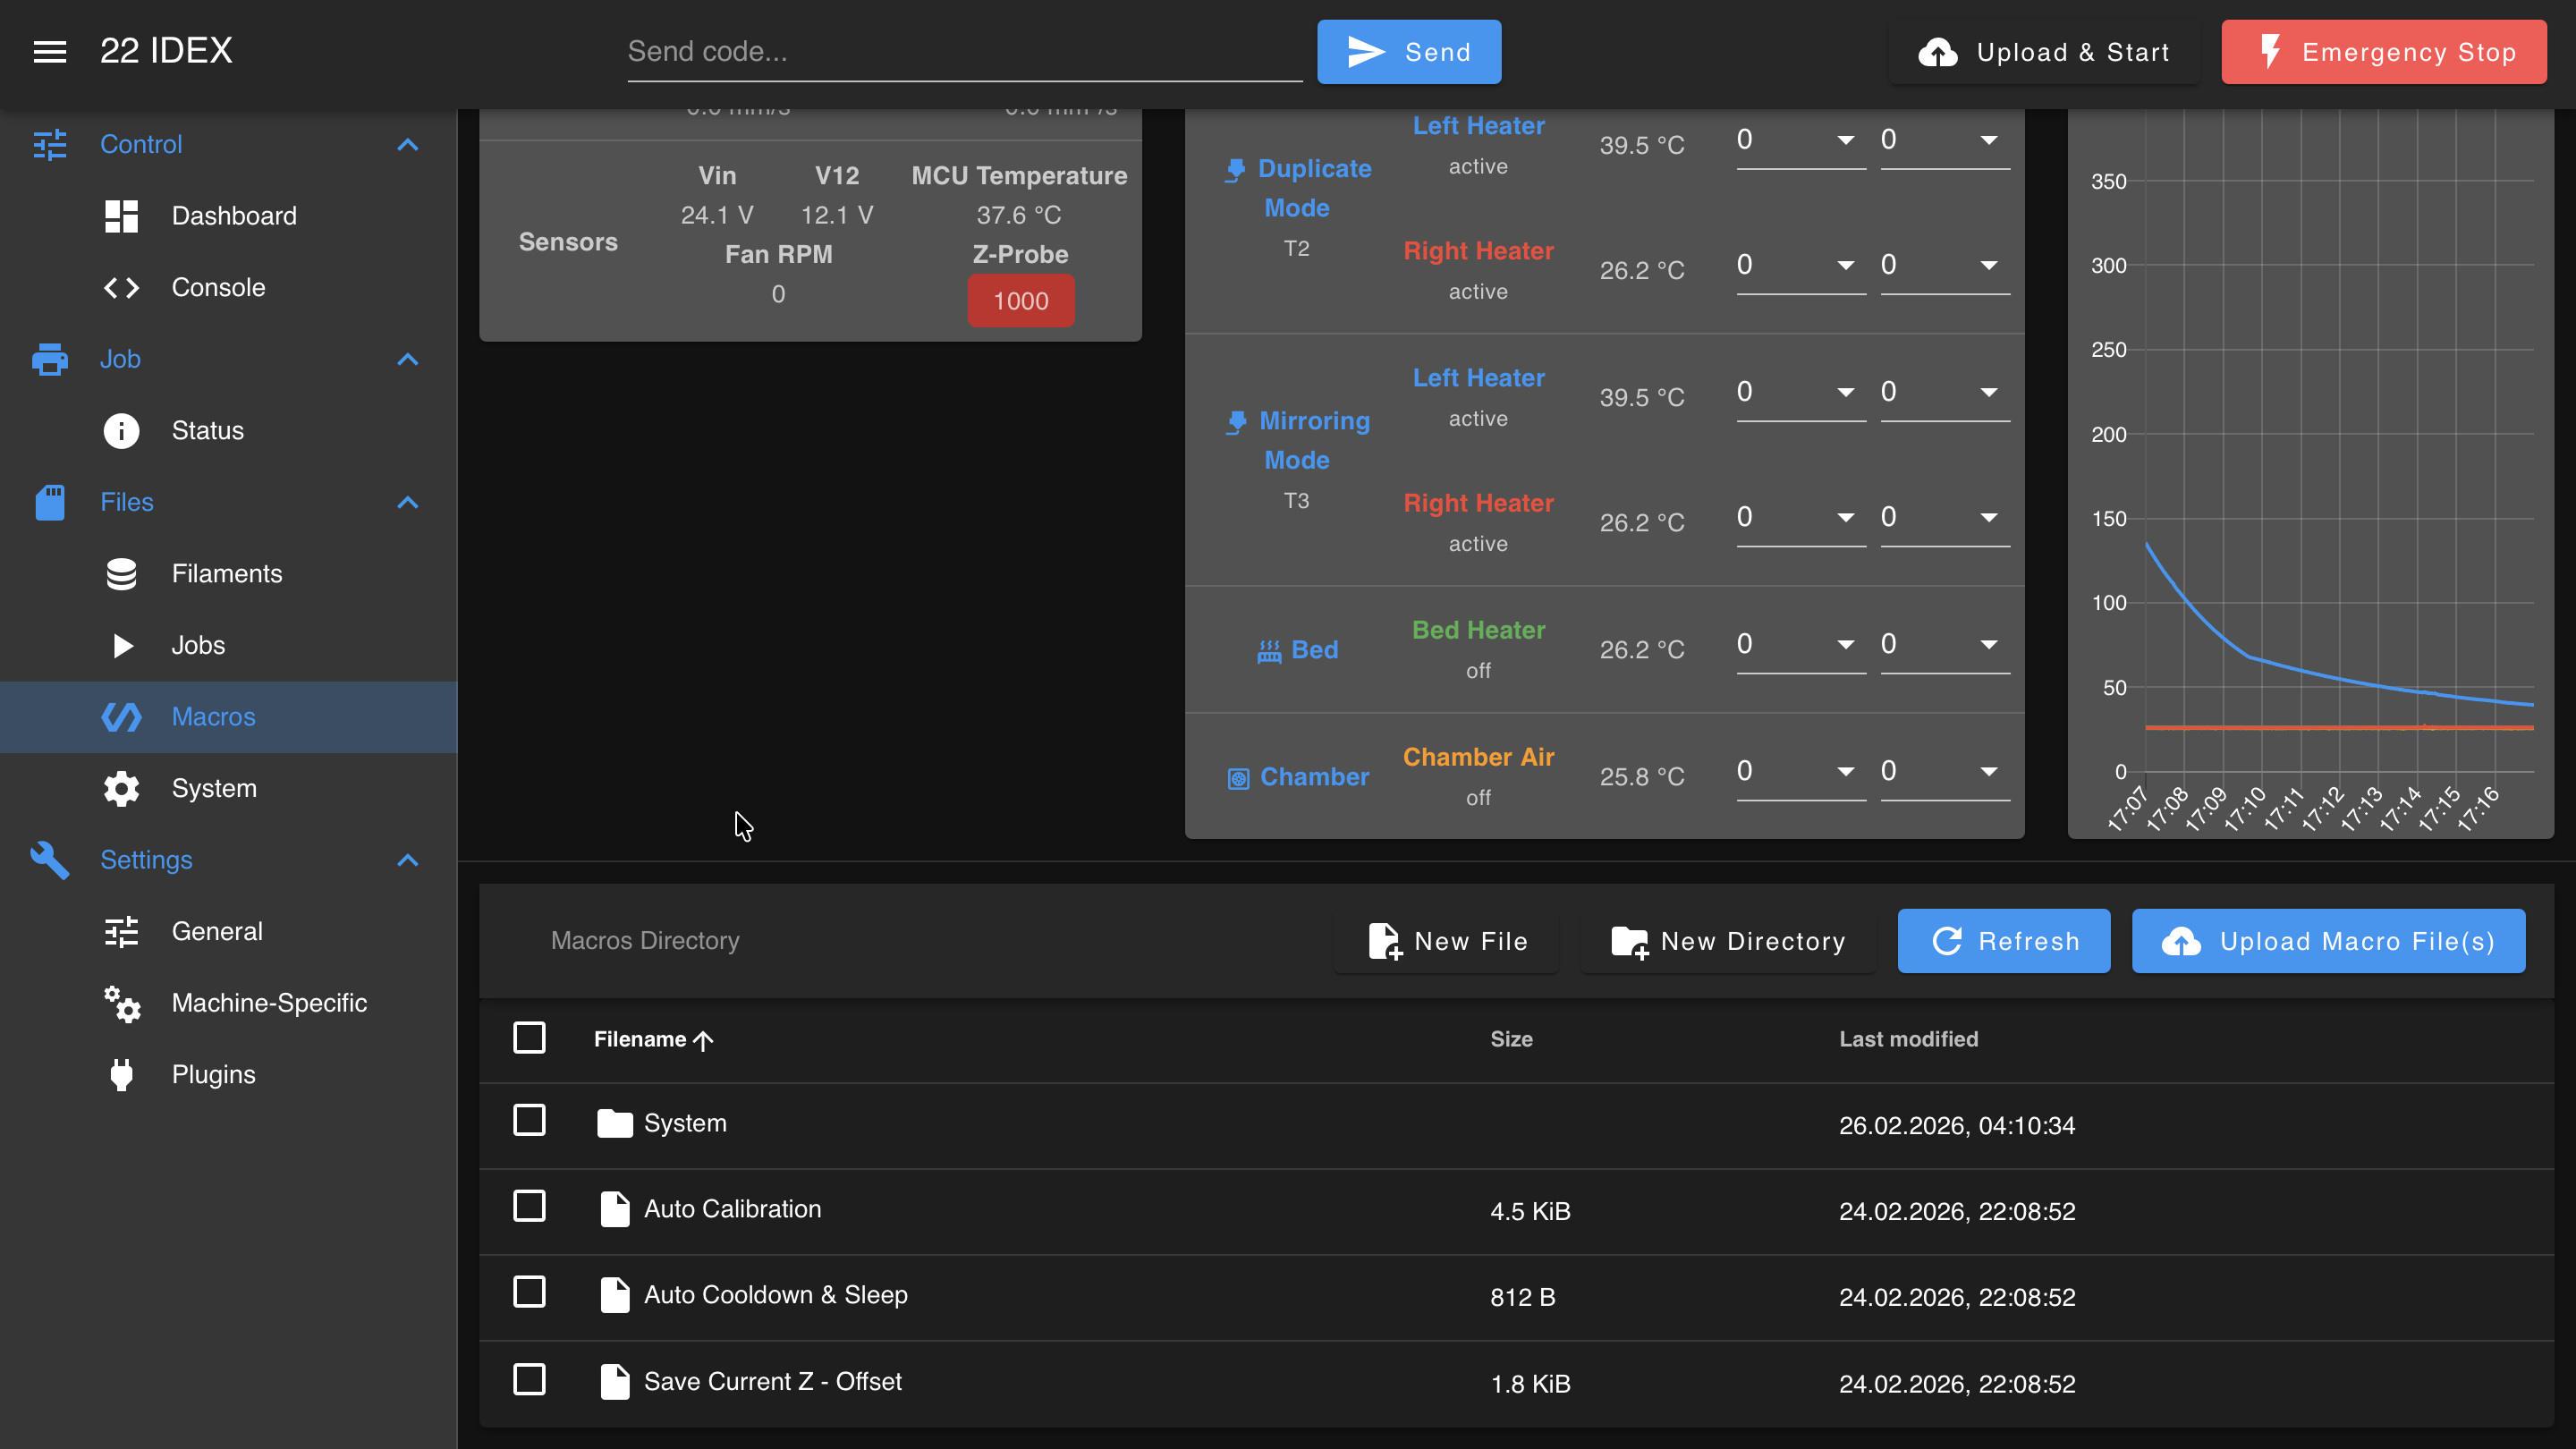
The Macros panel provides access to G-Code macros stored in the /macros/ directory:
Available actions:
- Run macros directly from the list (single click)
- Right-click menu for additional options (run, download, rename, delete, edit)
- Edit macros within the Web Interface
- Create new macros
- Organize macros in subdirectories
System
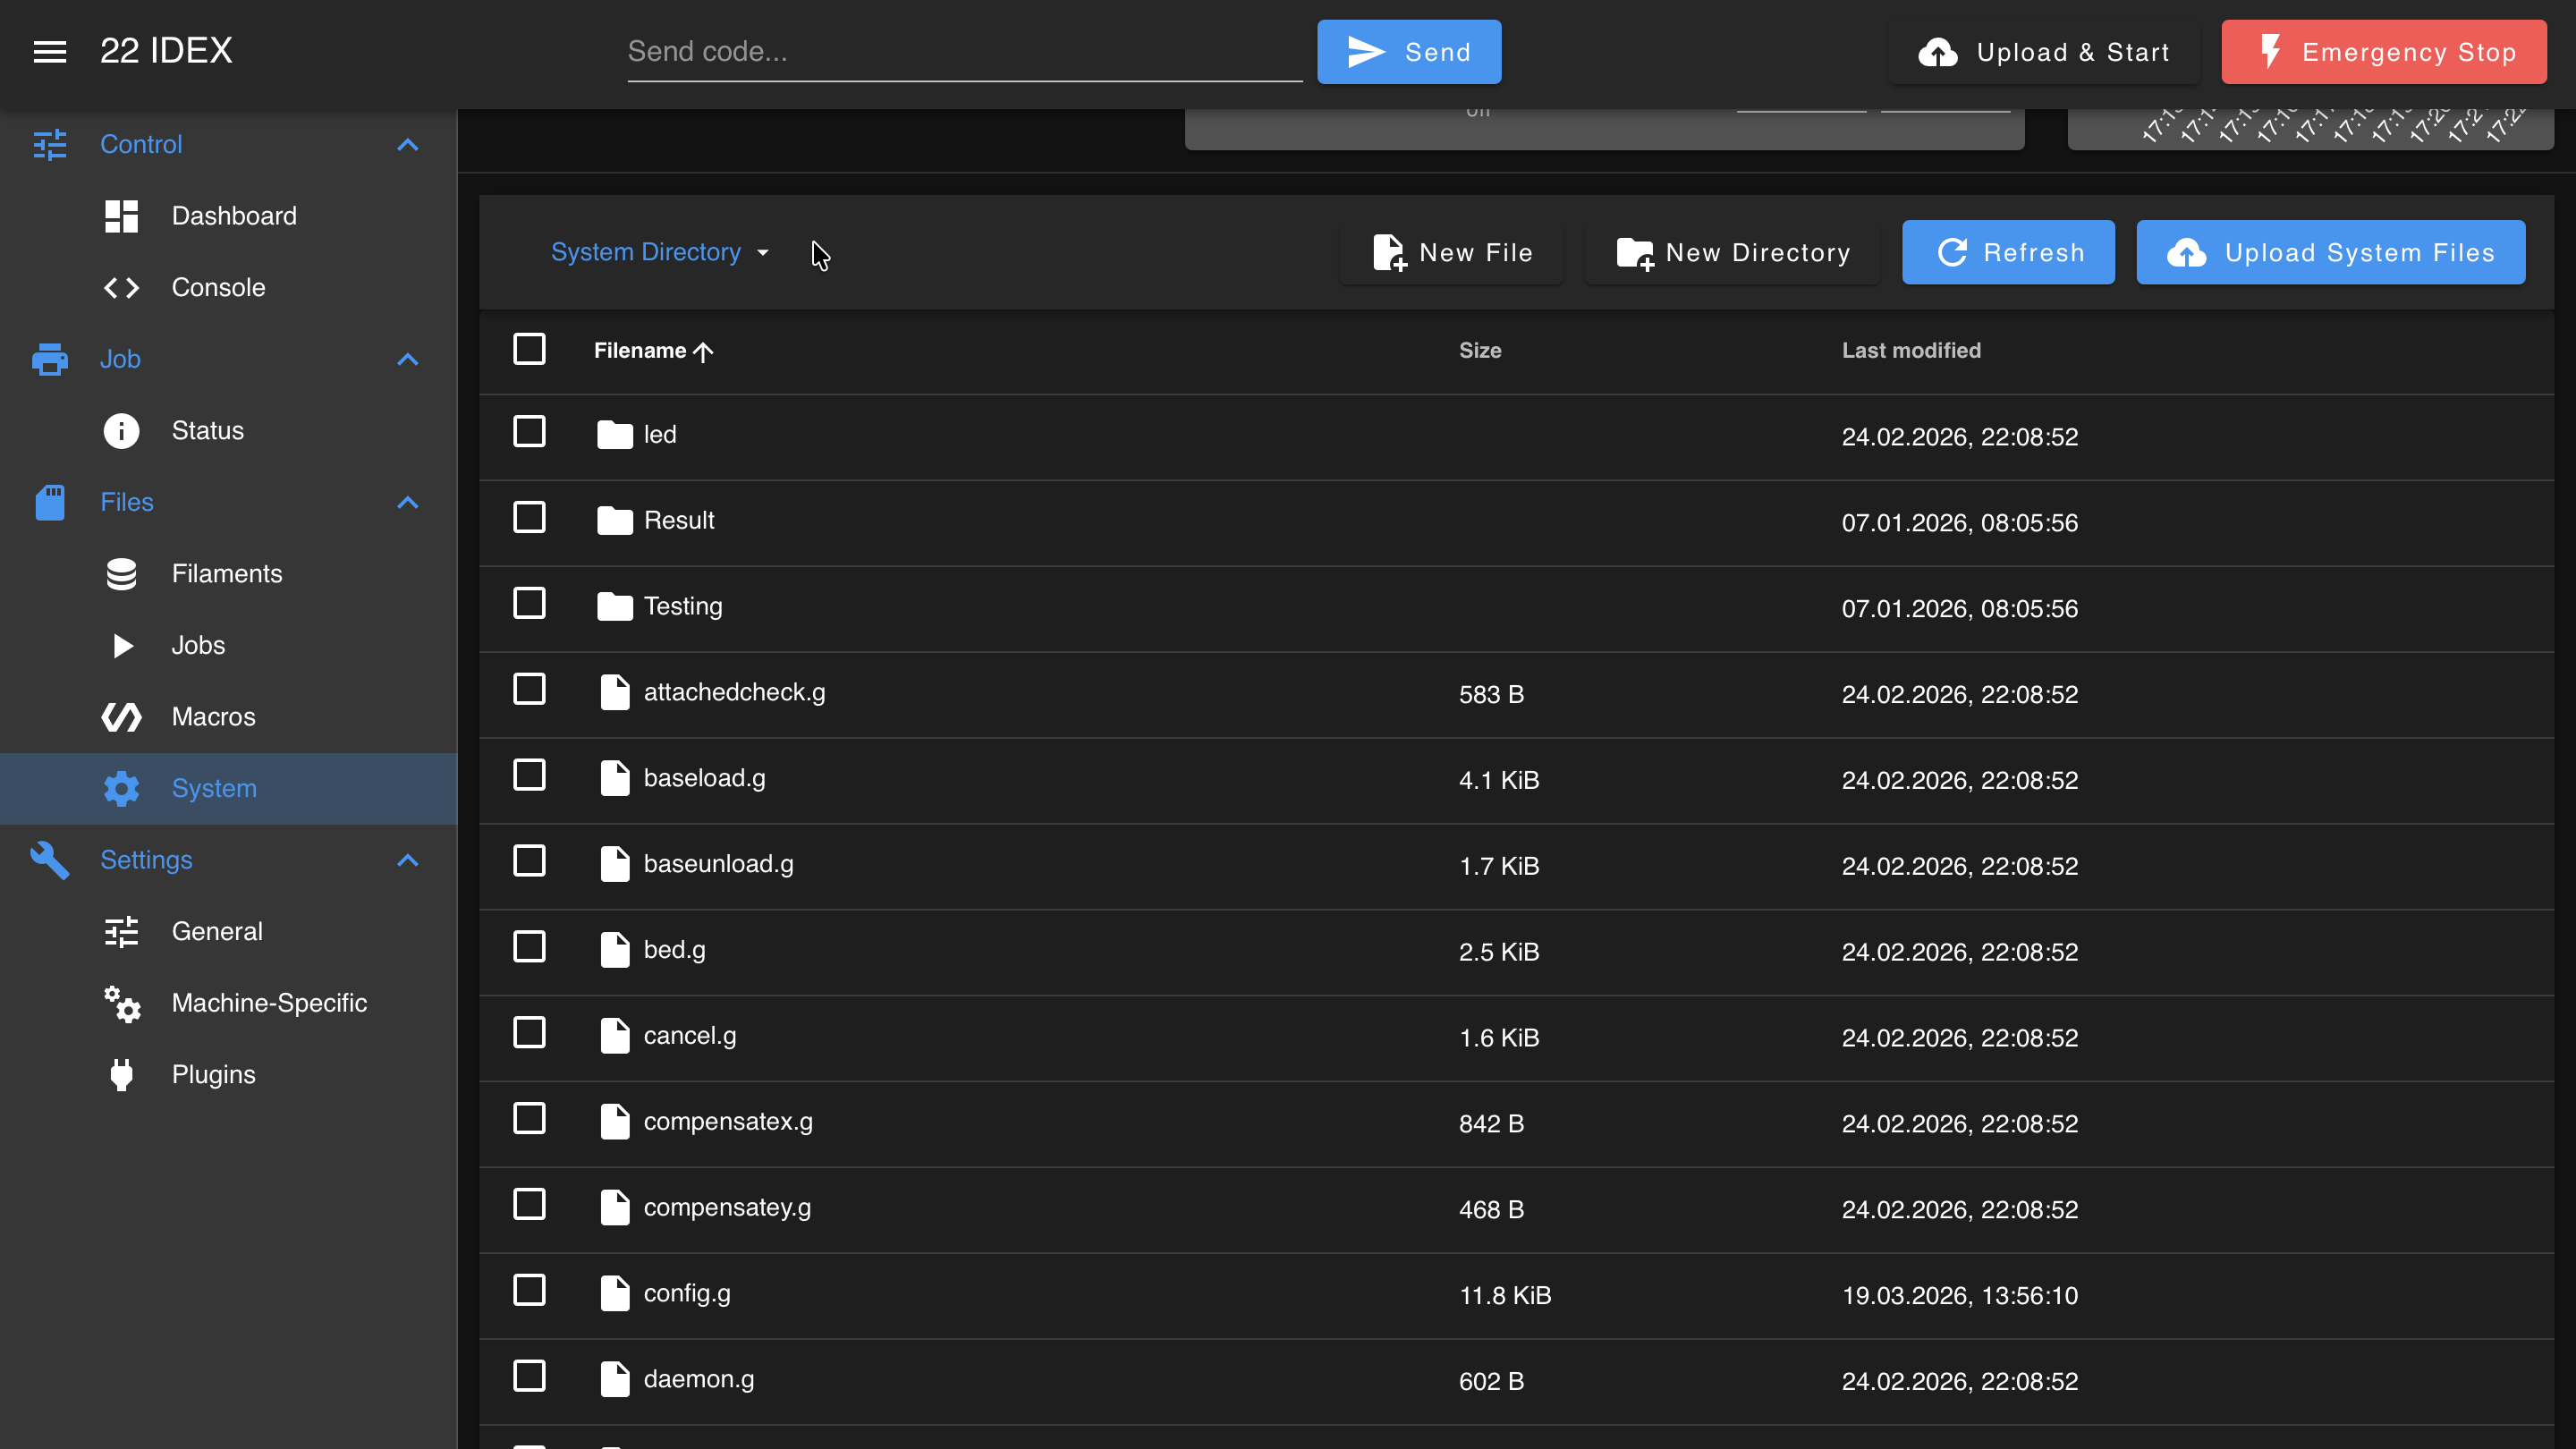
The System panel provides access to:
- Configuration files in the /sys/ directory
- System macros and G-Code files
- Firmware update mechanism
- WiFi firmware updates
- Web Interface software updates
Complex G-Code editing
For complex G-Code editing, download the file, use an offline editor, and re-upload. The browser editor is best for quick changes.
FAQ
Support
If you could not find an answer here, reach out to our support team.