Static IP Setup
A static IP address allows your 22IDEX printer to maintain the same IP address on your network, making it easier to connect consistently. This guide covers how to assign a static IP address to your printer.
Before you begin - safety and risk
Read the Safety - Before You Begin article to understand the hazards involved in working on the Vision Miner 22IDEX V4 - including electrical, thermal, mechanical, and chemical risks. All procedures in this wiki are provided as recommendations only. By choosing to follow any procedure, you do so at your own risk.
Router-based configuration recommended
We strongly recommend assigning static IP through your router or network administrator, NOT through the machine. Router-based configuration prevents IP conflicts, provides centralized network management, and is easier to troubleshoot. Only use the machine's built-in static IP assignment if you cannot access your router settings.
IP Assignment Methods
Router-based static IP (recommended):
Configure your router to always assign the same IP address to your printer based on its MAC address (DHCP reservation). The router manages all IP addresses, prevents conflicts with other devices, and is easier to change if needed. Consult your router's manual or network administrator for specific steps – this varies by router model.
Machine-based static IP (last resort):
Configure the printer itself to request a specific IP address. This can cause IP conflicts if the router assigns the same IP to another device, may be rejected by the router, and is difficult to recover if configuration fails. Only use this method if router configuration is absolutely not possible.
Assigning Static IP Through Machine
Prerequisites
Before starting: printer is connected to network (Ethernet or WiFi), you know your network's IP range (e.g., 192.168.1.x), you know which IP addresses are available, you understand your router's DHCP range, and you have physical access to the printer in case of failure.
- Open your printer's Web Interface.
- Navigate to
Macros > System > Settings > Network.
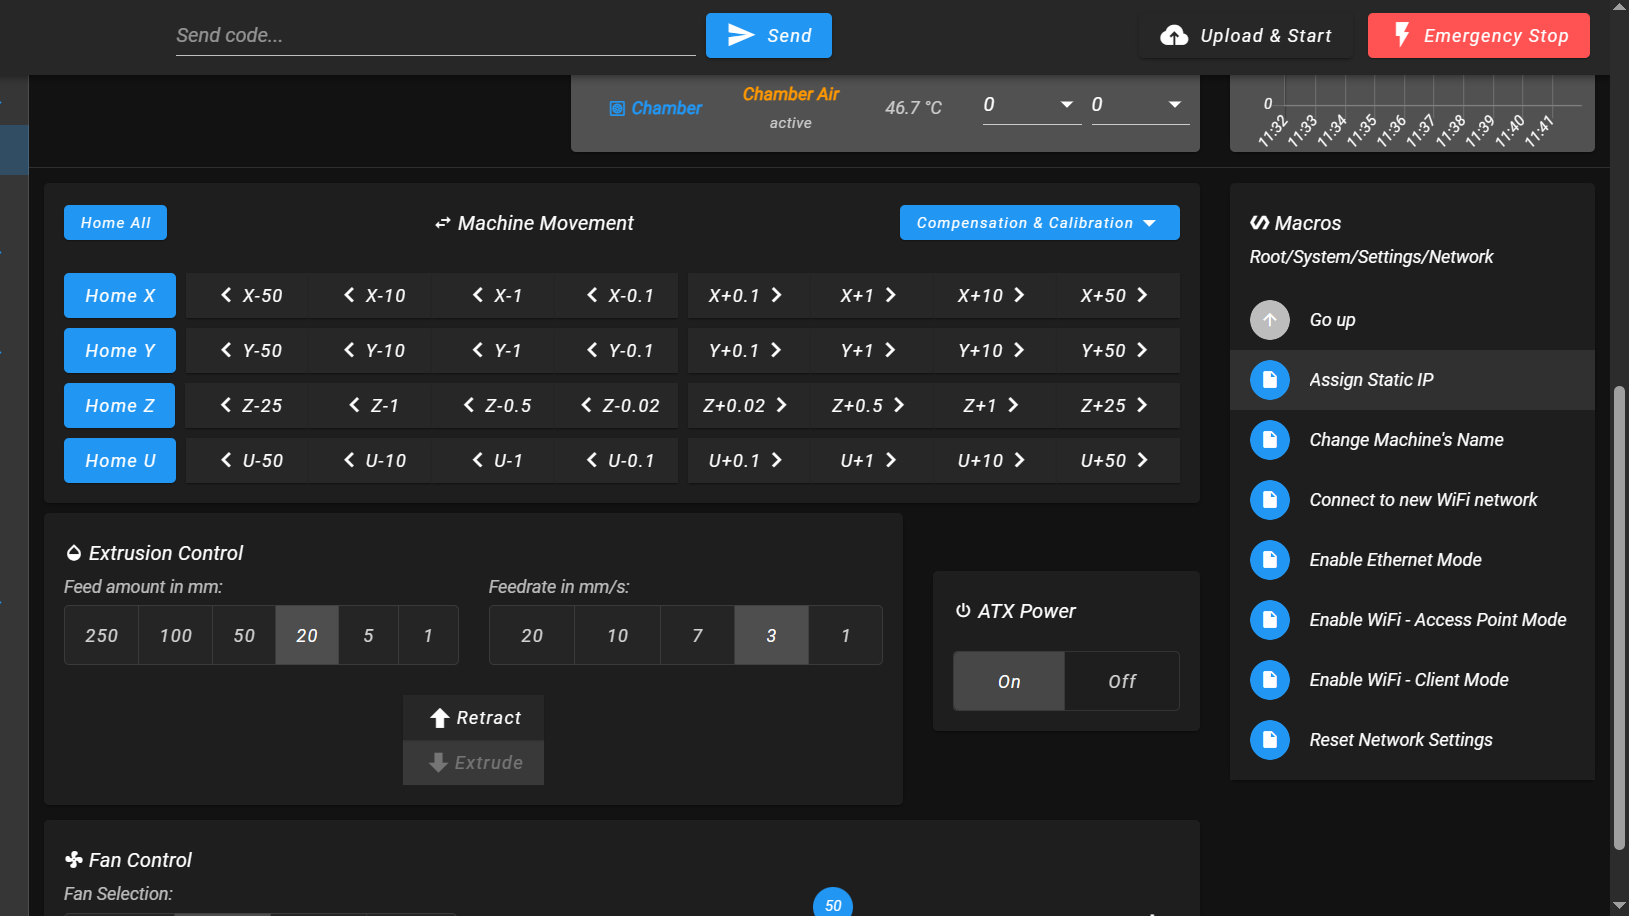
- Click Assign Static IP.
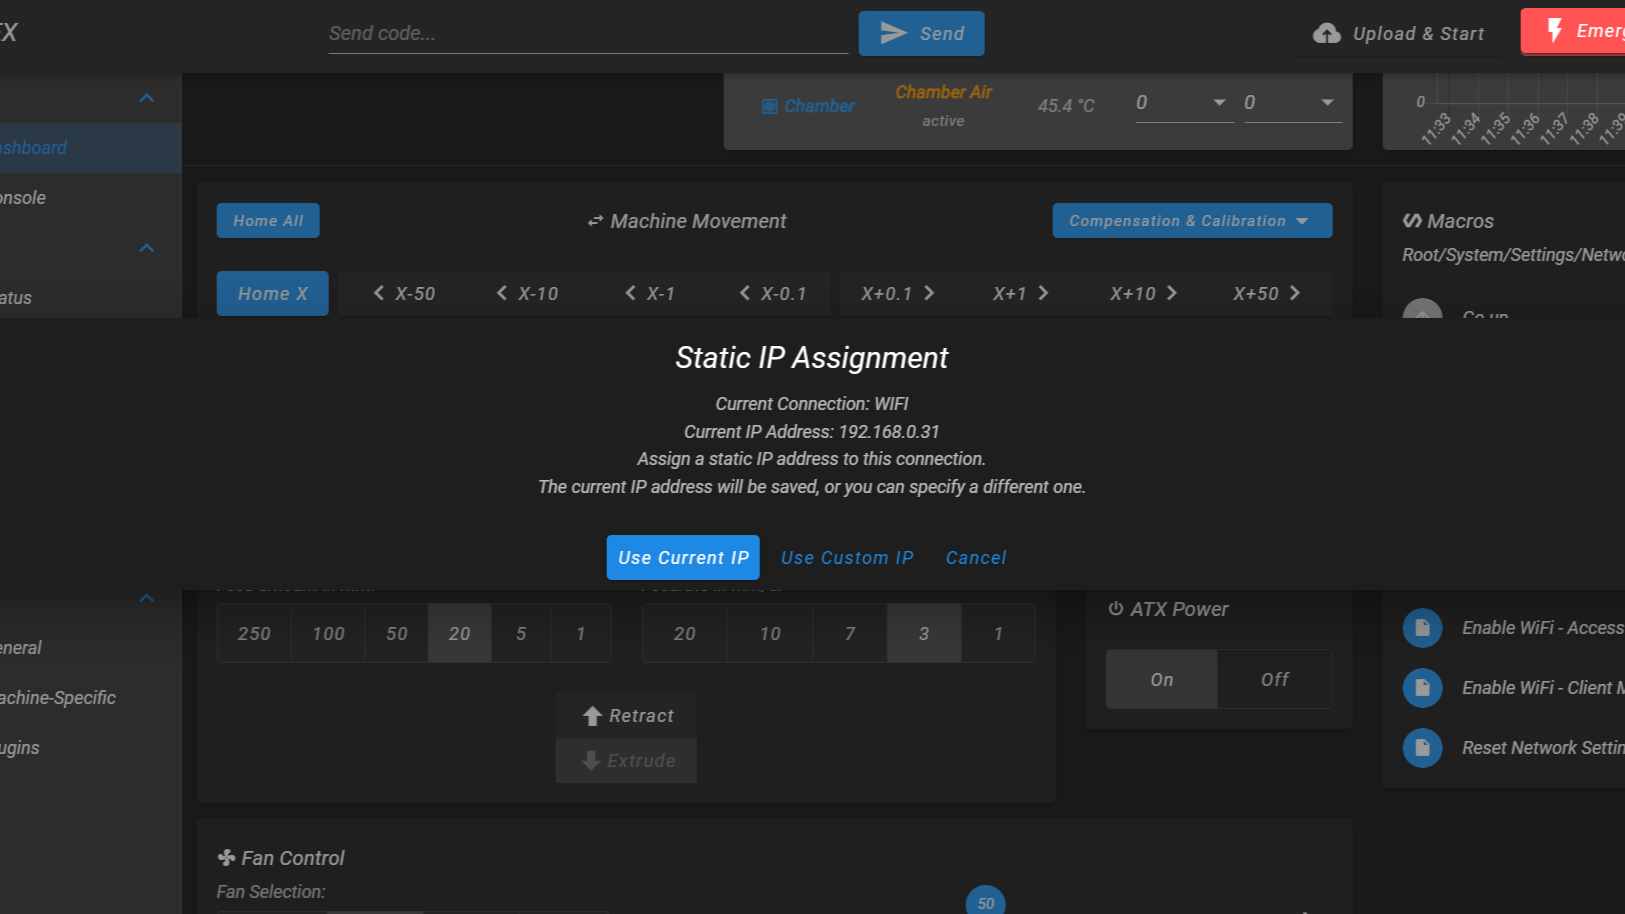
- The macro displays your current connection type (Ethernet or WiFi), current IP address, and options: Use Current IP, Use Custom IP, or Cancel. Choose Use Current IP if your current IP address works well – this is less likely to cause conflicts.
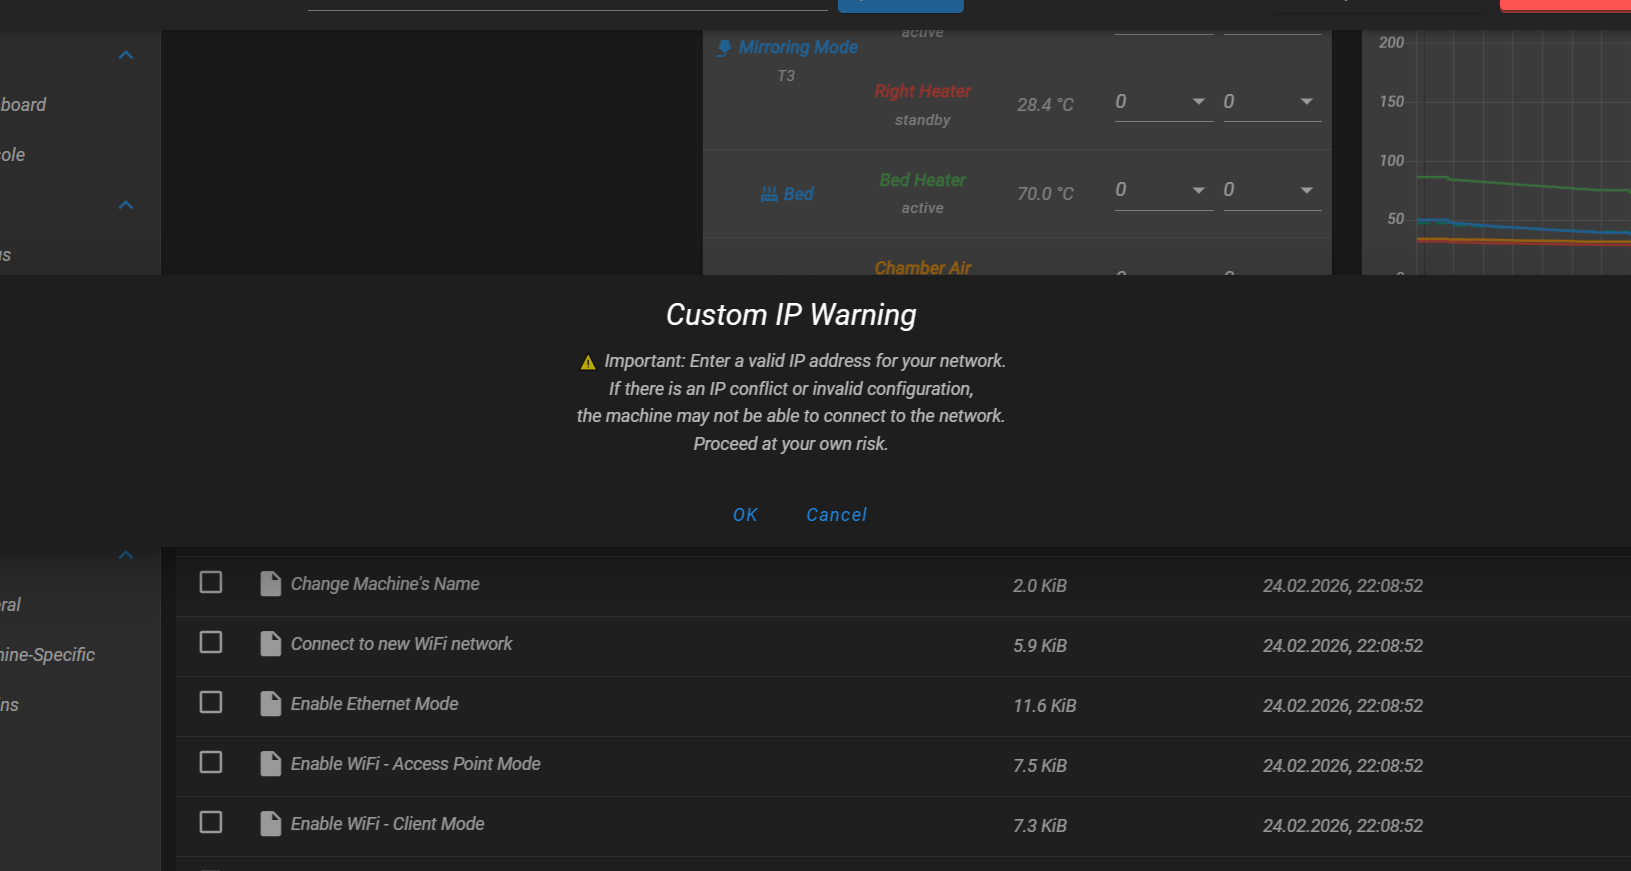
- If you chose Use Custom IP, enter your IP address in the format
192.168.1.100. The address must be valid for your network, not in use by another device, and preferably outside your router's DHCP range. The macro will warn about potential conflicts.
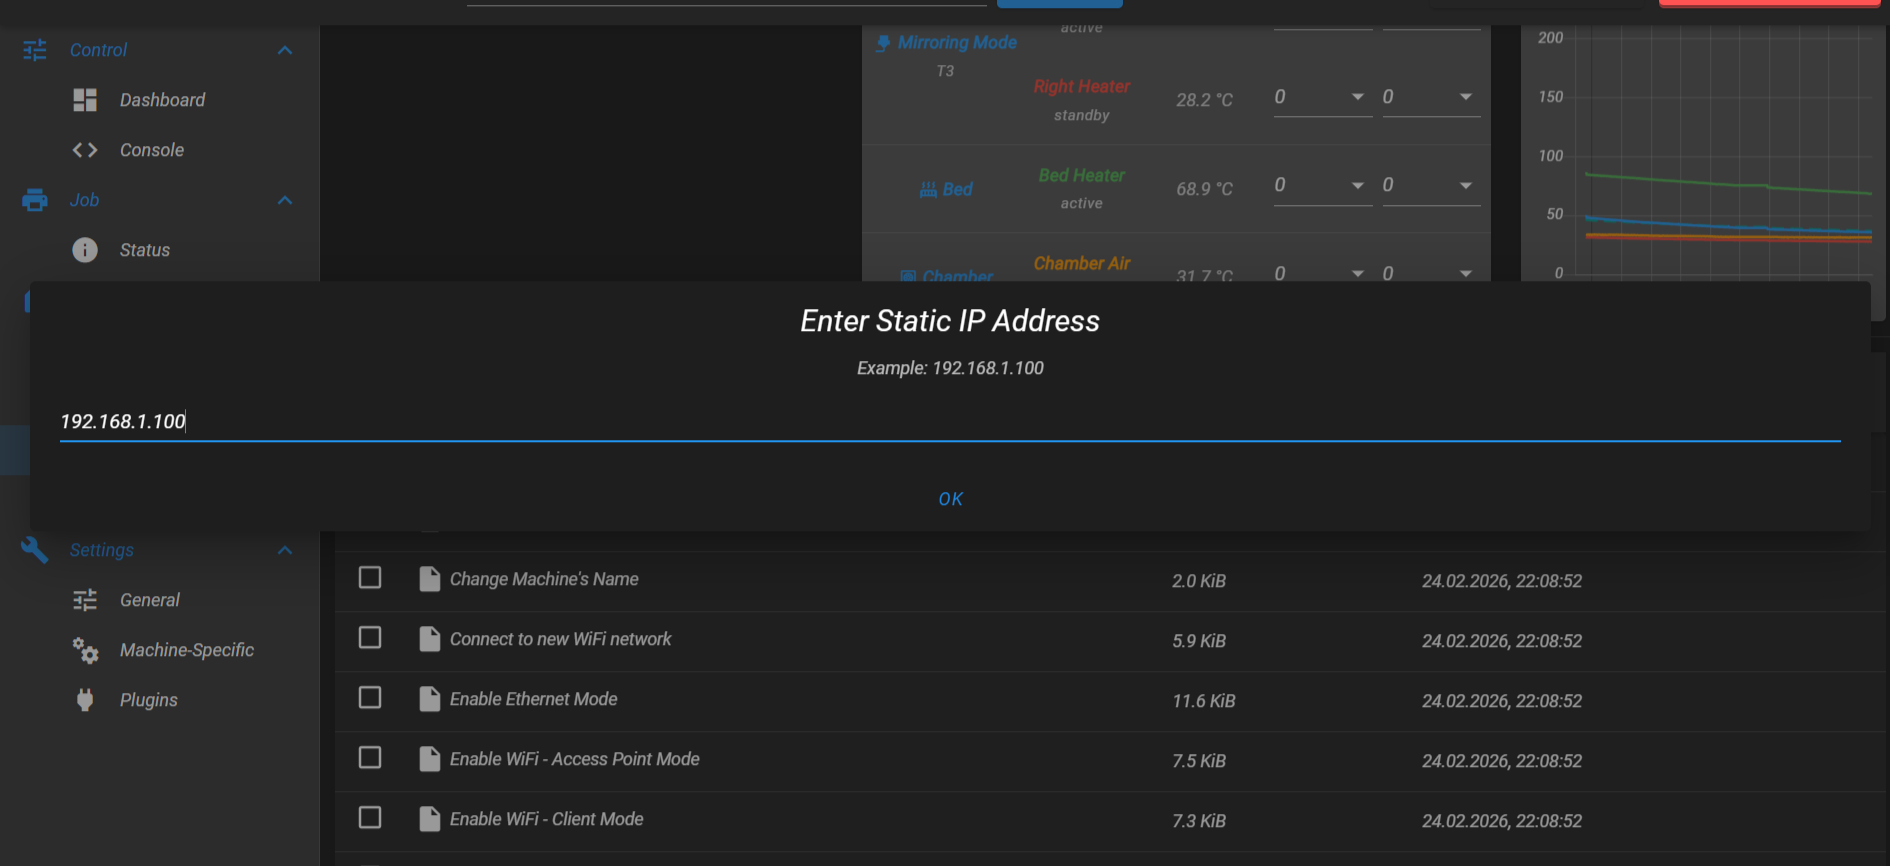
- Enter your desired IP address in the input field.
- Review the configuration summary showing your entered IP address and connection details.
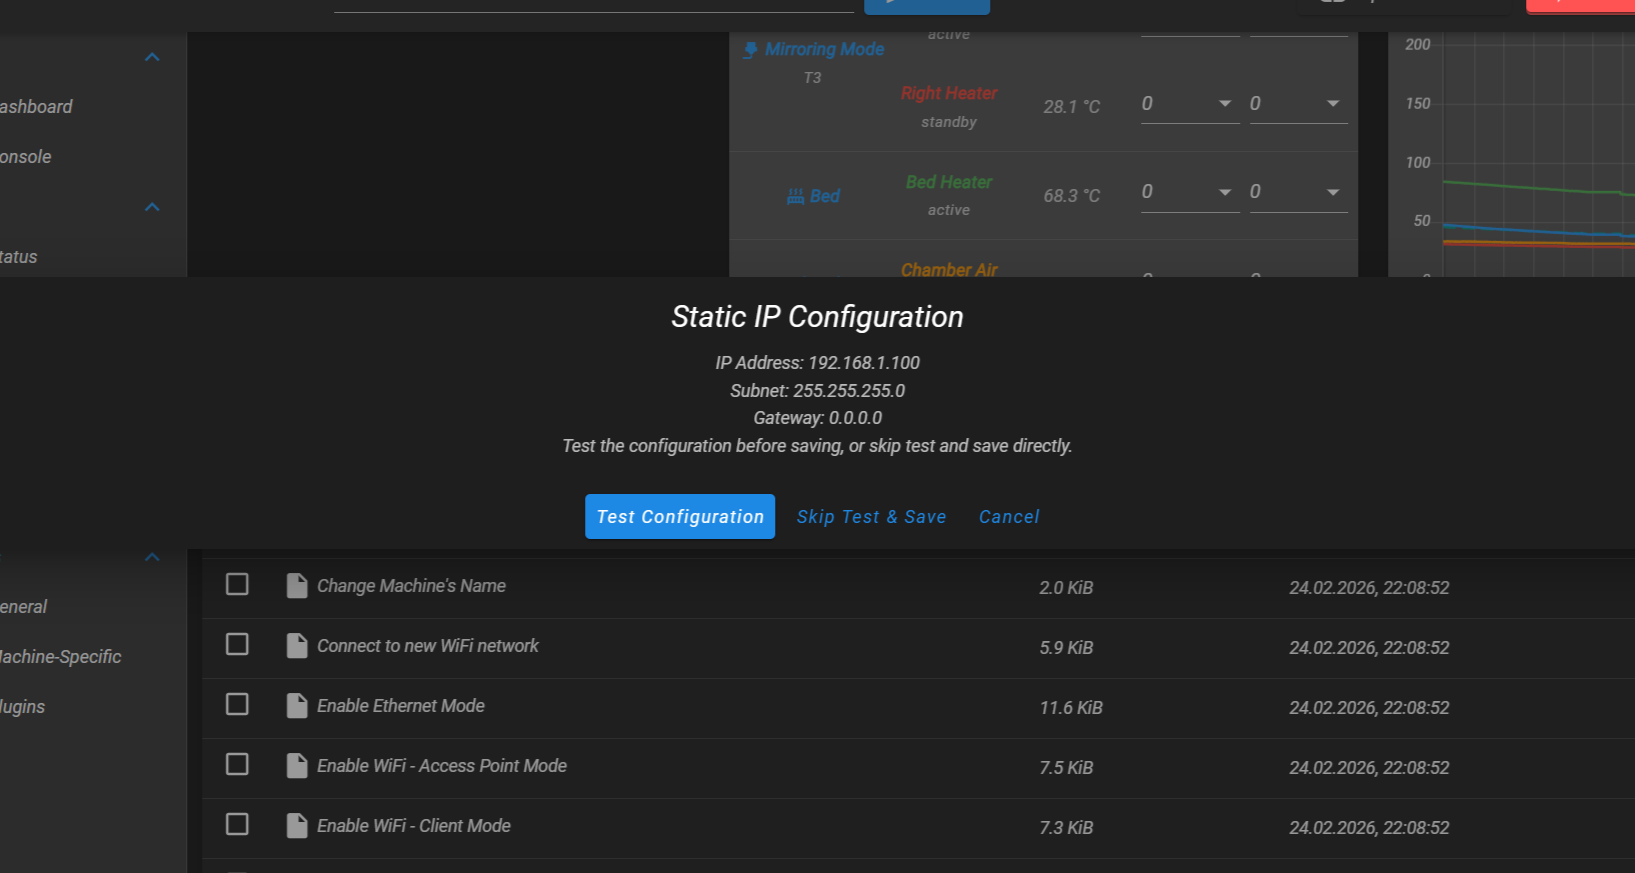
- Choose Test Configuration (recommended) or Skip Test & Save. Testing verifies the static IP works before saving permanently. If the test fails, the original connection restores automatically.
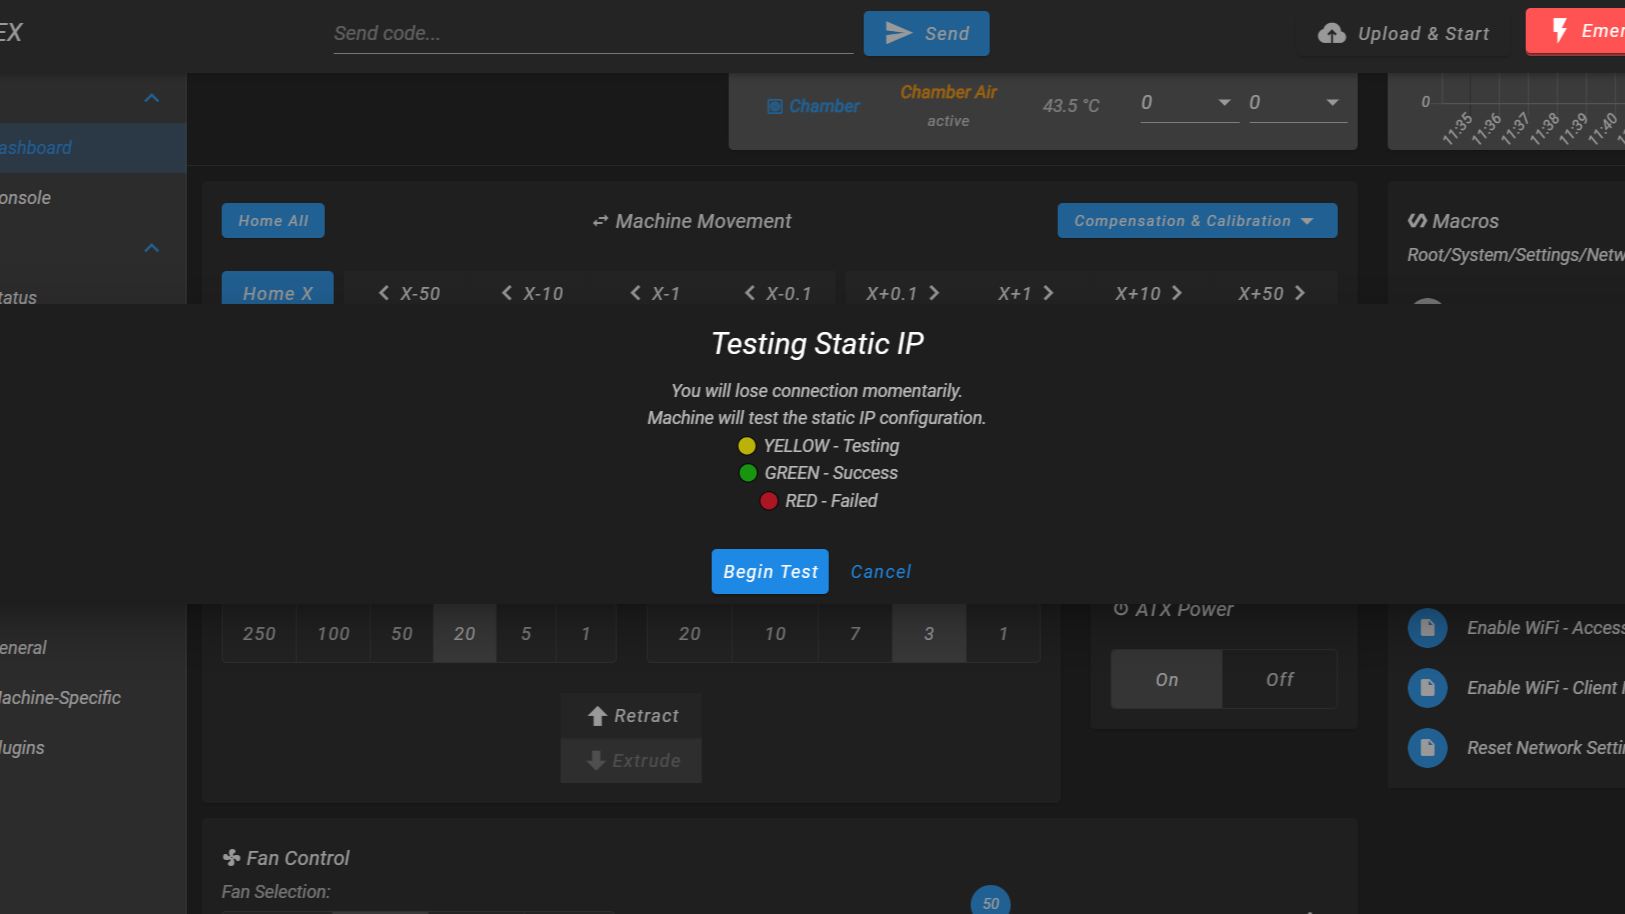
Always test before saving
Always choose "Test Configuration" unless you're certain the IP address is correct and available. Skipping the test is risky – if it doesn't work, you'll need to reset network settings.
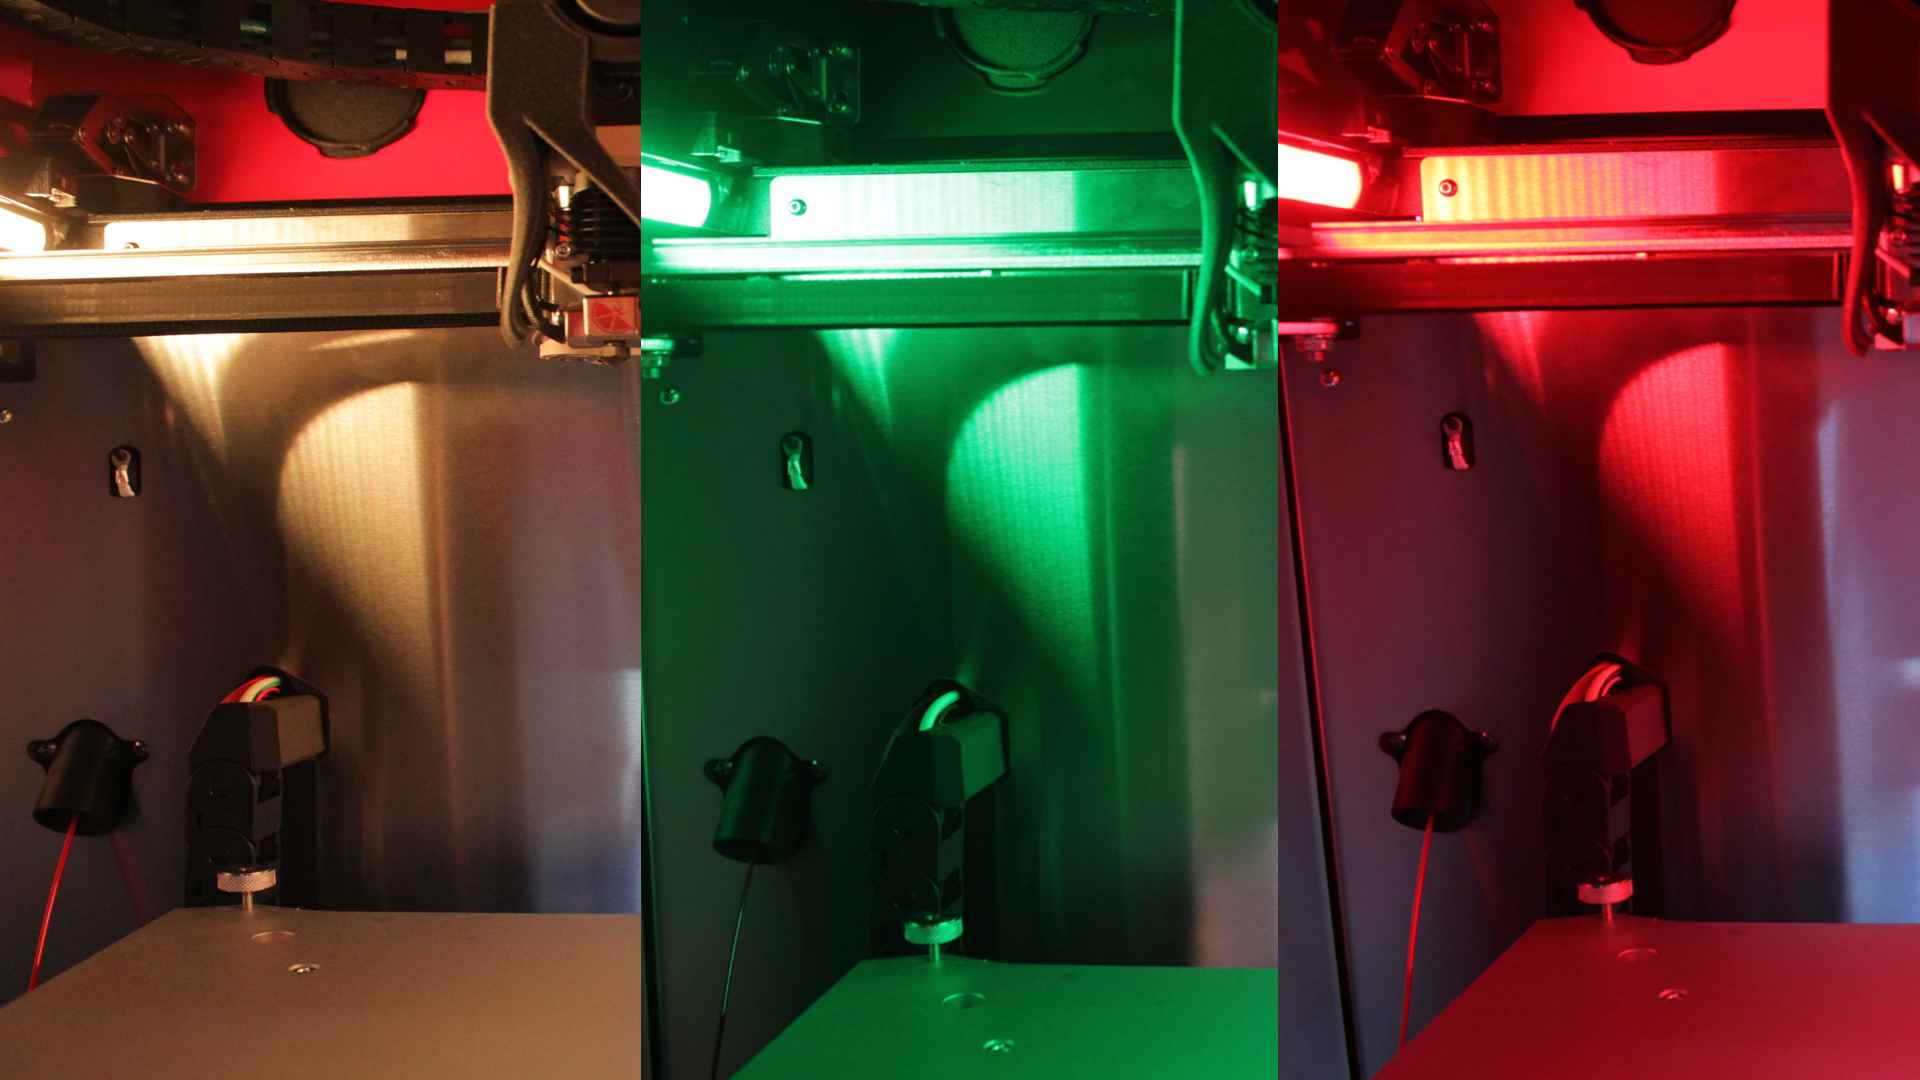
- If you chose to test, you will lose connection momentarily while the LED turns yellow (testing). Wait for the test to complete. LED indicators: yellow = testing in progress, green = test successful (configuration saved permanently), red = test failed (original connection restored automatically).
- For WiFi connections, enter your WiFi password when prompted. The network will be reconfigured with the static IP and the test proceeds as normal.
Recovery if Static IP Fails
If the test fails, the original connection is restored automatically. If you skipped the test and now cannot connect to the printer, reset network settings:
- Navigate to
Macros > System > Settings > Networkin the Web Interface (if still accessible). - Run Reset Network Settings. This erases ALL network settings, removes ALL WiFi networks and Ethernet configurations, and resets to Access Point mode.
- After reset, the printer will start in Access Point mode with default network name and password
1234567890. Reconnect and reconfigure network from scratch.
Reset erases all network configuration
Reset Network Settings is your recovery tool if static IP configuration prevents network access. It erases everything and starts fresh. You will lose all WiFi networks, Ethernet configurations, and custom settings.
FAQ
Troubleshooting
Support
If you could not find an answer here, reach out to our support team.