First Layer Calibration
Use this guide when the first layer shows wrong squish (too high or too low), when left and right differ in Standard Mode, or when Mirror / Duplicate jobs need a stable first layer. This guide does not replace Auto Calibration - run that first so Z starts close to correct.
Before you begin - safety and risk
Read the Safety – Before You Begin article to understand the hazards involved in working on the Vision Miner 22IDEX V4 – including electrical, thermal, mechanical, and chemical risks. All procedures in this wiki are provided as recommendations only. By choosing to follow any procedure, you do so at your own risk.
Babystepping uses hot nozzles and motion
Adjust Z only through the Web Interface during a print. Stay clear of the toolheads – the machine can move without warning.
Equipment and Software
- Vision Miner 22IDEX V4 with a build plate installed for real prints (remove the plate only when Auto Calibration requires bare aluminum - follow that guide).
- Computer on the same network as the printer - Web Interface in a browser.
- A small test job - wide skirt or brim, or a small cube - so you can judge layer 1 without a long print.
- Slicer (e.g. PrusaSlicer family) - only if you use a raft for Mirror/Duplicate (see below).
1. Read the first layer
| Look | What you see |
|---|---|
| Too high | Visible gaps between lines, weak bond to the plate. |
| Too low | Ripples, ridges, or washboard squish. |
| Good | Lines touch and bond without crushing into a wavy surface. |
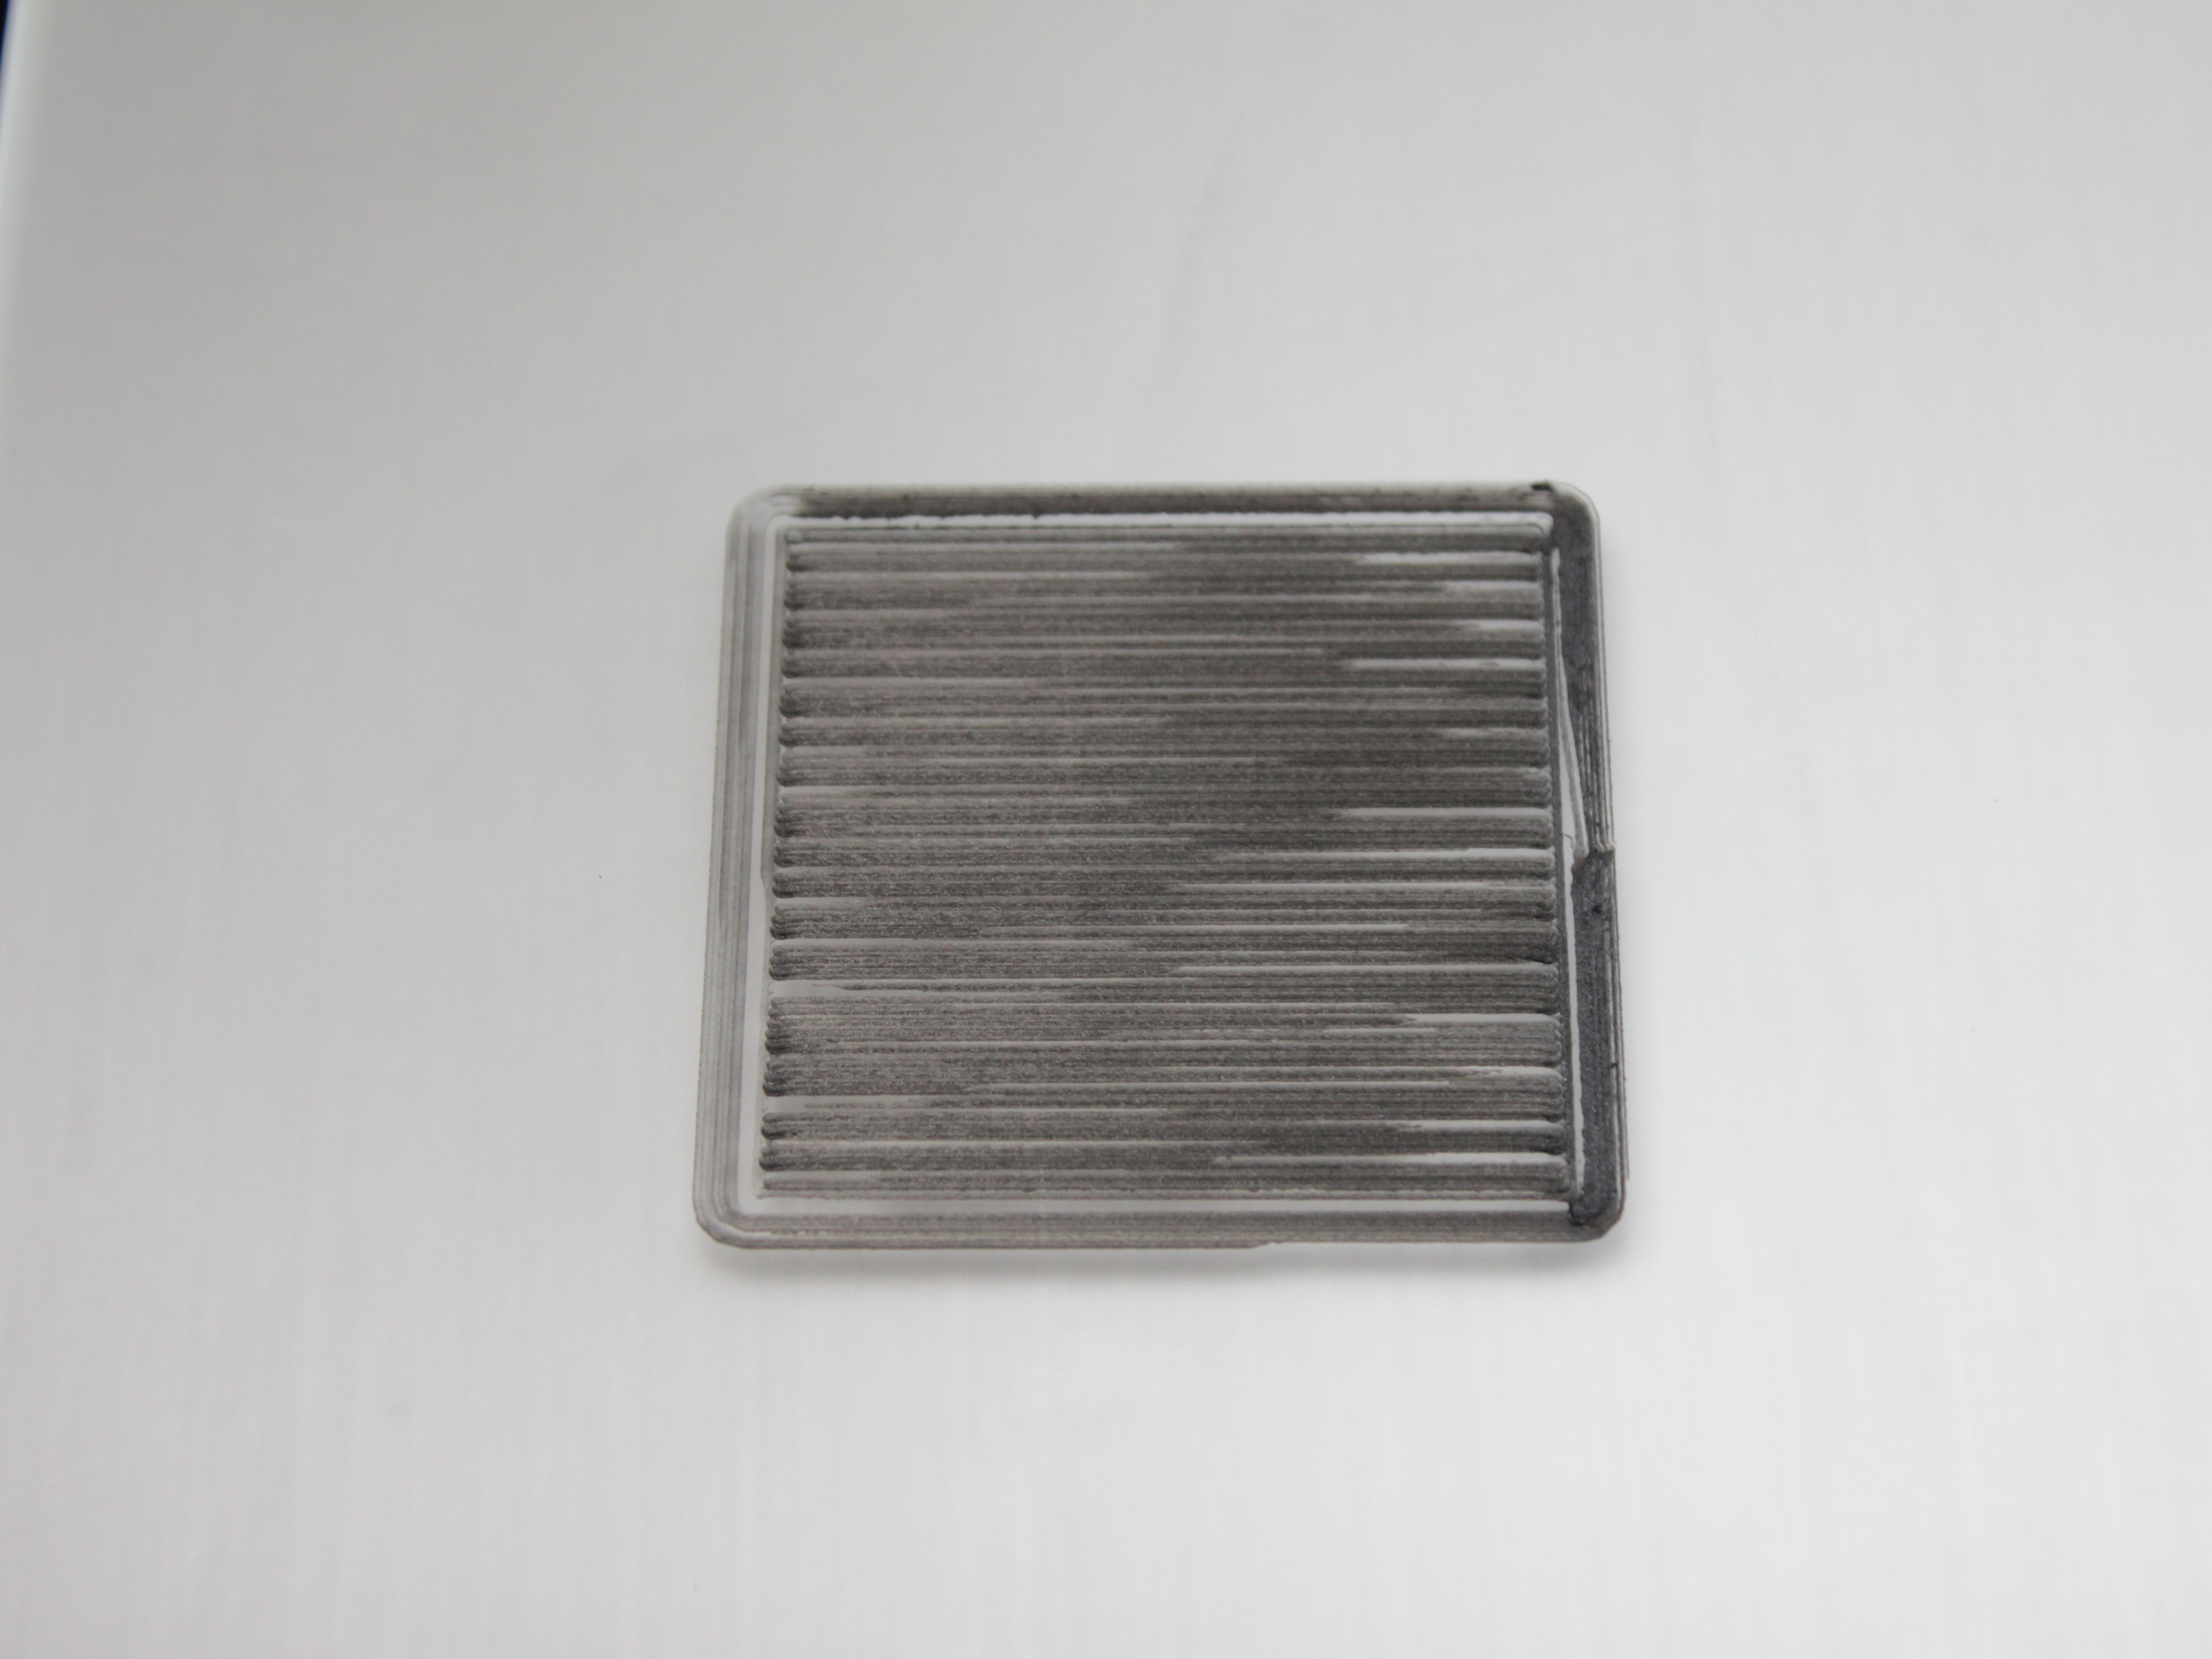
When the nozzle is too close to the build plate, the extruded plastic is crushed and creates ripples, ridges, or a "washboard" texture.
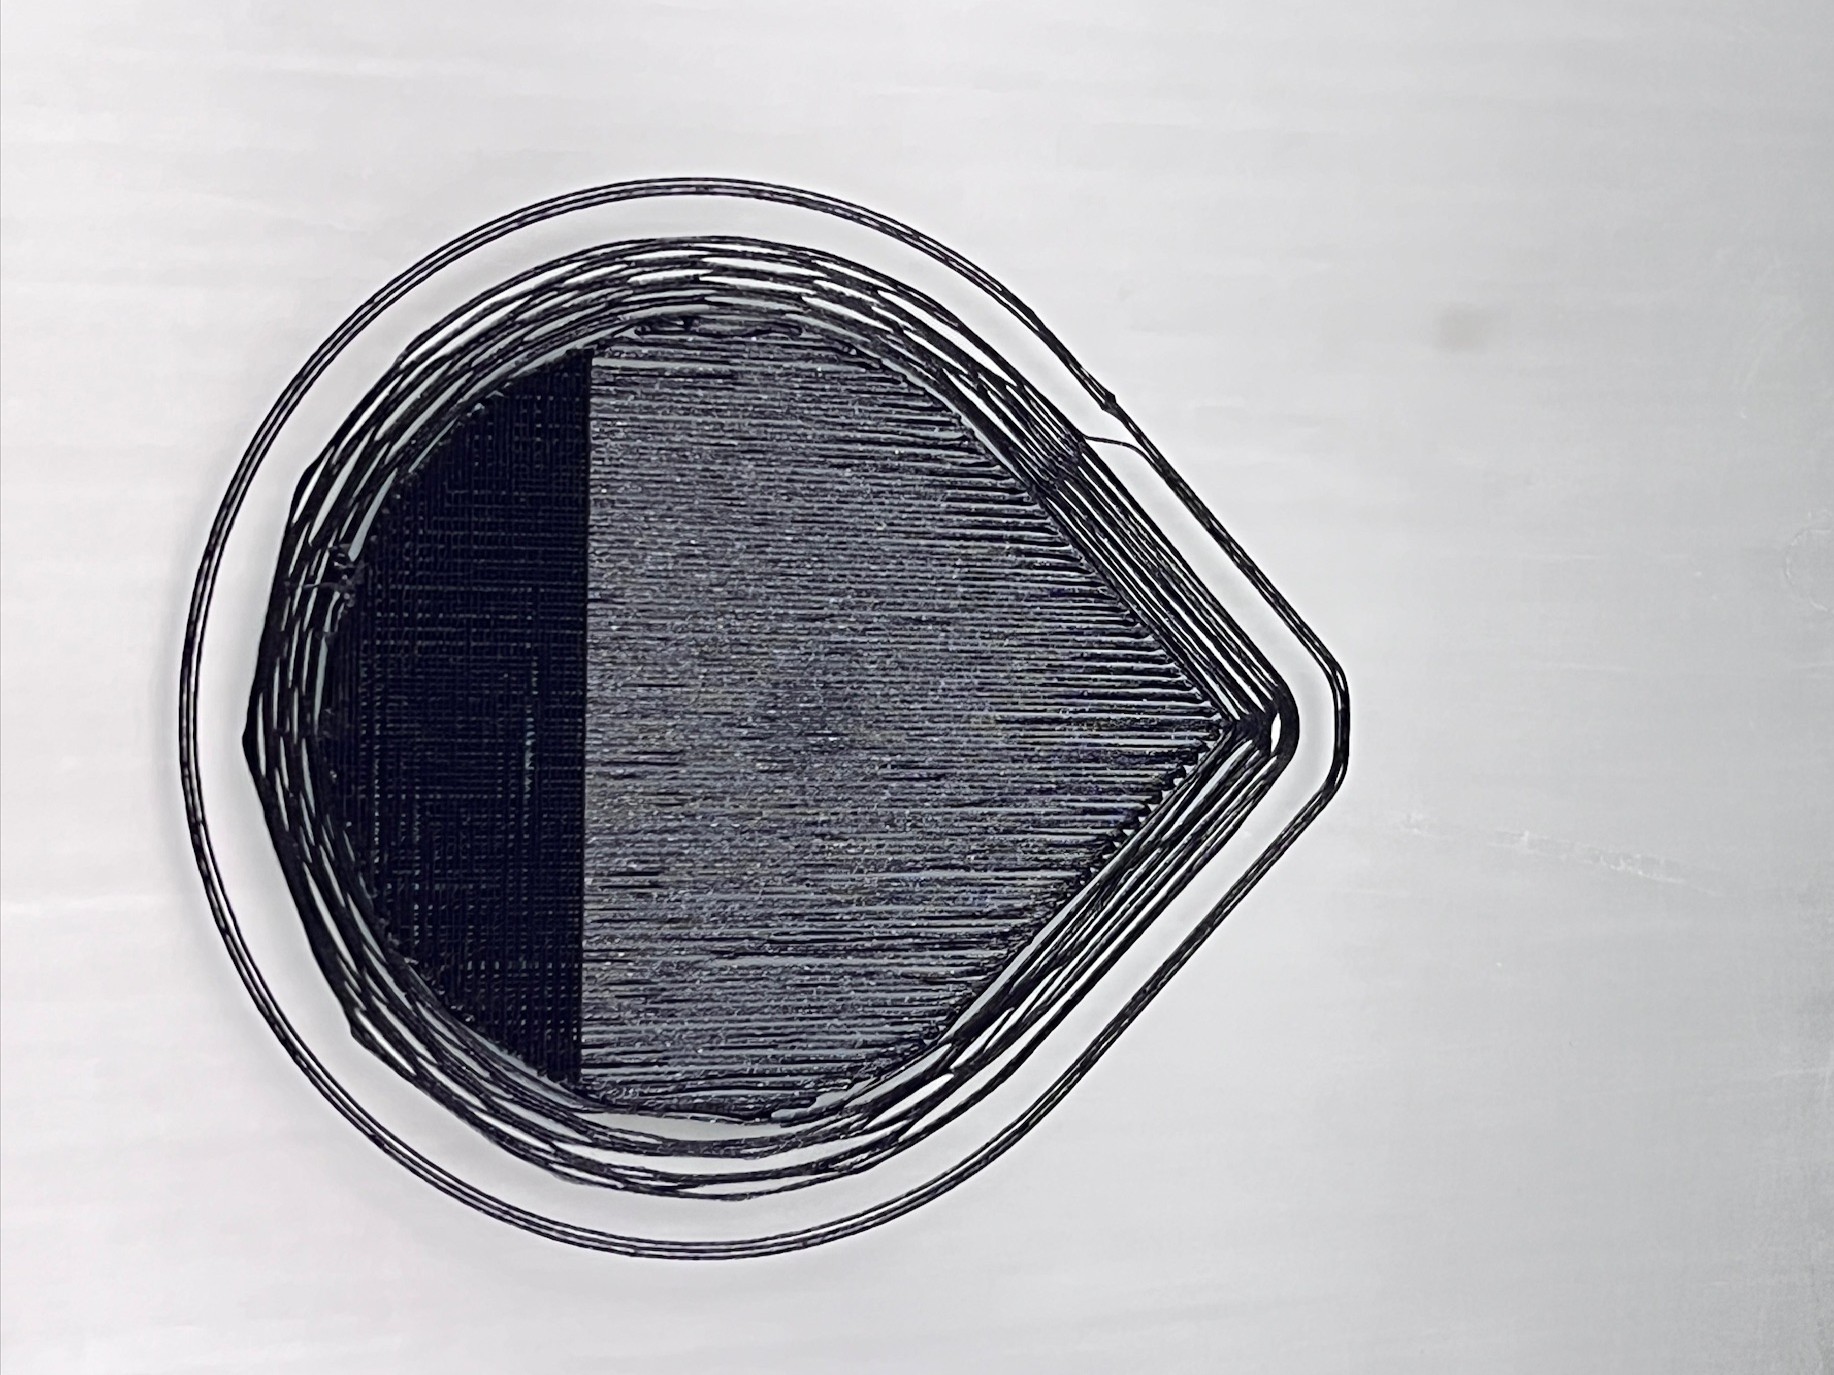
When the nozzle is too far from the build plate, visible gaps appear between extrusion lines and adhesion to the plate is weak.
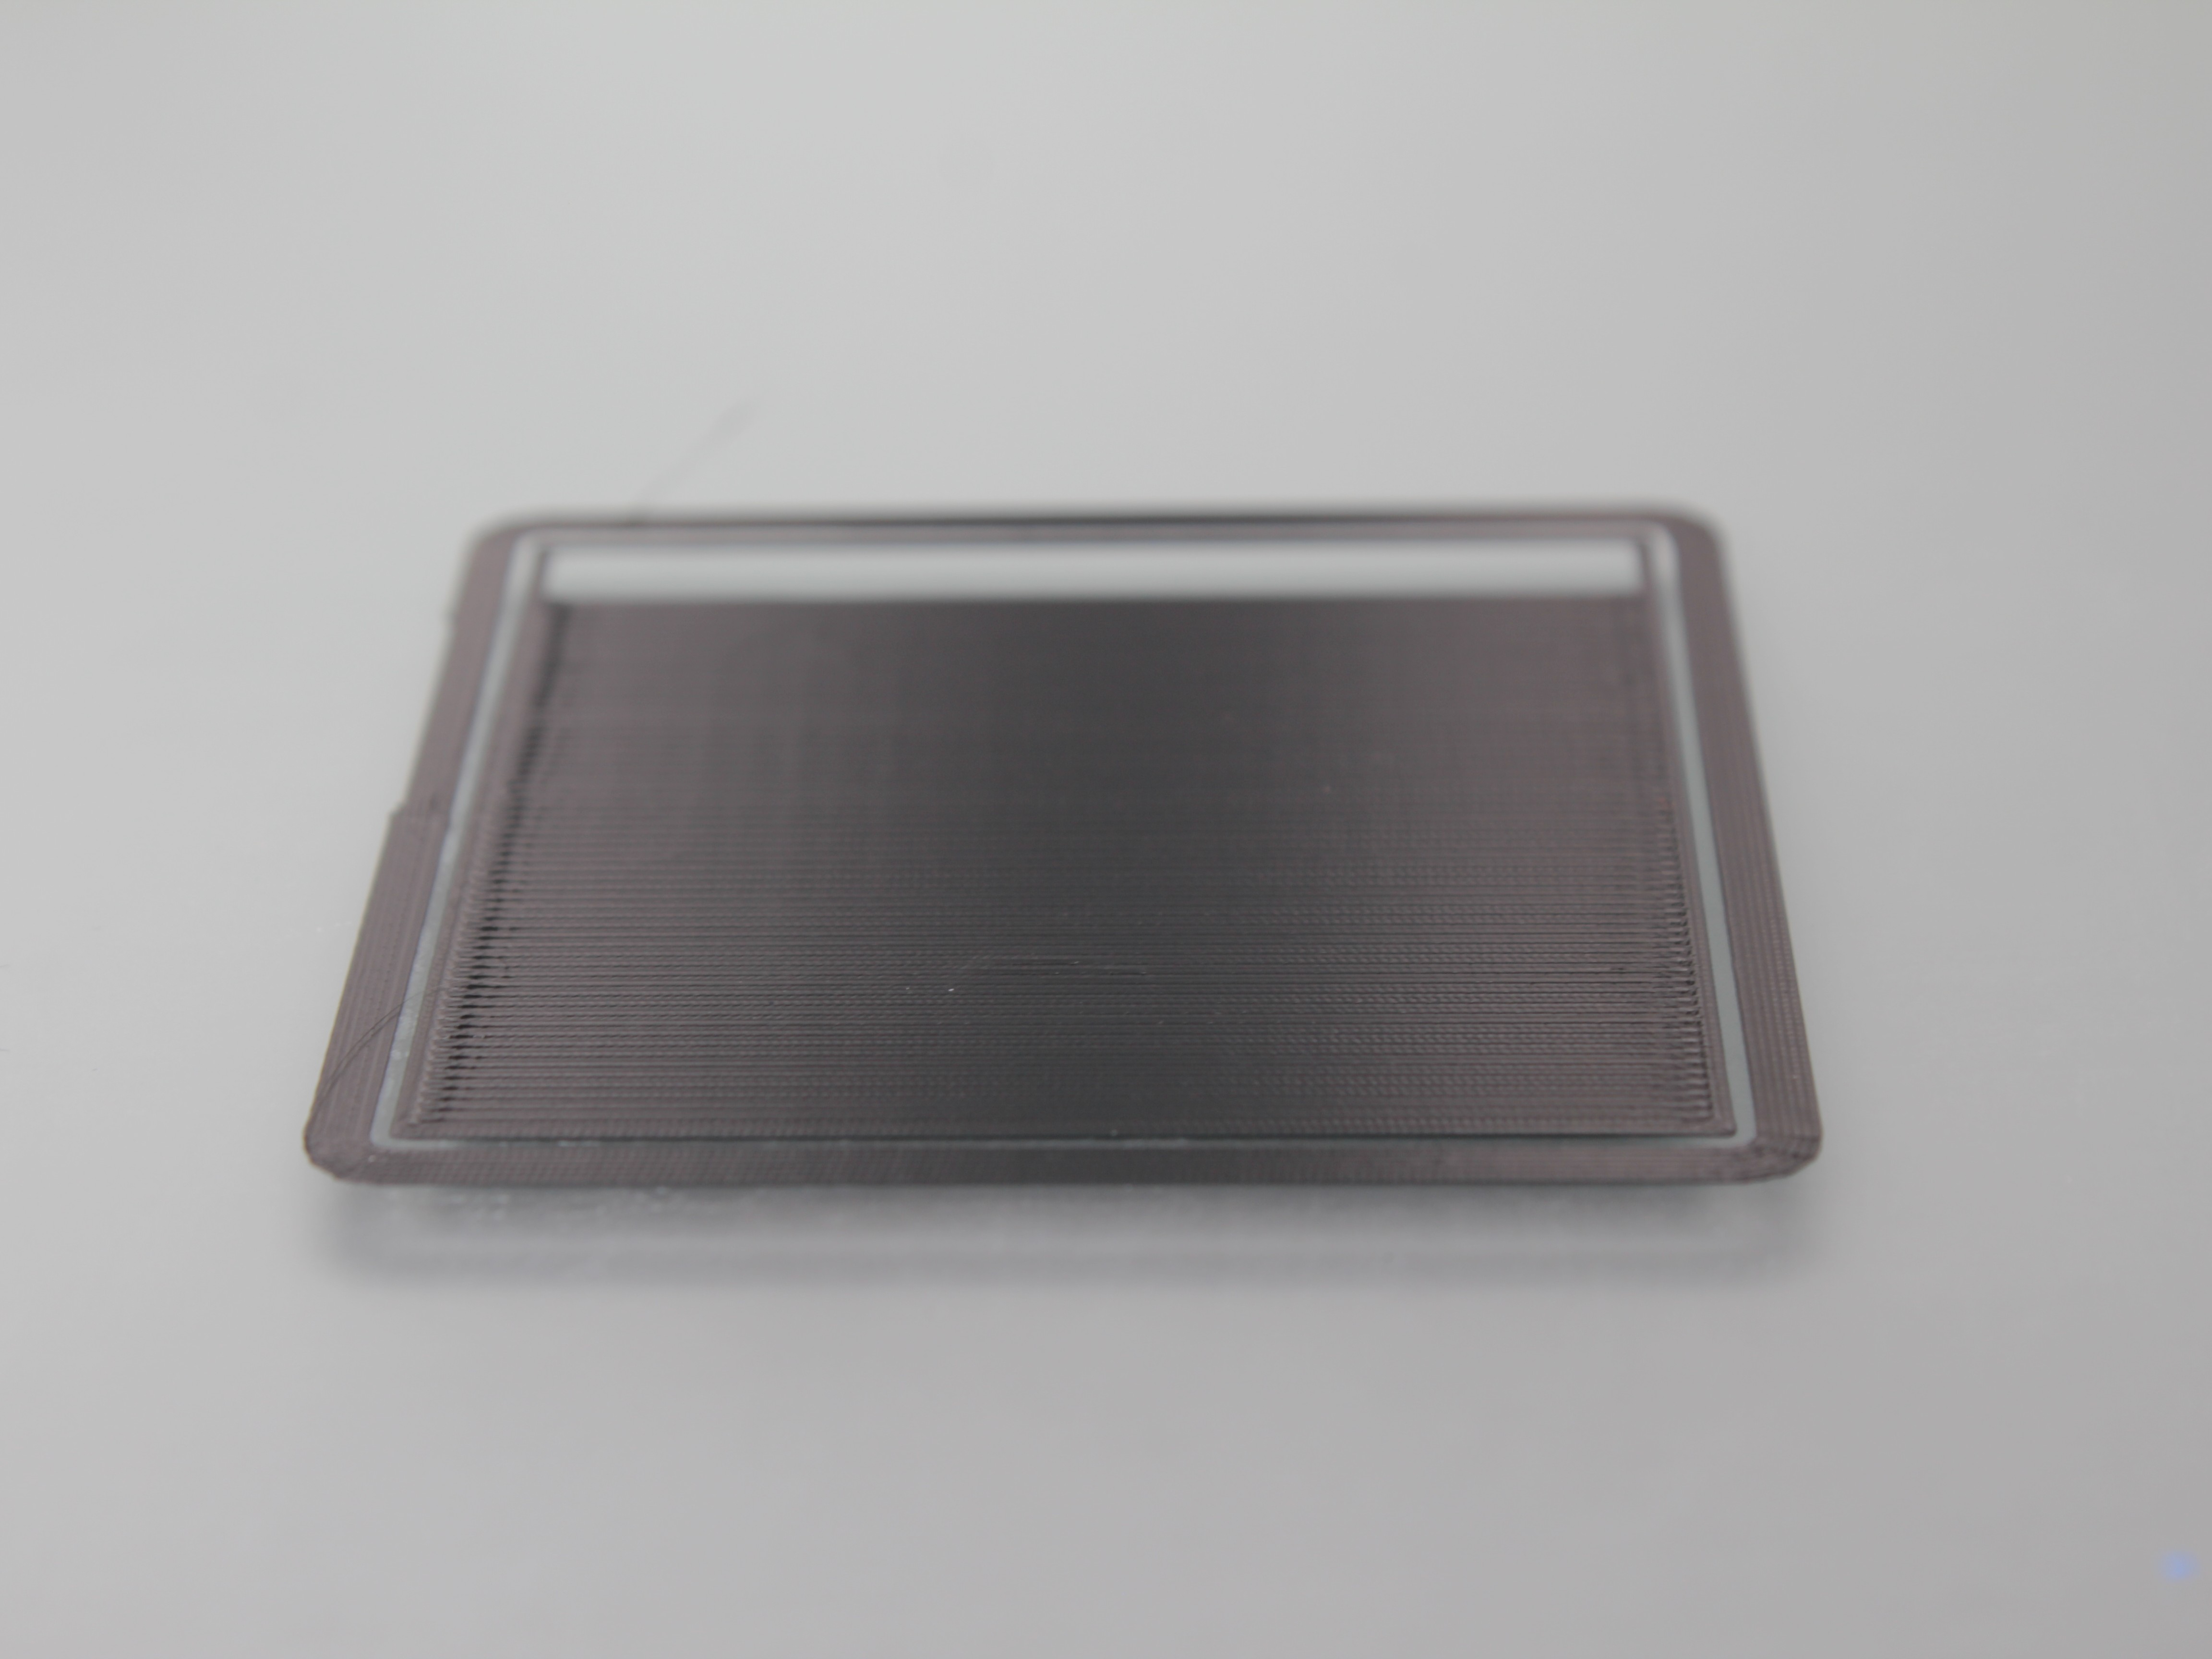
At the correct height, extrusion lines touch and bond together without being crushed into a wavy surface.
2. Z adjustment
- Start your test print. Use enough skirt or brim to watch layer 1 for a minute or two.
- Judge the lines using the table above.
Hot nozzle during babystepping
Do not touch the nozzle or heater block. The machine may move without warning during adjustment.
- Open the Web Interface. Go to the Status tab.
- Use Z babystepping:
- Nozzle too close to the plate - tap
+0.02 mm(moves Z to give more clearance). - Nozzle too far - tap
-0.02 mm.
- Nozzle too close to the plate - tap
- Change only during the first layer. Leave the value for the rest of the print so the job stays consistent.
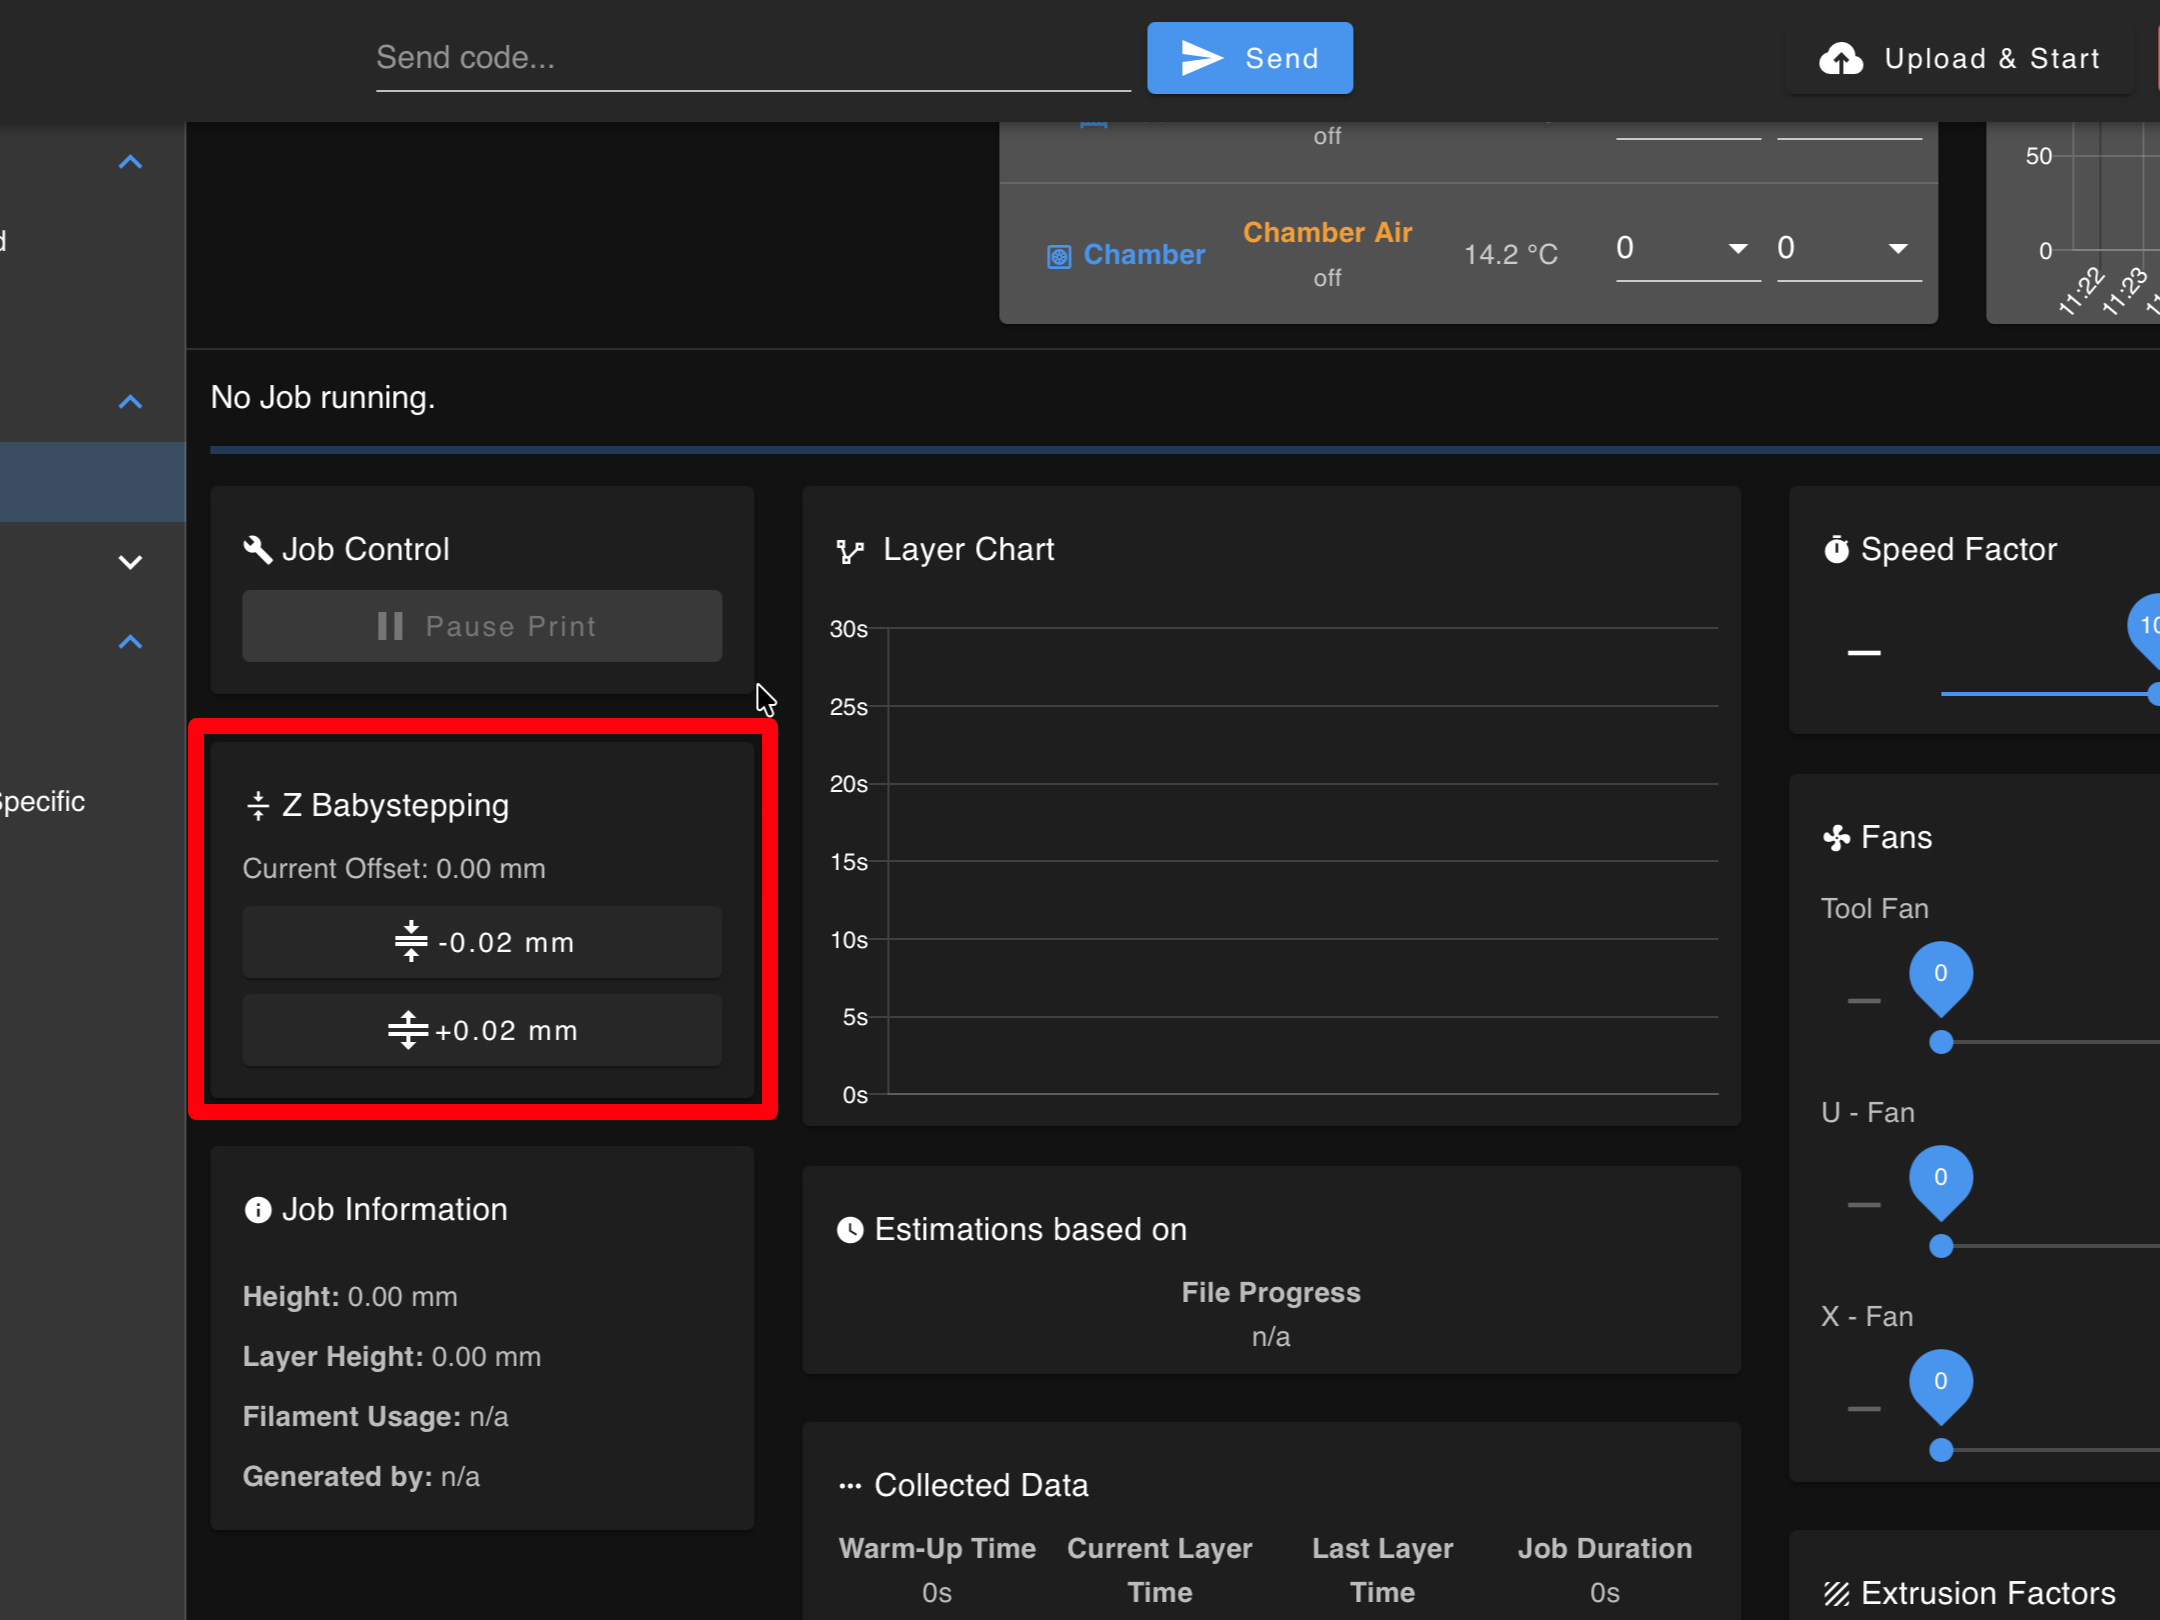
The red highlight shows the location of the Z babystepping controls.
3. Save Z-offset
After the print:
- Run
Dashboard > Macros > Save Current Z-Offsetif you changed Z during the print, or confirm when the UI prompts you to save. - If you skip save, the tweak is lost on the next boot or job.
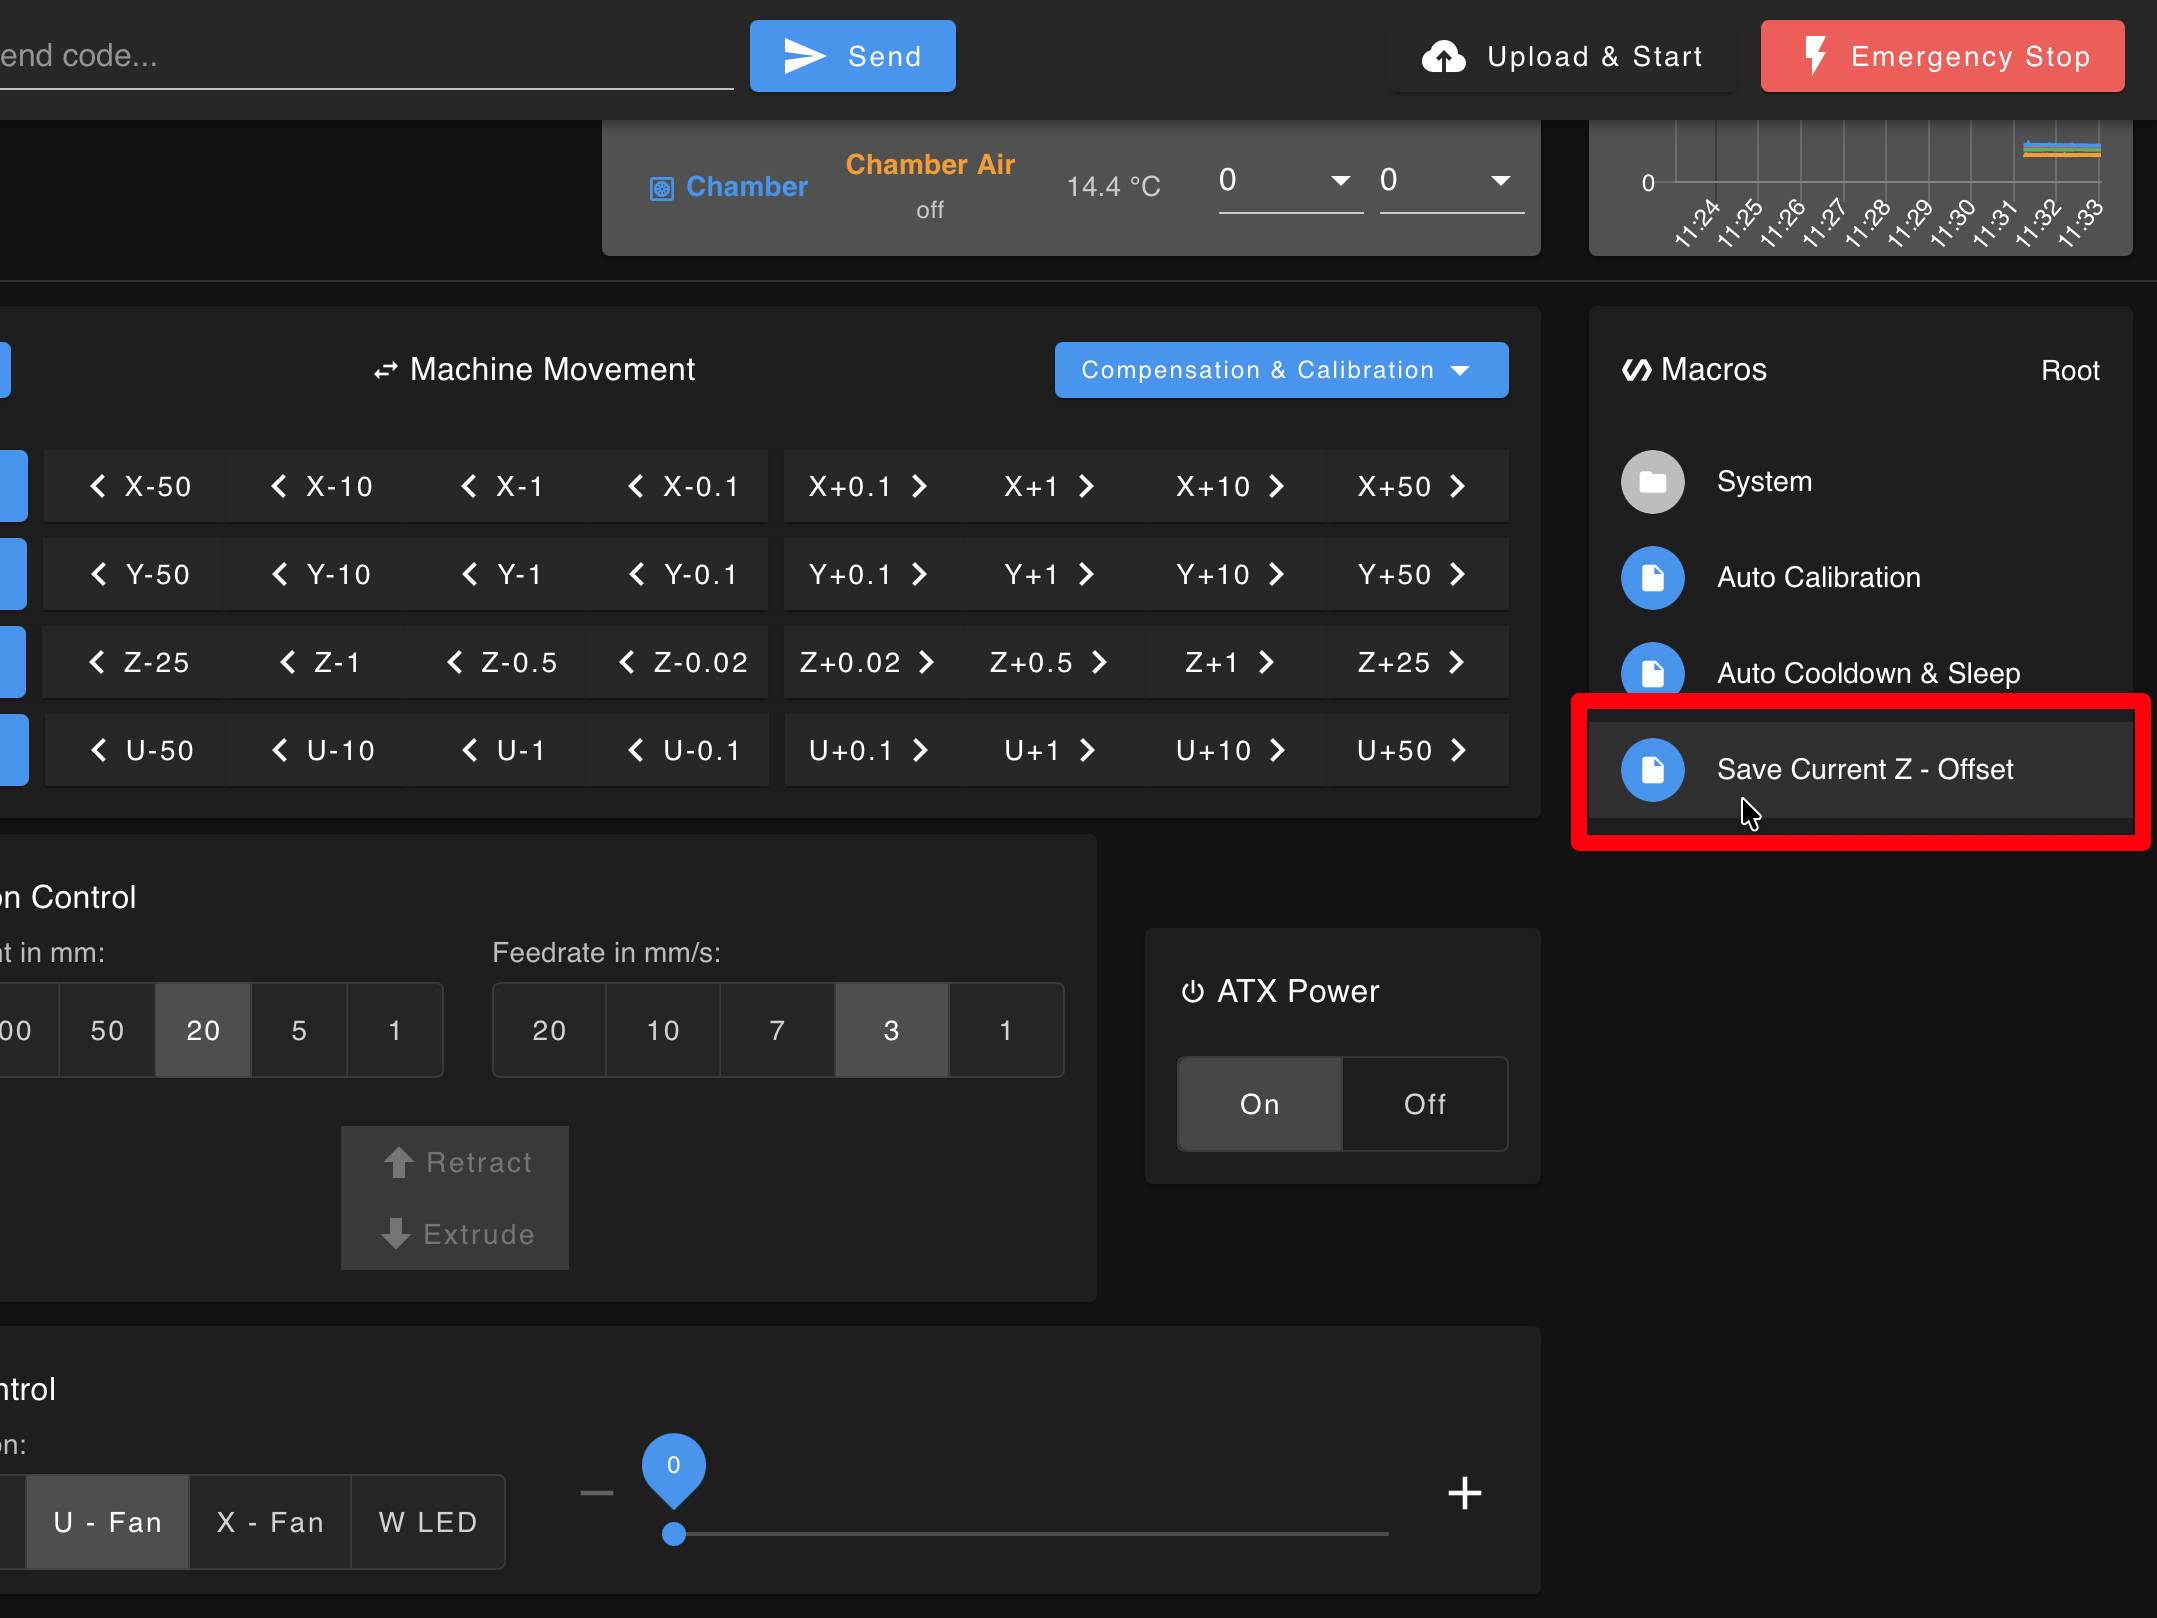
The red highlight shows the Save Current Z-Offset macro location in the Dashboard > Macros menu.
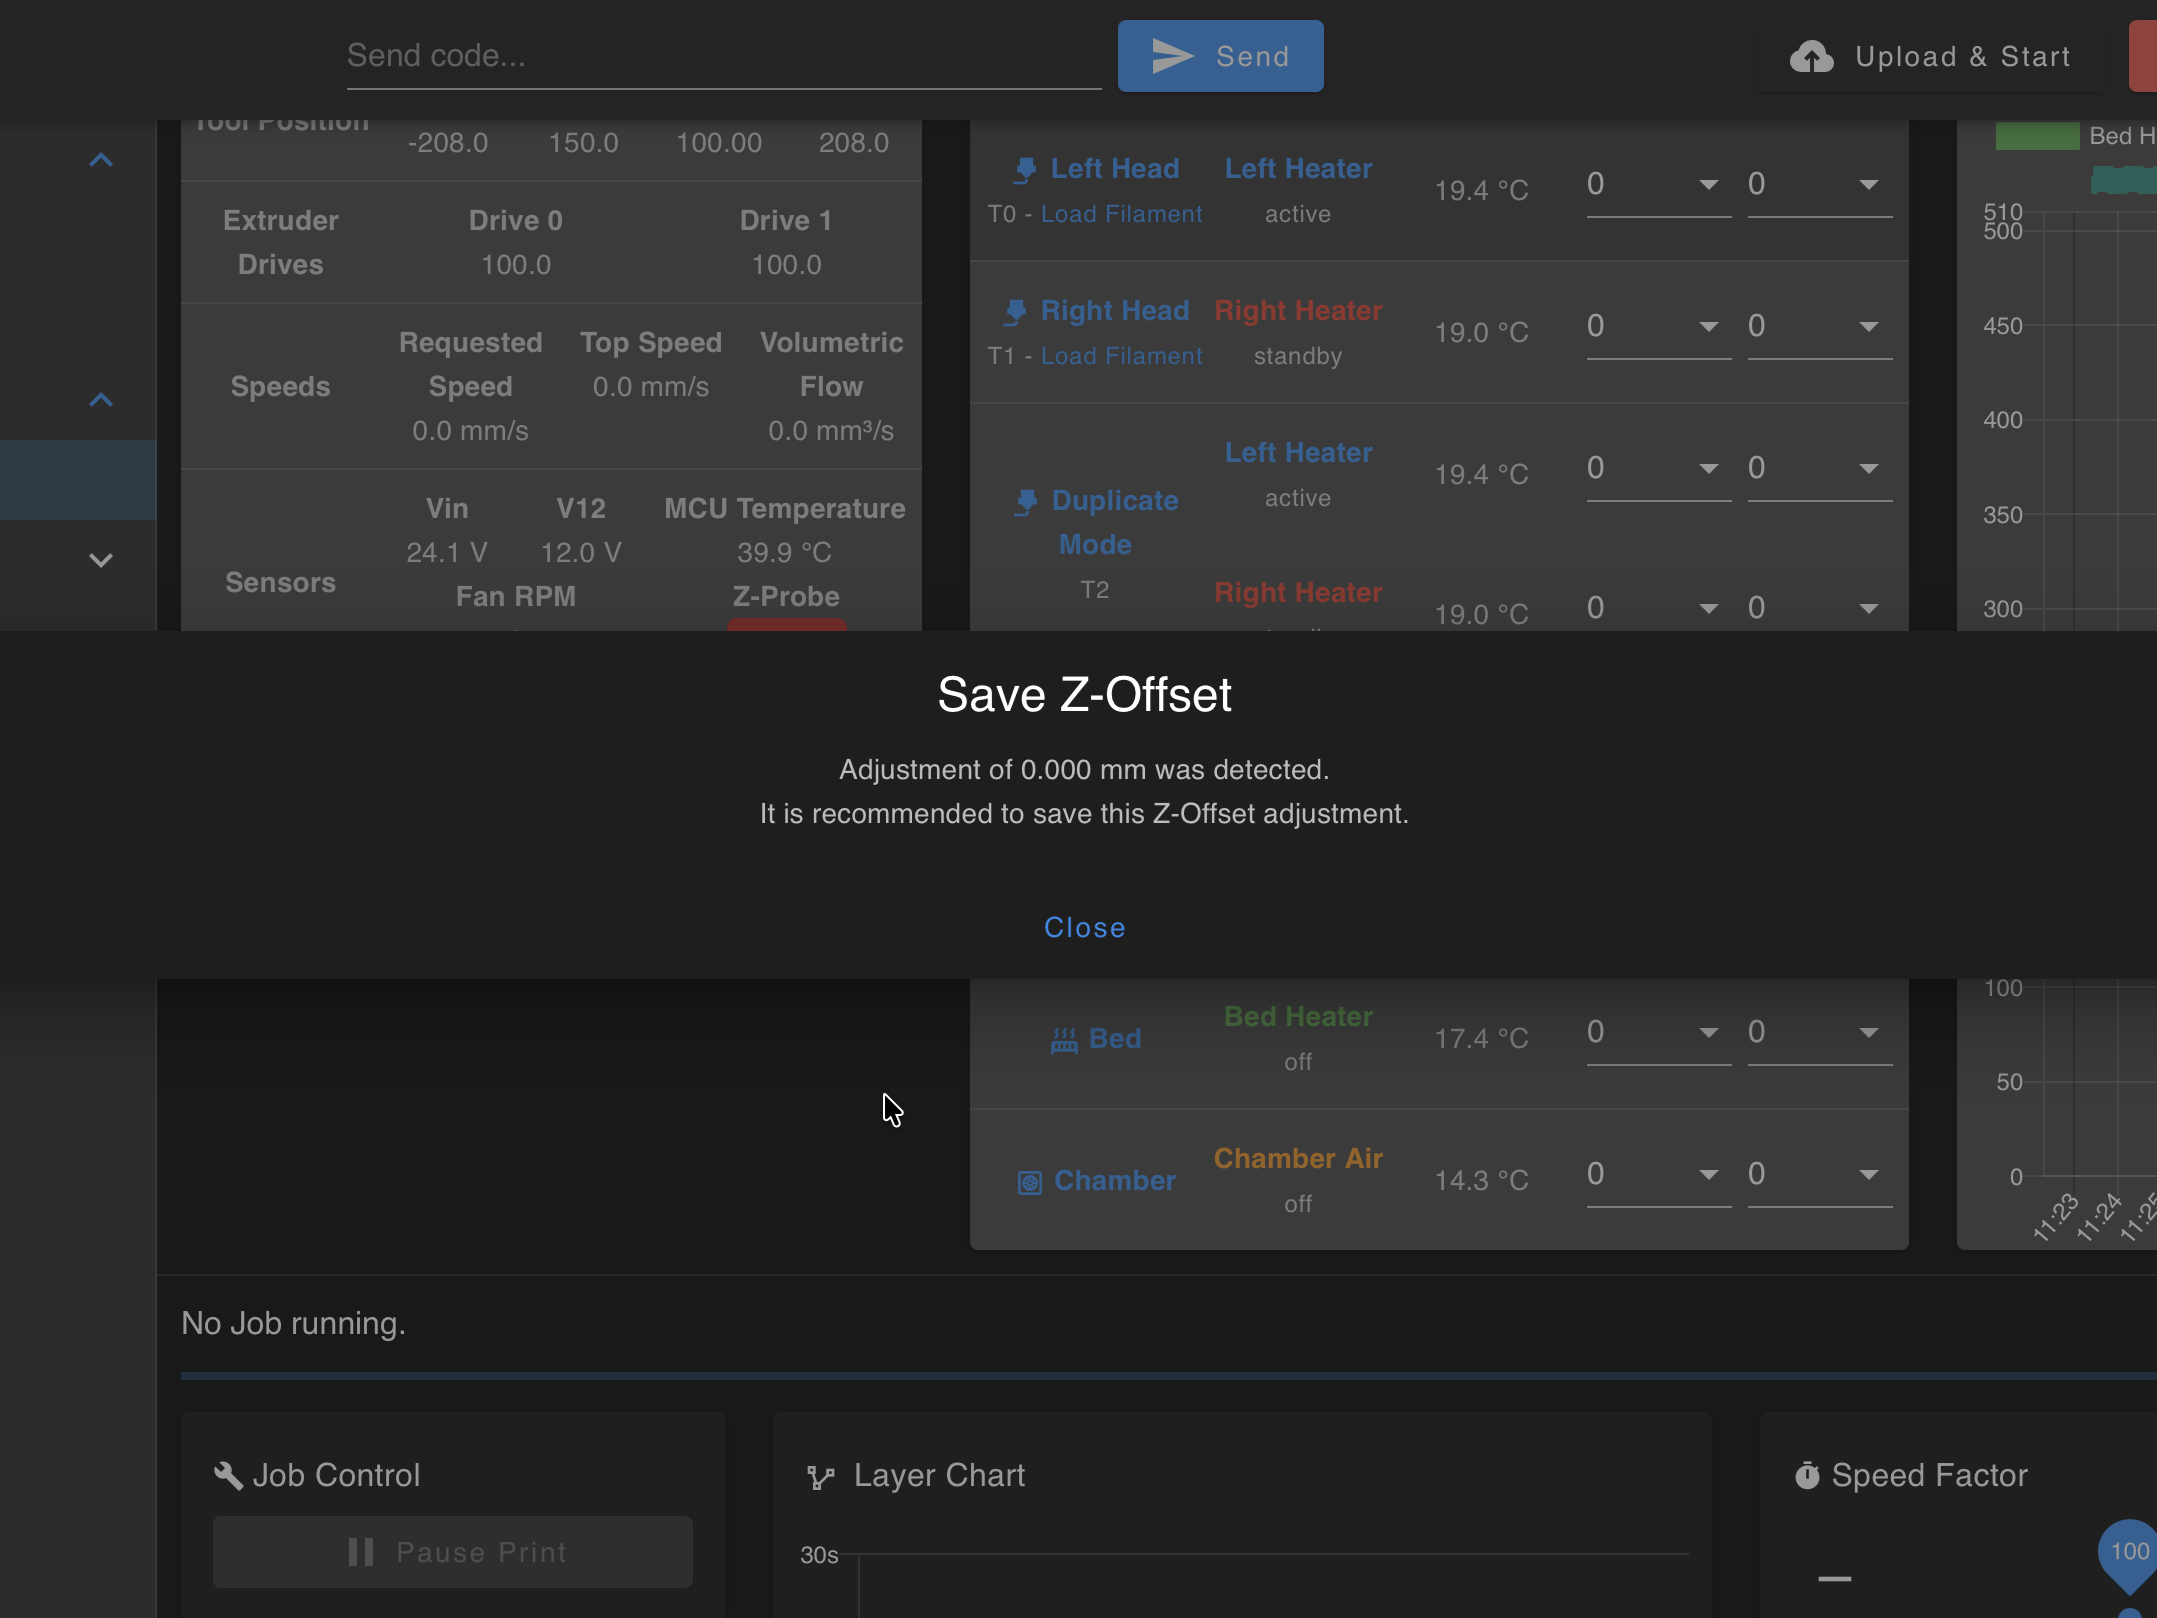
After clicking the macro, a popup appears to confirm the save action.
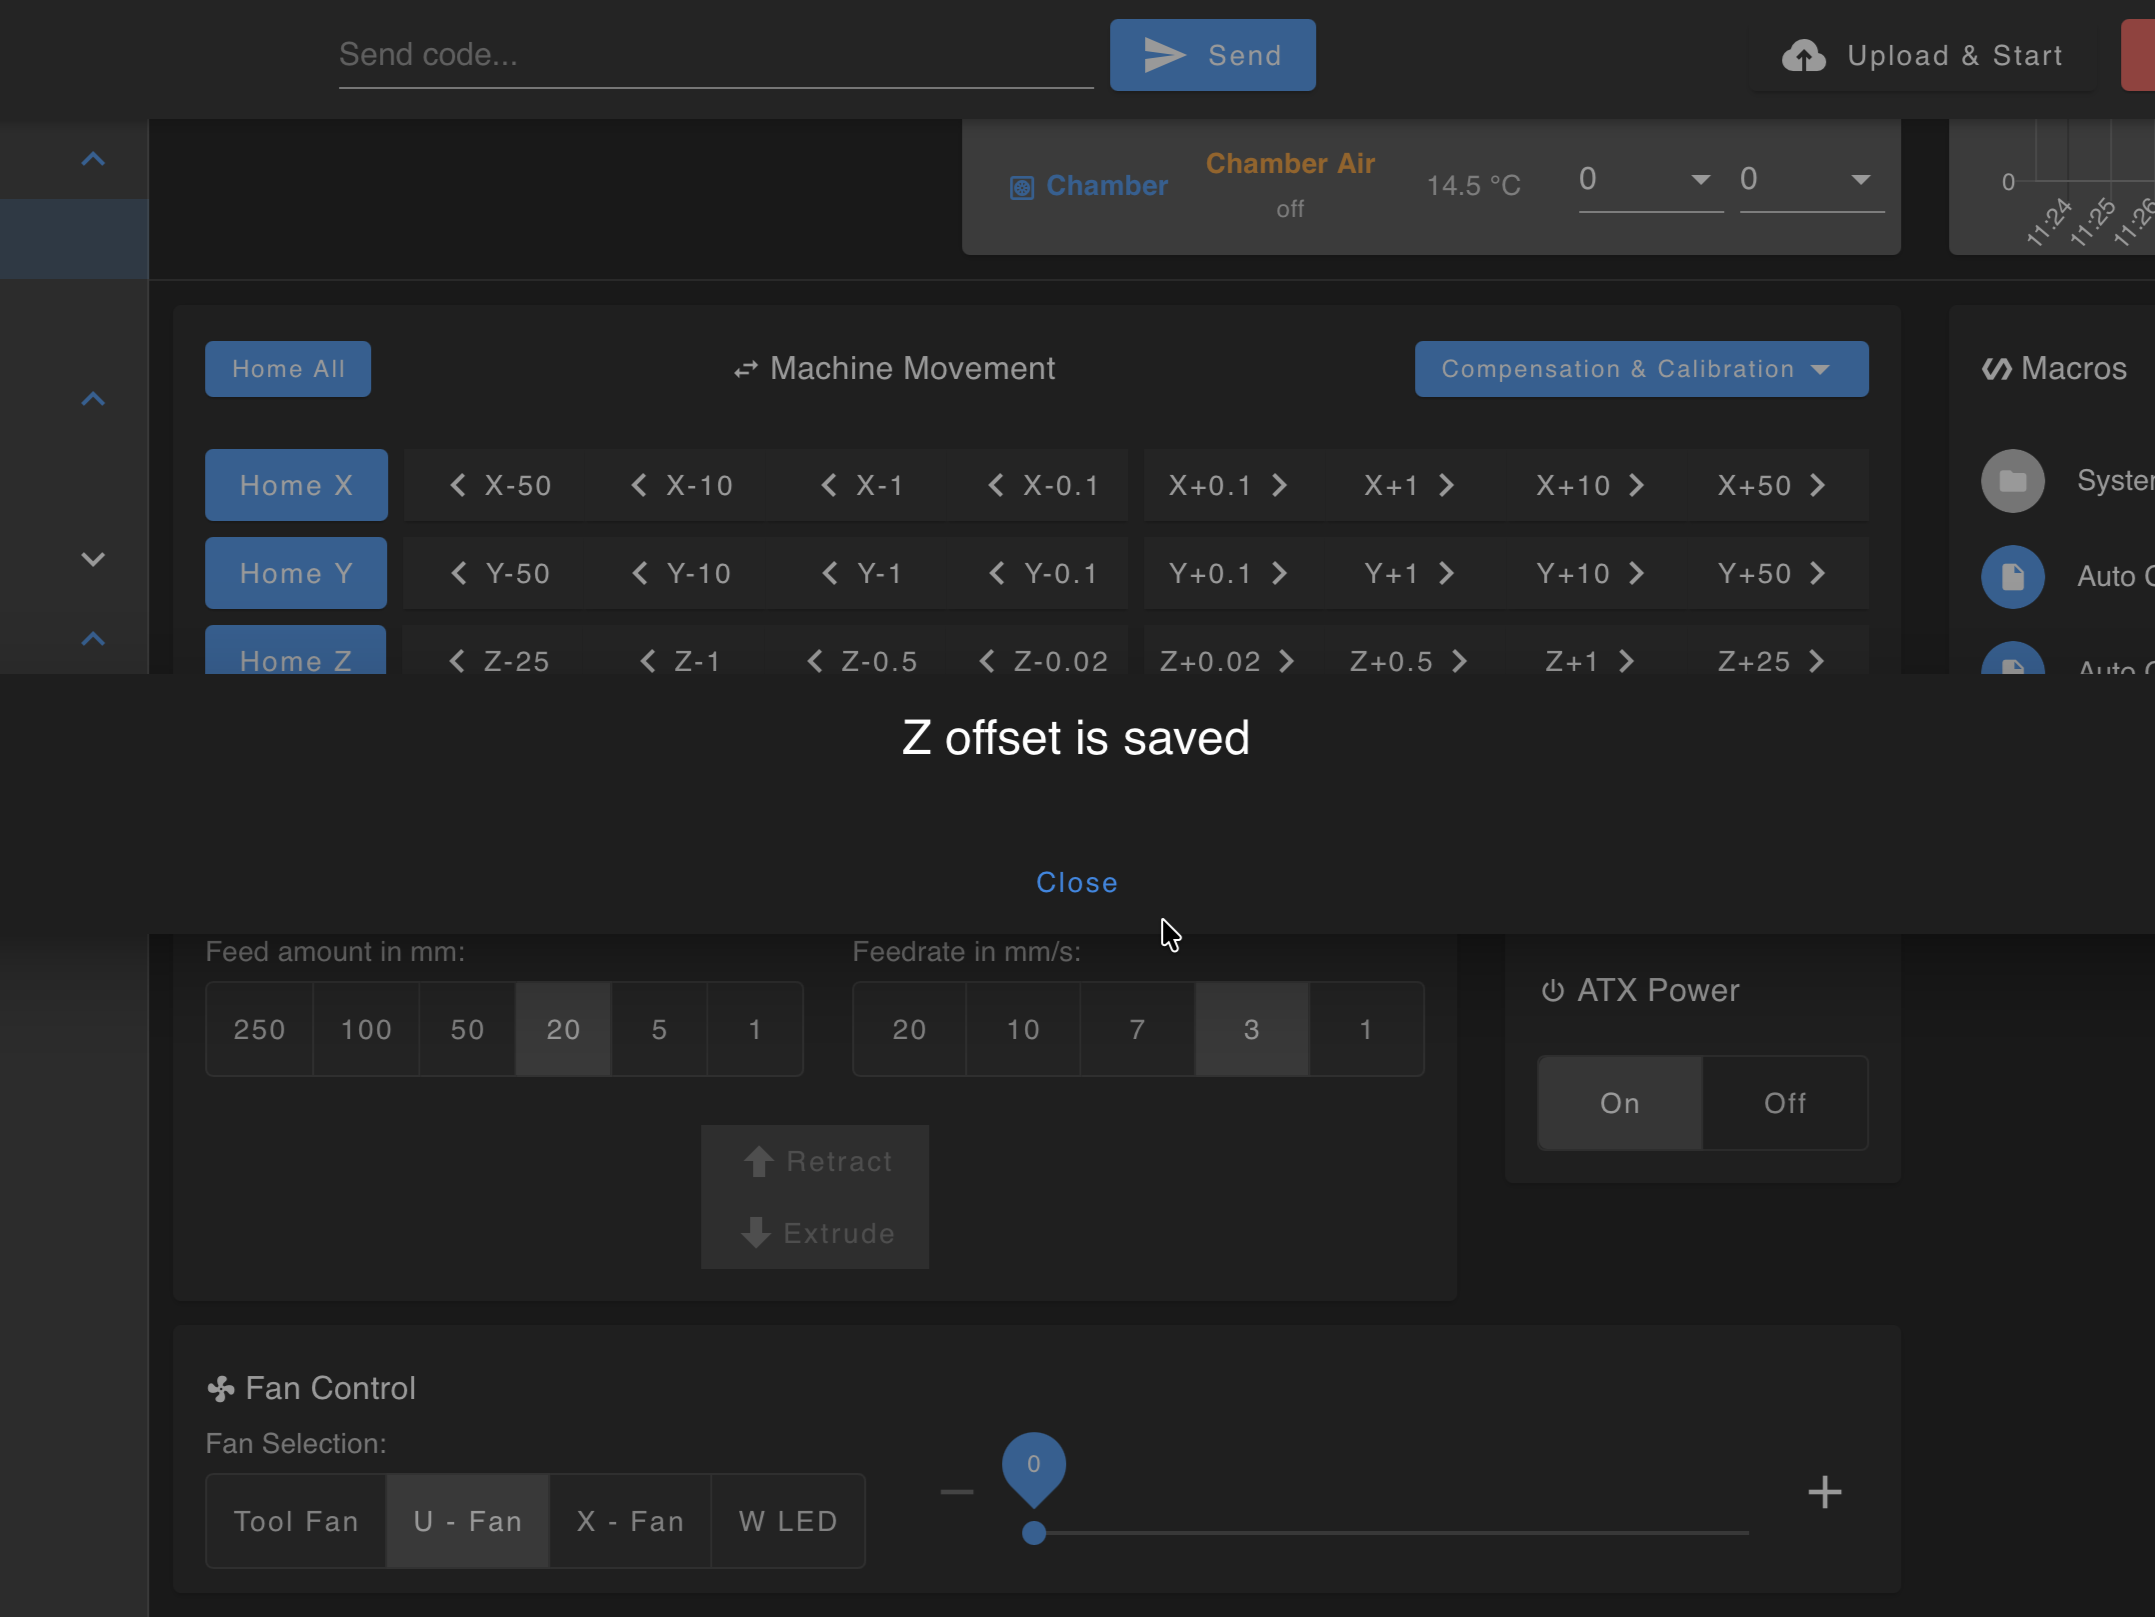
The confirmation message verifies that the Z-offset has been saved successfully.
4. Left vs right height
If the left side of the bed prints higher or lower than the right, refresh mesh bed compensation once so the map matches the plate. Full steps live in Auto Calibration (mesh section). Babystepping alone will not fix a tilted mesh.
5. Mirror and Duplicate modes
Large mirror/duplicate areas amplify small mechanical and plate errors. Layer heights are tens to hundreds of microns - small errors add up.
| Mode | Mesh | First-layer note |
|---|---|---|
| Mirror | On - biased to T0 | T1 follows indirectly - edges can still look different. |
| Duplicate | Off by default | Do not apply T0's mesh to T1 blindly - it often makes the right side worse. |
Raft (recommended)
A raft (often 3-4 layers in the slicer) prints flat on the plate; your part's first layer starts on the raft. That hides small bed errors better than fighting Z on both tools.
- Enable raft in the slicer.
- Budget roughly 5-15 extra minutes depending on footprint.
Raft vs large parts
Rafts cost time. Use them when reliability matters more than speed on big Mirror/Duplicate jobs.
Layer 1 flow split
Stay at the printer
Advanced only. Wrong flow or Z can cause a crash or failed adhesion. Watch the entire first layer.
- Use Mirror mode first (Duplicate is harder - mesh is off).
- On skirt or layer 1, see which nozzle is closer to the bed.
- Babystep Z until the closer nozzle looks right. The other will often show gaps.
- In Status, raise flow (extrusion multiplier) only on the higher nozzle in small steps (e.g. 105% to 115%) until layer 1 bonds.
- Confirm the slicer or firmware returns flow to 100% after layer 1.
Still uneven
- Clean both nozzles and run Auto Calibration again.
- If Standard Mode still shows left-right tilt, rerun mesh correction from the same guide.
When to run Auto Calibration
Auto Calibration as last resort
If you followed all steps in this guide and the first layer is still problematic, run Auto Calibration. Babystepping is meant for fine-tuning Z-offset. If you need large adjustments (more than ±0.1 mm), or if you changed nozzles, hotends, or motion hardware, run Auto Calibration first.
FAQ
Support
If you could not find an answer here, reach out to our support team: